background image

37

28-SETTINGS MENU

Technical Dept. - All rights reserved - Reproduction prohibited

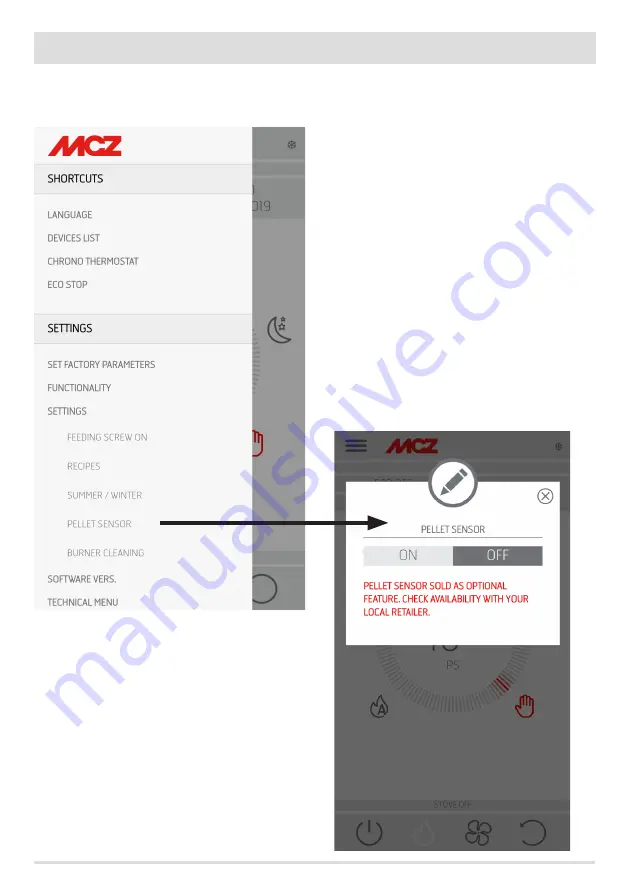
PELLET SENSOR

The pellet sensor is used to measure the level of pellets in the hopper. It can be activated from the side menu, SETTINGS after having 

assembled the sensor on the hopper and carried out the appropriate connection in the card (see next page).

Summary of Contents for VIVO 90 COMFORT AIR 11 M1

Page 1: ...INSERT VIVO 90 COMFORT AIR 9 M1 SLIM BASIC version VIVO 90 COMFORT AIR 11 M1 SLIM BASIC version PART 2 OPERATION AND CLEANING USE AND INSTALLATION GUIDE EN Instructions in English ...

Page 2: ...NEL 16 21 EMERGENCY PANEL FUNCTIONS 17 22 MANUAL CONFIGURATION 18 23 APP FUNCTIONS 19 24 SIDE DROP DOWN MENU 21 25 SHORTCUTS SETTINGS RAPID SETTINGS 22 26 MENU SETTINGS 26 27 FEATURES MENU 31 28 SETTINGS MENU 34 29 SOFTWARE VERSION 40 30 TECHNICAL MENU 41 31 INFO MENU 43 32 SAFETY DEVICES 44 33 ALARMS 45 34 RECOMMENDATIONS FOR SAFE USE 51 35 MAINTENANCE AND CLEANING 52 36 TROUBLESHOOTING 62 37 CIR...

Page 3: ...FROMTHEBRAZIERANDCONTACTANAUTHORISEDTECHNICIAN Do not touch the stove during the first start up as it is during this phase that the paint sets If you touch the paint youmayexposethesteelsurface It is good practice to ensure effective ventilation in the room during the initial start up as the stove will emit some smokeandsmellofpaint If necessary touch up the paint with the spray can of the specifi...

Page 4: ... handheld remote control optional The stove s operating status room temperature operating parameters such as ventilation power etc and any alarms may be checked remotely Attention The App is already available in English on the Handheld remote control accessory as the language used on the telephone is set by default If the App is downloaded onto a personal smartphone it similarly adopts the languag...

Page 5: ...ed nearby we recommend max 5 metres The range of action depends on the characteristics of the walls and how the home is structured REMOTEWI FI Connection between the app and stove using an internet connection With this technology you can communicate with the stove from anywhere Near the stove there must be aWi Fi router providing an internet connection and the mobile phone in turn must have a data...

Page 6: ... passwords are located at the back of the stove and in the warranty Scan the QR code using the camera of the device accessory or smartphone and acquire it When the code is acknowledged the app will ask you to enter an identification number for the stove for example living room stove to easily identify the stove s in the list of configured devices This will automatically configure the app to work w...

Page 7: ...yandthe selectdevice screenopens Thestovesnearbyarescanned select your stove and enter the password located near the QR code at the top and a stove identification name for example living room stove to easily identify the stove s in the list of configured devices To configure operation in REMOTEWI FI mode click on the REMOTE key and the SELECT DEVICE screen opens Fill in all the fields with thecode...

Page 8: ...rovidingtheinternetconnectionandenter the respective password From now on if the router provides a stable internet connection it is possible to command the stove remotely The access password to the network by the Maestro App must have a maximum of 32 characters For longer passwords forexamplegeneratedautomaticallybytherouteruponinitialinstallation thelengthmustbemodified accordingtotheproceduresfo...

Page 9: ...s not elapsed In this case remove the batteries and put them back in or press the reset button by inserting a paper clip in the hole to the right of the sensor dome From this time on the 8 minutes for configuration start over again If the probe is ready for configuration click the key in the app screen click T probe configuration the screen will show the stoves that theWi Fi probe can be associate...

Page 10: ...STRO system DYNAMICIf you prefer traditional automatic operation with the option of setting the temperature and ventilation OVERNIGHTGuaranteesthemaximumsilencepossible noisereducedupto4times allowingthemaintenanceoftheroomtemperature This mode is designed in fact for night time operation or temperature conservation in an already pre heated room ensuring the lowest possible acoustic impact In Over...

Page 11: ... typing the relative symbol in the screen that is also highlighted through the notches on the selection ring The product works in automatic mode it is not possible to increase ventilation To set the desired temperature press the temperature at the centre of the circle and the pop up appears to make the setting NOPOWERVENTILATIONSET ...

Page 12: ...l in the screen that is also highlighted through the notches on the selection ring The user has the possibility to manage ventilation and temperature To set the desired temperature press the temperature at the centre of the circle and the pop up appears to make the setting NOPOWERVENTILATIONSET ...

Page 13: ...an be selected by typing the relative symbol in the screen that is also highlighted through the notches on the selection ring The user has the ability to manage ventilation and power To set the desired parameters press the temperature at the centre of the circle and the pop up appears to make the setting ...

Page 14: ...ive symbol in the screen that is also highlighted through the notches on the selection ring The user has the possibility to manage ventilation and temperature To set the desired temperature press the temperature at the centre of the circle and the pop up appears to make the setting ...

Page 15: ...t is also highlighted through the notches on the selection ring The user has the possibility to manage ventilation and temperature To set the desired parameters press the temperature at the centre of the circle and the pop up appears to make the setting IF YOU GET OUT OF THE POWER MODE BEFORE THE END OF THE 20 MINUTES YOU CANNOT REACTIVATE IT AGAIN FOR ANOTHERHOUR ...

Page 16: ...s Stove in OPERATION Red LED that indicates Stove OFF Blue LED that indicates Stove START UP Yellow LED that indicates Stove cooling for SHUTDOWN Flashing red LED that indicates Stove in ALARM conditions B BUTTON functions Turns the product ON Turns the product OFF Changes the operating POWER 1 beep LOW 3 beeps MEDIUM 5 beeps HIGH RESET ALARMS ...

Page 17: ...the ignition procedure green LED on press the key briefly for 0 5 seconds to change the power according to this diagram LOW flame power 1 and ventilation level 1 MEDIUM flame power 3 and ventilation level 3 HIGH flame power 5 and ventilation level 5 Every time the power is changed a buzzer will indicate the selected power on the stove 1 beep LOW 3 beeps MEDIUM 5 beeps HIGH If the product is runnin...

Page 18: ...mperature probe remains configurable for 8 minutes ATTENTION Only insert the batteries just before proceeding with configuration Insert the batteries and start the procedure From mobile phone Wi Fi settings menu Wi Fi needs to be enabled on the mobile phone Search for MCZ Sensor from among theWi Fi networks available and connect to it no password is required since it is an open network Once connec...

Page 19: ...emotecontrolorontheAPP Theacousticbeepconfirmsthisphase has started Alternatively switch it off from the emergency panel by following the instructions provided in the dedicated chapter The equipment will start the shutdown process which involves consuming the residual pellets in the brazier the latter being cleaned and the residual heat in the structure being dissipated During the residual heat di...

Page 20: ...e option of automatic operation and the option to switch off the fan If the ventilation is set MANUALLY the function which limits the maximum power of the stove according to the ventilation is enabled COMFORT AIR 3 FANS maximum power level total of the ventilation levels 2 AIR maximum power level twice the total of the levels of ventilation ...

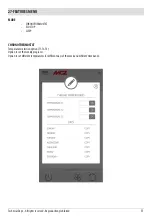
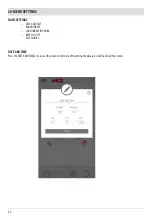
Page 21: ...includes SHORTCUTS shortcut and or quick settings LANGUAGE LIST OF DEVICES CHRONOTHERMOSTAT ECOSTOP SETTINGS BASIC SETTINGS DATE ANDTIME BOARD INPUTS CONFIGUREWIFI PROBE BEEP ON OFF ACCESSORIES MODE CHRONOTHERMOSTAT ECOSTOP SLEEP SETTINGS FEED SCREW ON RECIPES SUMMER WINTER PELLET SENSOR BRAZIER CLEANING AIRMATIC HYDROMATIC SOFTWAREVERSION TECHNICAL MENU INFO ...

Page 22: ...nd or quick settings LANGUAGE LIST OF DEVICES CHRONOTHERMOSTAT ECOSTOP LANGUAGE SCREEN Entering the side menu select LANGUAGE and the system will display all the languages available Select the desired language Press the SAVE button to confirm the chosen language ...

Page 23: ...tion prohibited LIST OF DEVICES This screen displays which devices have been configured Only the device depicting the icon of a stove next to it can be selected From the menu next to the configured device it is possible to access the MODIFY or DELETE function VIVO 90 AIRMATIC VIVO 90 ...

Page 24: ...TCUTS SETTINGS RAPID SETTINGS CHRONOTHERMOSTAT Temperature selection option T1 T2 T3 Option to set the weekly programs Option to set different temperatures for different days of the week and different time bands ...

Page 25: ...n drop down menu value ranging between 5 and 30 minutes the product switches off and remains instand byuntiltheroomtemperaturedropsbelowthedesiredtemperature hysteresisfrequencyrangesbetween2and5minutes The product then switches back on again If the room is not sufficiently insulated flame modulation does not allow the set temperature to stay satisfied for the set time and the product will not swi...

Page 26: ...INGS BASIC SETTINGS DATE ANDTIME BOARD INPUTS CONFIGUREWIFI PROBE BEEP ON OFF ACCESSORIES DATE ANDTIME Press the DATE ANDTIME key to access the screen to edit data After setting the data press SAVE and exit the screen ...

Page 27: ... MENU SETTINGS Technical Dept All rights reserved Reproduction prohibited BOARD INPUTS Room input is used to set theWi Fi probe thermostat or room probe Click the drop down menu to select the desired option ...

Page 28: ...28 26 MENU SETTINGS CONFIGUREWIFI PROBE This screen configures the frequency in minutes and shows the last connection made ...

Page 29: ...29 26 MENU SETTINGS Technical Dept All rights reserved Reproduction prohibited BEEP ON OFF This function is used to enable disable the tones ...

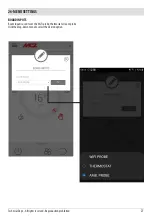
Page 30: ...INGS ACCESSORIES Entering the ACCESSORIES menu it is possible to CONFIGURE REMOTE CONFIGURATION T PROBE CONFIGURATION Refer to Chapter 3 Configure stove accessories for the mode REMOTE CONFIGURATION CONFIGURE PROBE T ...

Page 31: ...served Reproduction prohibited MODE CHRONOTHERMOSTAT ECO STOP SLEEP CHRONOTHERMOSTAT Temperature selection option T1 T2 T3 Option to set the weekly programs Option to set different temperatures for different days of the week and different time bands ...

Page 32: ...5 and 30 minutes the product switches off and remains instand byuntiltheroomtemperaturedropsbelowthedesiredtemperature hysteresisfrequencyrangesbetween2and5minutes The product then switches back on again If the room is not sufficiently insulated flame modulation does not allow the set temperature to stay satisfied for the set time and the product will not switch off NOTE It is recommended to use t...

Page 33: ...l rights reserved Reproduction prohibited SLEEP Sleep mode allows to quickly set the time when the product must switch off This function is only available in MAN and AUTO mode To enable or disable the SLEEP function touch the relative key ...

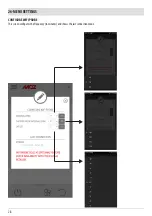
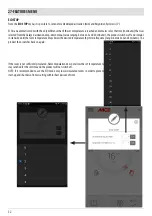
Page 34: ...toloadpellets into the loading system feed screw and is used every time pellets in the hopper run out It is useful to prevent failed start ups alarm A01 due to the hopper being empty RECIPES To enable this function enter the SETTINGS menu and select RECIPE The POP UP appears prompting the password enter 1234 You may now edit the two functions AIR RECIPE and PELLET RECIPE ...

Page 35: ... is too high or too low To edit the PELLET recipe select one of the values available The available values are 3 Reduction of pellet loading by 20 at all power values 2 Reduction of pellet loading by 13 at all power values 1 Reduction of pellet loading by 6 at all power values 0 no change 1 Increase of pellet loading by 3 at all power values 2 Increase of pellet loading by 6 at all power values 3 I...

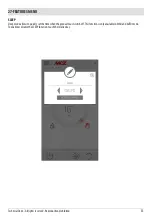
Page 36: ...36 28 SETTINGS MENU SUMMER WINTER Option to select the operating season ...

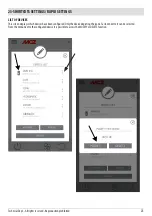
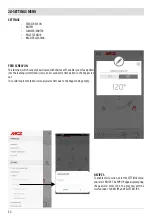
Page 37: ...ion prohibited PELLET SENSOR The pellet sensor is used to measure the level of pellets in the hopper It can be activated from the side menu SETTINGS after having assembled the sensor on the hopper and carried out the appropriate connection in the card see next page ...

Page 38: ...ets are finishing With the hopper empty lift the pellet loading cover and manually remove the cap J fitted inside then insert the pellet level sensor K from inside the hopper The sensor is locked to the hopper by externally mounting the seal s and firmly securing it with the ring nut t The sensor must then be connected to position 16 on the circuit board with the supplied cable ...

Page 39: ...TINGS MENU Technical Dept All rights reserved Reproduction prohibited BRAZIER CLEANING Only for MATIC products with automatic brazier cleaning system Press ENABLE to set a complete cleaning cycle for the product ...

Page 40: ...40 29 SOFTWAREVERSION SOFTWAREVERSION The SOFTWAREVERSION option is found in the SET menu Through this item it is possible to know all the stove information e g Database and app version ...

Page 41: ...uction prohibited TECHNICAL MENU To enter theTECHNICAL MENU select the three dashes at the top scroll to the end of the drop down menu and select the item To enter the functions it is necessary to enter a Password available for authorised technicians and press OK ...

Page 42: ...HNICAL MENU The main functions that can be changed and or controlled from the technical menu are PARAMETERS ACTIVE ON OFF SYSTEMT DIAGNOSTICS SELECT DATABASE FACTORY RESET SERVICE RESET LAST ALARMS WORKING HOURS ...

Page 43: ...43 31 INFO MENU Technical Dept All rights reserved Reproduction prohibited INFO The INFO menu provides certain information regarding the stove s status ...

Page 44: ... said boards SMOKE FAN BREAKAGE If the fan stops the circuit board promptly blocks the supply of pellets and the alarm is displayed GEAR MOTOR BREAKAGE If the gear motor stops the product switches off and the relative alarm is displayed TEMPORARY POWER CUT If a power cut occurs during operation the product automatically sets itself in cooling mode when the power is restored and then it restarts FA...

Page 45: ... there is poor ventilation When the product is sufficiently cold press button B on the control panel or OFF on the remote control to cancel alarm A03 Once the alarm is cancelled the product can be switched on normally A04 Thetemperatureoftheexhaustsmokehas exceeded certain preset safety limits The stove switches off automatically Let the stove cool down for a few minutes and then switch it on agai...

Page 46: ...r motor in both directions Try to remove the pellet and or foreign body with an extractor or call an authorised service centre to perform this operation A21 SAFETY DEVICES TRIP Open stove door Close the door Open fuel loading hatch Close the hatch Lower the fuel level in the hopper Air pressure switch Draught difficulties or clogged brazier Check whether the brazier is clogged by deposits and clea...

Page 47: ...rs thestructureistoohotbecausetheproducthasbeenusedfortoolongatthemaximumpowerorthereispoorventilation When the stove cools down sufficiently clear alarm A03 on the stove panel Once the alarm is cancelled the product can be switched on normally If A04 appears The stove switches off automatically Let the stove cool down for a few minutes and then switch it on again Check the smoke expulsion and ver...

Page 48: ... clogging The presence of a foreign body in the flue birds nests clogged grilles etc Wind coming through the flue because it is unprotected or the installation was wall mounted or required no flue Cold air draught down the flue A damaged pressure switch Blocked membrane inside the pressure switch because soot or pellet dust got in The pellet hopper is open or ajar for more than 60 seconds 60 secon...

Page 49: ...ch as a percentage correspond to RPM 10 10 in Active System products RPM 30 50 in NON Active System products Thepercentagevariationaffectsallpowervalues 1to5 proportionallyandasapercentage Thepercentagevariationdoesnotaffect intermediate operating stages such as SWITCH ON FIRE ON or SWITCH OFF AstheRPMincreases suctionalsoincreasesandconsequentlytheinternalnegativepressure therebycompensatingtheph...

Page 50: ... C 155 C 172 C 195 C Smoke temperature 14 kW 17 6 18 0 Pa 19 8 20 4 Pa 23 1 23 7 Pa 28 9 29 6 Pa 37 8 38 2 Pa Draught 118 C 131 C 161 C 187 C 210 C Smoke temperature PLEASENOTETheindicatednegativepressurereadingsmaydifferby 1Pabasedonfluegastemperature Likewise fluegastemperature may differ by 10 C based on fuel quality or appliance cleanliness Changing the smoke fan speed In order to further impr...

Page 51: ...it is crucial to guarantee that the product is installed in compliance with standards in force Furthermore it is of the utmost importance to comply with the following simple rules Every time the brazier is removed for cleaning it must always be put back properly in the work position before using the product completely removing any residual dirt left on the support base Pellets must never be loaded...

Page 52: ...r b and remove any ash or incrustation from it that might obstruct the air flow holes paying attention to hot ash In the case of ignition failure or if fuel in the hopper runs out unburned pellets may accumulate in the brazier Always empty the residue in the brazier before each start up Only if ash is completely cold may a vacuum cleaner be used to remove it In this case use a suitable vacuum clea...

Page 53: ...g the ash collection compartment Tocleantheashcollectioncompartment extracttheashpan P Removeanyresidualashbeforereinsertingthepan Yourexperienceand the quality of the pellets will determine how often the ash pan must be cleaned However it is recommended not to exceed 2 or 3 days Attention Once cleaning is completed remember to put the ash pan P back in insert the brazier b and close the firebox d...

Page 54: ... oftenduetothequalityofthefuelandtheinstallation maycausetheglassandchambertosoilmorequickly Mainlytoimprovecleanlinessoftheglass wheretotalcleanlinesswillneverbepossibleduetothenatureofthepelletfuel youcansimply adjust the front deflector increasing the space between the deflector and the glass Loosen the two fixing screws x the outer ones of the deflector R shown in the diagram and push the defl...

Page 55: ...en the movable part is put back in place make sure the machine is locked to the fixed part by closing the handle or the mechanicallock Basicversion Forgettingtodosomayresultintheproductnotworkingduetoleakingsoot CLEANINGTHE HEAT EXCHANGER Clean the exchanger when the stove is cold Open the firebox door and proceed as follows loosen the two screws x fastening the deflector so that the top calorite ...

Page 56: ...earing it with the nozzle of a vacuum cleaner Use a flexible brush to scrape the wallsofthefirebox arrow1inthe figure so as to make the ash fall into the ash pan Use a vacuum cleaner nozzle to vacuum up any remaining ash and dust in the ash pan and brazier zone Repeatedly pass it between the exchangers pipes arrow 2 in the figure to remove the fuel deposits and residues ...

Page 57: ...uct extracted remove the screws z the plate P and the gasket O at the bottom and use a vacuum cleaner to remove any remaining ash residues Before putting the plate P back in place change the gasket O It is also advisable to vacuum near coupling r and k and remove and clean the smoke fan L also see image on the next page ...

Page 58: ...NG After cleaning as described above and before reassembling the cast iron firebox panels it is advisable to vacuum the ash pan and brazier zone Then thoroughly clean the lower exchanger replace any gaskets if needed and reassemble ...

Page 59: ...ct where the fan outlet is located Also clean this compartment with a vacuum cleaner by inserting the nozzle on the fan inlet hole Then clean the smoke outlet system especially around the fittings curves and any horizontal sections For information on cleaning the flue contact a chimney sweeper ATTENTION The frequency that the smoke outlet system needs to be cleaned depends on the use of the produc...

Page 60: ...stion chamber but above all ask the specialised technician to refresh the paint inside the combustion chamber with the special silicone spray paints available at any store or Technical Assistance Centre during the necessary annual end of season scheduled maintenance operations This way the paint will protect the inner parts of the combustion chamber blocking any type of oxidative process When not ...

Page 61: ...cheduled service contract This operation consists of a visual and functional inspection of the internal components A summary of the checks and or maintenance operations that are essential for the correct operation of the product is provided below PARTS FREQUENCY 1 DAY 2 3 DAYS 1 YEAR UNDER THE USER S RESPONSIBILITY Brazier Ash pan Glass BY THE QUALIFIED TECHNICIAN Heat exchanger Smoke duct Gaskets...

Page 62: ...in See the previous anomaly The pellet temperature safety probe has been triggered Let the product cool down restore the thermostat until the lockout is off and switch the appliance back on If the problem persists contact Technical Assistance Timer active Check if the timer setting is active The door is not closed properly or the gaskets are worn Close the door and replace the gaskets with origina...

Page 63: ...re clear Perform a general cleaning of the combustion chamber and the smoke duct Check the condition of the door gaskets Damp or unsuitable pellets Change the type of pellets Faulty smoke extraction motor Check the motor and replace it if necessary The smoke extractor motor is not working No electrical supply to the appliance Check the mains voltage and the protection fuse The motor is faulty Chec...

Page 64: ...e probe and replace it if required Faulty or broken control panel Check the panel and replace if necessary The product does not switch on No power supply Check that the plug is inserted and the main switch is in the I ON position Fuse blown due to a fault Replace the fuse with one of identical characteristics 5x20 mmT 3 15A Check the brazier Clean the brazier and remove any deposits or residues of...

Page 65: ...SURE DIFFERENTIAL 9 WIFI CONTROL PANEL CONNECTOR 10 ON OFF SWITCH 11 CONTROL PANEL 12 SMOKETEMPERATURE PROBE 13 ROOM PROBE EXTERNALTHERMOSTAT 14 USB 15 SMOKE ENCODER 16 PELLET LEVEL SENSOR OPTIONAL 17 GEAR MOTOR 18 24V SAFETY DEVICES PLEASE NOTEThe electrical wiring of individual components is fitted with pre wired connectors of different sizes LIVE ELECTRICAL CABLES DISCONNECT THE POWER SUPPLY CA...

Page 66: ......

Page 67: ......
Page 68: ...REV 1 8901939900 20 12 2019 MCZ GROUP S p A Via La Croce n 8 33074Vigonovo di Fontanafredda PN ITALY Telephone 0434 599599 a s Fax 0434 599598 Internet www mcz it e mail mcz mcz it ...

Reviews: