X 4
X 4
X 2
17
15
28
X 4
29
X 4
31
X 16
X 2
24
P1
FIG.10
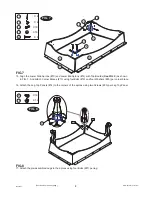
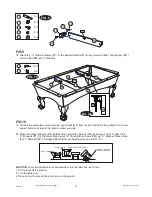
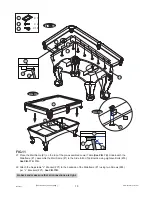
19. Lift the pre-assembled Lower Aprons & Legs (SeeFIG.8) from the floor with four strong adults, turn it over,
and set table on its legs in the location where you play.
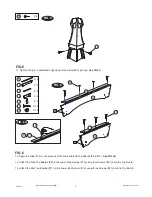
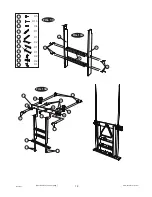
20. Place the Support Boards (#15) between the Lower Side Aprons (#10) as shown in FIG.10. Attach the
“U” Brackets (#17) to the Lower Side Aprons (#10) using four Screws (#24) per “U” Bracket. Please note
that “L” Brackets (#P1) & Support Board (#15) are parallel as shown in FIG. 10A.
P1
28
17
31
29
15
FIG. 9
FIG. 10
P1
P1
24
10
17
10
15
15
15
FIG. 10A
FIG.9
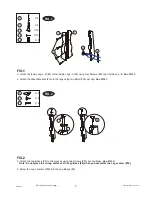
18. Attach the “U” Plastic Brackets (#17) to the Support Boards (#15) using one Bolt (#28), one Washer (#31)
and one Nut (#29) per “U” Bracket.
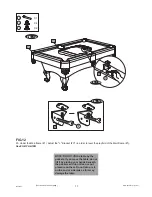
DO NOT LEAN THE
TABLE ON ITS LEGS
HOLD TABLE
HOLD TABLE
DO NOT HOLD THE LEGS
CAUTION:
Four strong adults are recommended to turn the table over as shown.
1. Lift the table off the ground.
2. Turn the table over.
3. Place it on all four feet at the same time on the ground.
www.themdsports.com
1439021
9
(Continued on the next page.)


