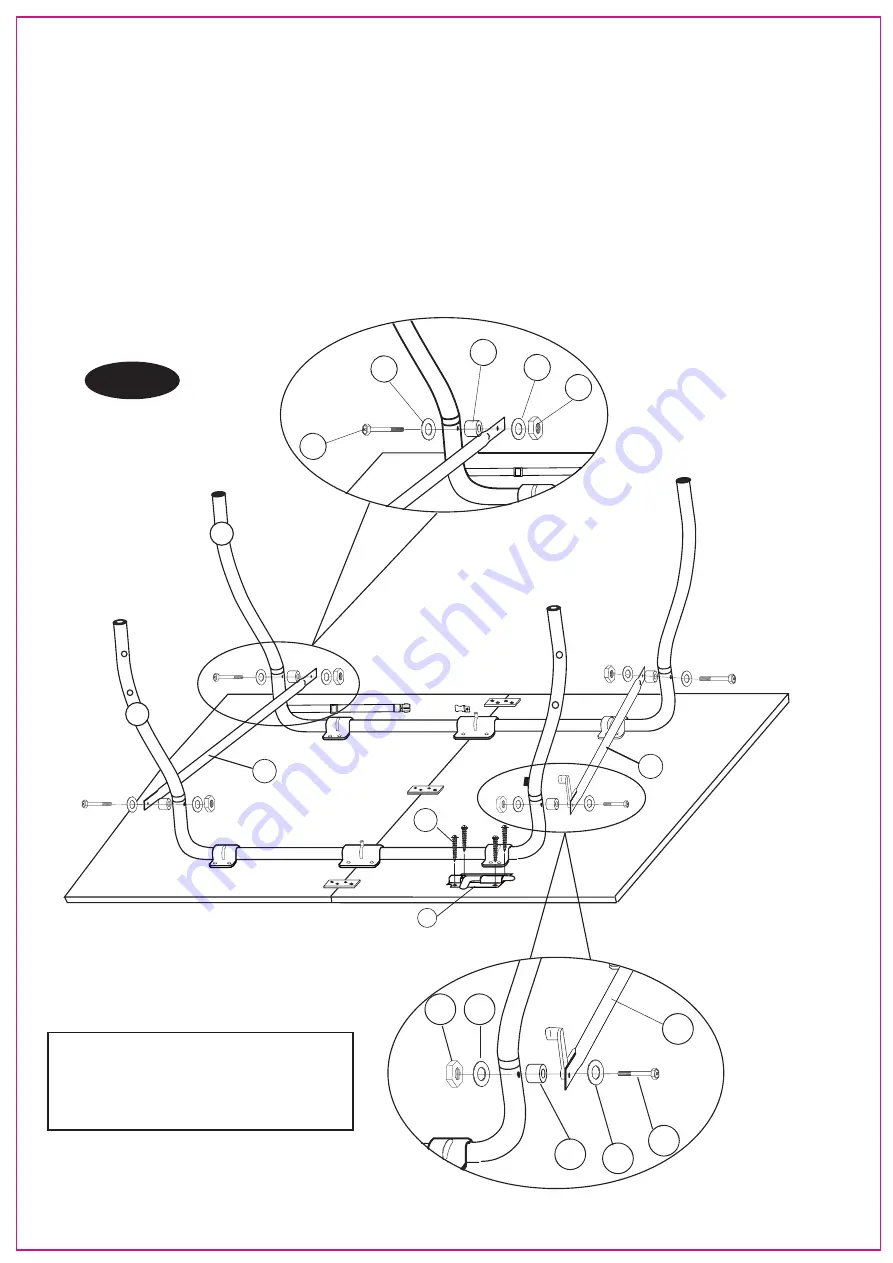
FIG.3
9. Attach one end of the Linkage Tube (#8) to the inside of the Curved Outer Leg (#5) using one Bolt (#3), two Washers
(#4), one Spacer (#14) and one Nut (#13).
10. Repeat the same for the other end of this Linkage Tube, only attaching it to the outside of the Curved Inner Leg (#6).
11. Attach one end of the Linkage Tube with Stop Bracket (#7) to the inside of the Curved Outer Leg (#5) using one Bolt
(#3), two Washers (#4), one Spacer (#14) and one Nut (#13).
12. Repeat the same for the other end of this Linkage Tube, only attaching it to the outside of the Curved Inner Leg (#6).
13. Next attach the Lock Pin (#10) to the bottom of the table using four Screws (#18)
14. Repeat the above steps for the other table half.
14
13
4
3
4
7
14 4
3
4
13
Center
18
8
10
7
Player
5
6
6
FIG. 3
Note:
Be careful of the assembly direction on
pictures when you assemble the Linkage
Tube #7 and #8 in order to fit the folding
function.


