background image

H5

H11

G

H7

page 5

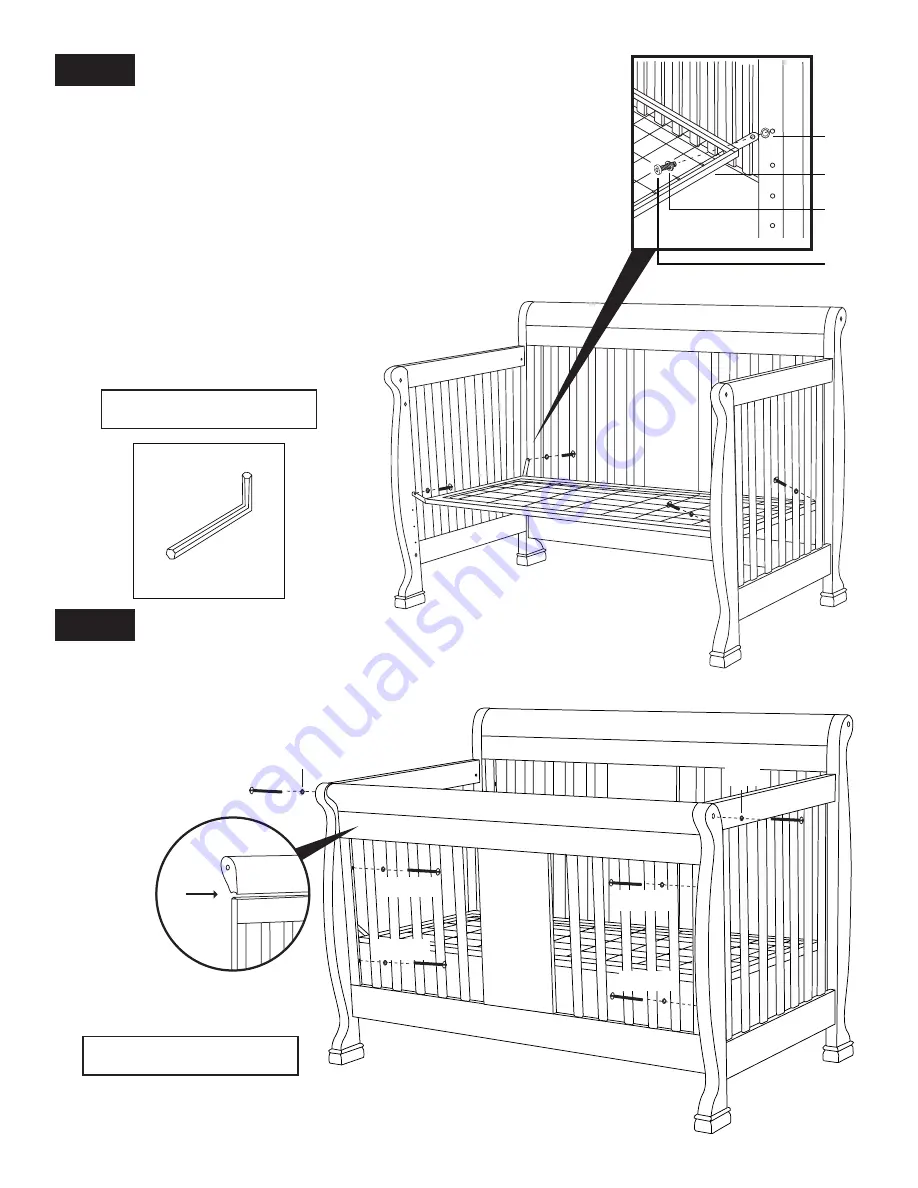
H10. Allen wrench

DO NOT OVERTIGHTEN.

Attach the spring frame (G) to legs.

Swing out four hangers at corner of the spring frame (G) carefully. 

Attach spring frame 

FLAT SIDE UP. 

Choose the height of the 

spring frame. Start at the highest level and adjust accordingly.

Bolt the spring frame (G) to legs using Allen head bolts (H5), 

washers (H7), lock washers (H11) and Allen wrench (H10). 

As the child grows, it is important to lower the spring. 

Make sure the spring frame is level.

DO NOT OVERTIGHTEN.

Step 6b.)

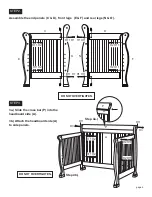
5a.) Slide the cross bar (P) into the 

stationary side (B).

5b.) Attach the stationary side (B) 

to side panels.

B

G

P

B

H3

H3

P

Step 6a.)

STEP 4.

STEP 5.

H11

H11

H11

H2

H11

H2

H2

H11

H2

H11

Summary of Contents for Crib (8501)

Page 1: ...ion to the Allen wrench included in the hardware box Do not use power screwdrivers All of our cribs are made from natural woods Please understand that natural woods have color variations which are the...

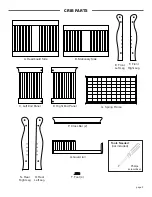
Page 2: ...D Right End Panel B Stationary Side P Cross Bar 2 T Foot 4 E Front Left Leg F Front Right Leg O Rear Left Leg N Rear Right Leg G Spring Frame Tools Needed not included Phillips screwdriver page 2 A H...

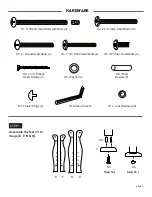
Page 3: ...ews 4 H5 3 4 Allen Head Bolts 4 H4 1 3 4 Allen Head Bolts 4 H8 Wood Dowels 8 H10 Allen Wrench H9 Plastic Plugs 4 E F N O H8 T H9 H6 Step 1a Step 1b Assemble the feet T to 4 legs E F N O H2 2 1 4 Allen...

Page 4: ...dboard side A to side panels DO NOT OVERTIGHTEN P A P A H3 H3 Step 4a Step 4b Assemble the end panels C D front legs E F and rear legs N O DO NOT OVERTIGHTEN C D E F O N STEP 2 STEP 3 H2 H11 H2 H11 H1...

Page 5: ...e highest level and adjust accordingly Bolt the spring frame G to legs using Allen head bolts H5 washers H7 lock washers H11 and Allen wrench H10 As the child grows it is important to lower the spring...

Page 6: ...below on the inside face of the headboard Record the model item number and serial number of your crib the name of the store where you made the purchase the date of purchase and the wood finish in WE W...

Page 7: ...sure a safe environment for the child by checking regularly before placing the child in the product that every component is properly and securely in place For cribs equipped with teething rails replac...

Page 8: ...11 H11 H11 Attach the guard rail Q to the side panel posts using four Allen head bolts H4 and lock washers H11 The guard rail can be installed with the high end facing either to the left or the right...

Page 9: ...ze adult wooden bed rails for your full size bed conversion Congratulations on purchasing a MDB Family product This product will provide many years of service if you adhere to the following guidelines...

Reviews: