Assembly Instructions 14 X 27 X 9 Party Tent Style
V2.0 14 X 27 Size
SITE PREPARATION
Select a level or as close to level as practical location for
your MDM Products Party Tent. The unit should be
placed on a base for the intended use, usually grass or
soft surface. The unit should not be located under trees,
which will shed hard fruit such as apples, walnuts, or
heavy pine cones. The cover of your unit will protect
against light leaves or debris, however large branches or
other falling items may cause puncture or tears in the
cover material.
Take notice of drainage both around your intended
location. Water draining from the surrounding terrain
should be planned so that it does not run into the unit.
Check to be certain that adequate clearance is allowed
for entry and exit from ends of unit. Party tent should not
be installed close to buildings or other obstructions that
would prevent exit in the event of an emergency.
FRAME ASSEMBLY
Read the complete instructions guide before starting to
assemble party tent. Familiarize yourself with each of
the component parts. These are itemized for easy
identification. Some parts are similar and vary only in
shape or size so be sure you use the correct ones where
stated.
Identify the Corner and Interior Straight Upright Leg
Poles (items #1 & 2). These and all have pre-drilled
holes at the bottom for securing the feet plates. The
number of Interior Straight Uprights will vary by the size
of the Party Tent. The 4 corner leg poles (#2) have
additional holes at the top, which will be used for
attaching the roof cover to the legs with the use of the
attached “S” hooks.
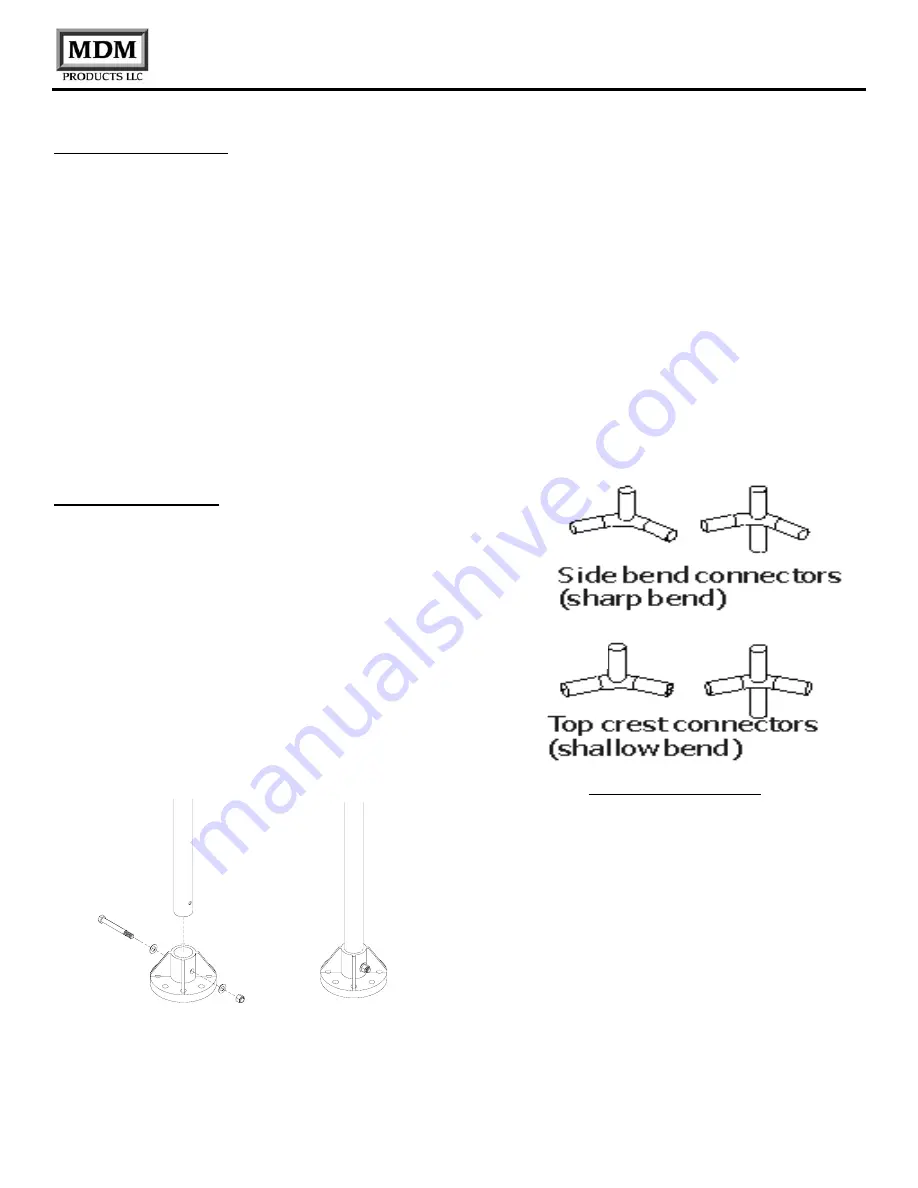
Insert the leg poles (#2) into the white plastic feet plates
(#12) so that the base holes align with the corresponding
ones in the feet. Use a 2-3/8” hex bolt (#14) with a
washer (#15) and pass it through the aligned holes. Use
one more washers on the threaded side of the bolt as
needed. Use a lock nut and tighten. Do not over tighten
and damage either upright leg or plastic foot. Repeat for
all legs and place aside until needed.
Lay out all the parts as shown in the Frame Component
Diagram so that they are roughly in their correct places.
There are 4 different types of Connectors (#5, 6, 7, & 8).
Those with a sharp bend (#7 & 8) connect the Leg Poles
to the Rafter (#4) and Cross Poles (#3). Those with a
shallow bend (#5 & 6) connect the Rafter & Cross Poles
at the ridge of the tent. These connectors are either 3 or
4 way types. The 3 way connectors of both types (#5 &
7) are to be used at each end of the party tent frame.
Frame Connector Types
#7
#8
#5
#6


