Assembly Instructions 14 X 27 X 9 Party Tent Style
V2.0 14 X 27 Size
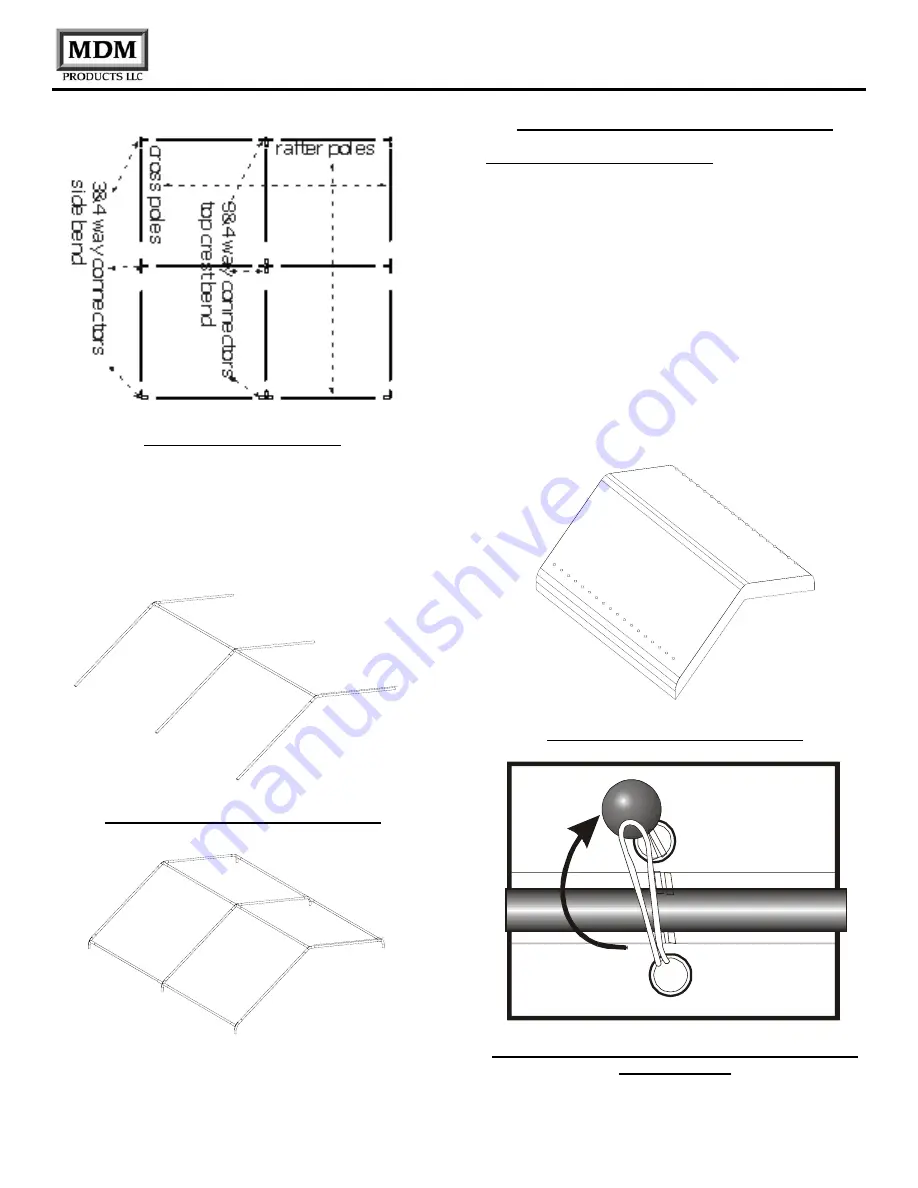
Frame Component Diagram
Begin by assembling the Roof Frame. Start by
connecting the Cross Poles (#3) together that will create
the center ridge of the tent. When this is completed join
the Rafter Poles (#4) to these cross poles. The last part
of the roof assembly is to add the Cross Poles (#3) that
create the eaves of the tent.
Ridge Pole and Eave Poles Assembled
Frame Assembly with Rafter Poles Attached
INSTALLING THE ROOF COVER
Before installing the upright leg poles to the frame
structure the roof cover (#9) must be put over the
assembled roof frame and attached using the bungee
cords (#13). This is best done from underneath by
passing the elastic cord of the bungee through the
eyelets in the cover, stretch it around the pole and back
over the toggle to secure. In calm conditions only the
corners will need to be attached with the remainder done
once the frame is fully erected. The more windy the
weather then additional bungee cords will be needed at
this stage to ensure that the cover is securely attached.
CARE AND SPECIAL PRECAUTIONS MUST BE
TAKEN IN ADVERSE OR WINDY WEATHER
CONDITIONS.
Roof Cover Installed on Roof Frame
Bungee Cords For Securing Roof Cover, Sidewalls,
and End Panels


