Assembly Instructions
14 X 14 Party Tent Style
V2.0 Party Tent 14 X 14 Size
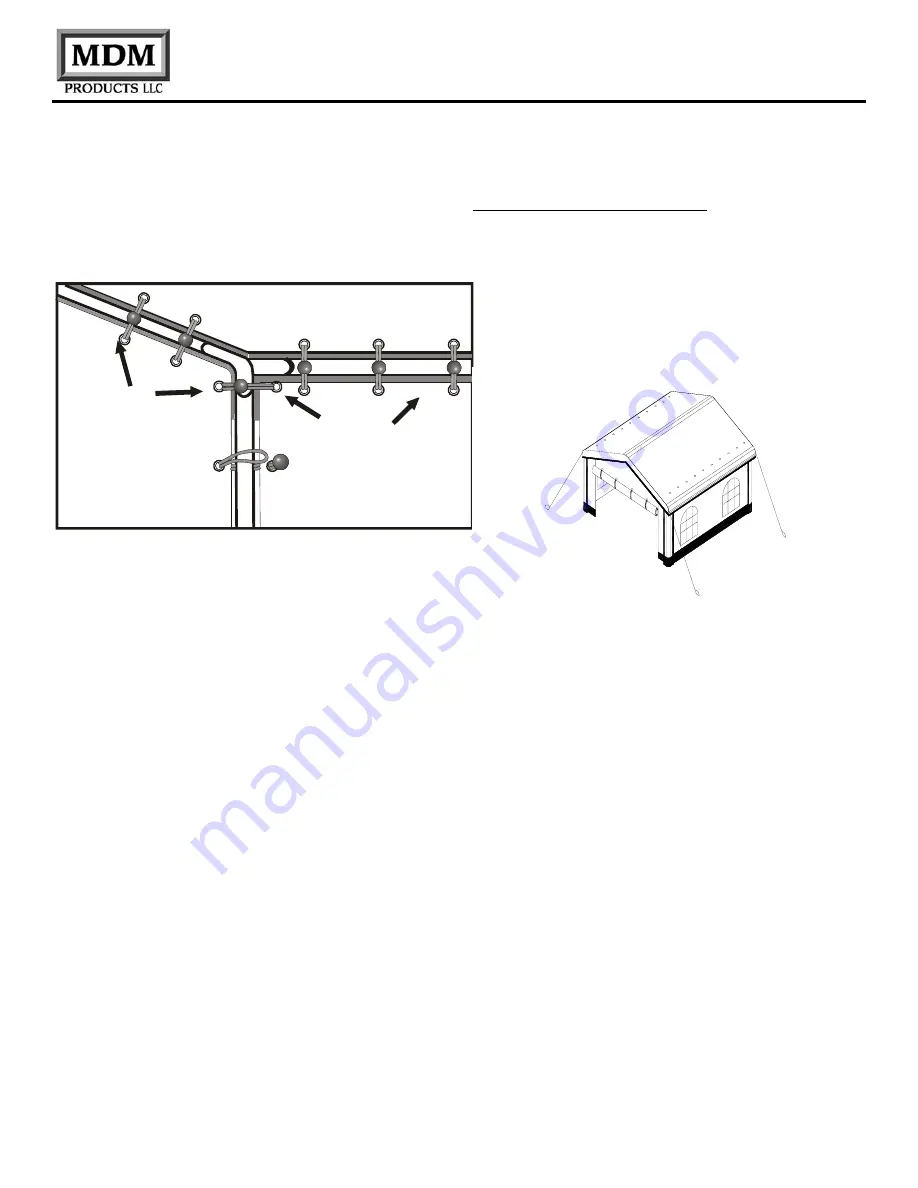
same way as you did to secure the roof. Along the eaves it
is best to share the same eyelets: i.e. from the inside first
pass the bungee elastic through the eyelet in the roof, then
back inside through the eyelet in the wall panel, wrap
around the pole and back over the toggle. Repeat with all
attachment points along the eaves so that roof and the
wall panels (where required) are secured to the frame, and
where the vertical ends of the walls finish or join each
other.
BUNGEE CORDS
ATTACH WALL TO FRAME
COVER
BACK WALL
BUNGEE CORDS
ATTACH WALL TO FRAME
SIDE WALL
Using the pegs (#17) provided, peg down the bottom edge
of the side and end walls; drive all pegs in at an angle
(ideally of 45
°
or less to the horizontal) and in line with the
seams. The guy ropes (#16) provided should be attached
or tied to the frame only, ensuring that they are all pegged
directly in line with the seam or pole to which the will apply
tension and support. Once this is achieved tighten the
adjusters so that equal tension is applied to each guy
point.
If these are not already attached, we suggest that securing
straps be used to guard against sudden changes in
weather and gusts of wind.
DISMANTLING THE PARTY TENT
Simply reverse the instructions above, again taking
particular care in windy conditions to prevent the tent from
becoming damaged and avoiding personal injury.
Please note that the stakes should be removed by either
using a tent peg extractor or more simply by using another
peg. Do not pull them out by using the guy rope or the
tents’ fabric.


