EN
20
Delete previously configured
wireless transmitters on the
wireless flush-mount switch
Previously configured channels can also
be deleted.
a.) Plug the wireless flush-mount switch into
a standard 230 VAC mains voltage in the
manner indicated in the above section.
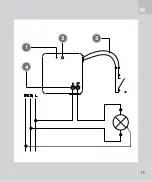
b.) Press button (2) until LED (1) flashes red.
c.) Before LED (1) stops flashing, press for
3 seconds the “OFF” button of the switch
channel set to be deleted on the wireless
transmitter for which the wireless flush-
mount switch was configured. LED (1) will
stop flashing, indicating that the delete
process has been successfully completed.
d.) Repeat these steps for other wireless
transmitters.
Delete all pre-configured
channels on the wireless
flush-mount switch
All preconfigured channels can be
deleted again.
a.) Plug the wireless flush-mount switch into
a standard 230 VAC mains voltage in the
manner indicated in the above section.
b.) Press button (2) until LED (1) flashes red.
c.) Before LED (1) stops flashing, again press
button (2) on the wireless flush-mount
switch. LED (1) will stop flashing, indicating
that the delete process has been success-
fully completed
FUNCTION TEST
Plug the wireless flush-mount switch into
a suitable 230 VAC mains voltage in the
manner indicated in the above section. You
Summary of Contents for CUVEO CR-UPMS300
Page 1: ...FUNK EINBAUSCHALTER MINI CR UPMS300 BETRIEBSANLEITUNG...
Page 2: ...FUNK EINBAUSCHALTER MINI CR UPMS300 02 DE...
Page 3: ...PE N L 4 1 2 3 03 DE...
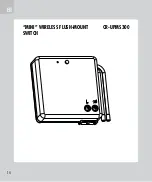
Page 14: ...MINI WIRELESS FLUSH MOUNT SWITCH CR UPMS300 14 EN...
Page 15: ...PE N L 4 1 2 3 15 EN...
Page 25: ...25 EN...
Page 26: ...INTERRUPTEUR ENCASTRABLE RADIO MINI CR UPMS300 26 FR...
Page 27: ...PE N L 4 1 2 3 27 FR...
Page 38: ...DRAADLOZE INBOUWSCHAKELAAR MINI CR UPMS300 38 NL...
Page 39: ...PE N L 4 1 2 3 39 NL...
Page 50: ...50...
Page 51: ...51...

