background image


GENERAL ADVICE


-------------------------------------------------------------------------------------------------------------- -------------------------


Before putting your dehumidifier into operation for the first time, the instruction manual should 
be studied carefully.  


After receiving the dehumidifier, you should check the unit for any transport damage. In case 
of damage, you should inform the sender immediately.  


Store  the  dehumidifier  box  and  packaging  in  a  safe  place 

–  this  will  be  required  if  the 

dehumidifier requires a service in the future. In order to save space, you can simply cut through 
the adhesive tape using a knife and fold up the cardboard box.  


Using a third-party switching device that turns the dehumidifier ON or OFF via the mains will 
invalidate the warranty as such devices damage the internal components.  

 
DEHUMIDIFIER PRINCIPLES


----------------------------------------------------------------------------------------------------------------------------- ----------


This  dehumidifier  is  designed  to reduce  humidity  from  the  air  in  a  building  or  part  of a  building.  The 
purpose  is  to help  dry  laundry,  prevent  condensation,  mould,  musty  air  and  other  issues  associated 
with high relative humidity.  

The time necessary for the dehumidifier to dry a room and reach the desired relative humidity depends 
on the environmental conditions prevailing within the room. For example, the number of air changes 
with outside, any sources of moisture, and the room temperature can all either speed up or slow down 
the dehumidification process.  

The dehumidifier functions according to the condensation principles with heat recovery. The fan takes 
the  humid  air  from  the  room,  in  and  across  a  filter,  and  then  through  an  evaporator.  Here  the  air  is 
cooled below dew point, so that the water vapour of the air forms a condensate on the coils, which flows 
into  the  internal  container  ready  to  be  poured  away.  The  cooled  and  dried  air  is  heated  again  by  a 
condenser.  By  recycling  the  room  air  through  the  dehumidifier  repeatedly,  the  moisture  content  and 
relative humidity of the air is reduced.  


INSTALLATION AND TRANSPORTATION 

----------------------------------------------------------------------------------------------------------------------------- ----------


For installation and transportation, the following instructions must be considered: 


Before using the dehumidifier, leave it to stand upright for six hours. 


Plug the unit directly into a wall socket and switch on using the ON/OFF button on the unit. 


Ensure there is more than 20cm of space around the unit to enable adequate air flow. The air 
inlet and the air outlet must not be covered whilst the dehumidifier is in operation. 


Make sure the water tank is securely in place. The unit will not switch on unless the water tank 
is secure. 


If you need to move the dehumidifier, it must be switched off by its ON/OFF switch on the unit. 
The mains plug must be removed from the socket and the water tank should be emptied. 


For  transportation,  the  dehumidifier  should  be  secured  on  a  level  base  only  and  must  be 
prevented from rolling around. 


The  dehumidifier  must  always  be  transported  vertically 

–  if  the  dehumidifier  has  been  in  a 

horizontal position for any time over a few minutes, you must let it stand in the upright position 
for at least 30 minutes before operating. This allows the oil to drain back into the compressor. 


Summary of Contents for MeacoDry ABC 10L

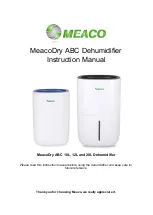
Page 1: ...ifier Instruction Manual MeacoDry ABC 10L 12L and 20L Dehumidifier Please read this instruction manual before using the dehumidifier and keep safe for future reference Thank you for choosing Meaco we...

Page 2: ...the appropriate voltages to the unit Handle with Care Do not drop throw or crash the dehumidifier Rough treatment can damage the components or wiring and create a hazardous condition Run on Stable Su...

Page 3: ...tilated area then the room must be designed to prevent the accumulation of refrigerant leaks resulting in a risk of fire or explosion due to ignition of the refrigerant caused by electric heaters cook...

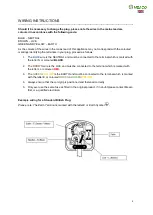
Page 4: ...minal which is marked with the letter N or coloured BLACK 2 The BROWN wire is the LIVE and must be connected to the terminal which is marked with the letter L or coloured RED 3 The GREEN YELLOW is the...

Page 5: ...humid air from the room in and across a filter and then through an evaporator Here the air is cooled below dew point so that the water vapour of the air forms a condensate on the coils which flows in...

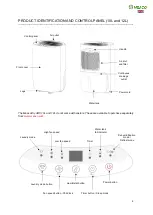
Page 6: ...from www meaco com Handle Air inlet and filter Control panel Air outlet Water tank Continuous drainage outlet Legs Front cover Power cord Power button Timer button Sleep mode Humidistat button Fan sp...

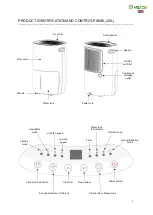
Page 7: ...t and filter Air outlet Wheels Continuous drainage outlet Power cord Laundry mode Laundry mode button Fan speed button Child lock Timer button Sleep mode Power button Up arrow Down arrow High fan spee...

Page 8: ...n using the power button The buttons on the control panel are sensitive Press the timer button quickly and firmly Do not hold the timer button down as the dehumidifier will go into sleep mode see belo...

Page 9: ...r 6 hours After 6 hours the dehumidifier will switch off until it is manually switched on again Laundry mode can be switch off at any point by pressing the laundry button or turning the dehumidifier o...

Page 10: ...g on the display will show the current relative humidity level in the environment the dehumidifier is being used in When the humidistat button on the 10L and 12L model or the down arrow on the 20L mod...

Page 11: ...arget humidity level of 50 rh or 55 rh and positioning the dehumidifier in a central position within your home for example the landing or hallway If you have more of a problem in one area of your hous...

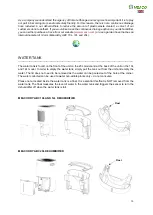
Page 12: ...from the dehumidifier Secure the 14mm hose onto the internal outlet pipe Once the hose is in place put the water tank back into the dehumidifier for continuous drainage to work the water tank must alw...

Page 13: ...L 12L and 20L WATER TANK The water tank is found on the front of the unit on the 20L model and at the back of the unit on the 10L and 12L model In order to empty the water tank simply pull the tank ou...

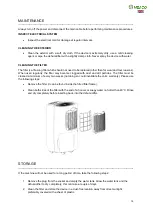
Page 14: ...e clogged with dust and dirt particles The filter must be cleaned a minimum of every two weeks not doing so could invalidate the units warranty Please use the following steps Remove the filter it can...

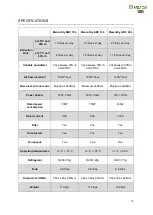
Page 15: ...80 rh Air flow nominal 105m hour 105m hour 145m hour Noise level at one metre Maximum 40dB A Maximum 40dB A Maximum 44dB A Power Supply 230V 50Hz 230V 50Hz 230V 50Hz Rated power consumption 155W 155W...

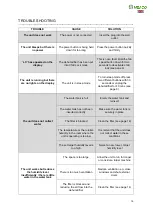
Page 16: ...unit does not collect water The water tank is full Empty the water tank and reinsert The water tank has not been inserted correctly Make sure the water tank is securely in place The filter is blocked...

Page 17: ...t feel cooler because it is moving this is the same as the air from a fan The room temperature will not be reduced by the unit and it is not cooling the air The display is not showing the target humid...

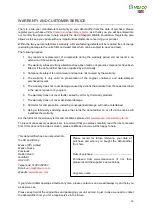
Page 18: ...as described in the user s manual or by neglect 6 The warranty does not cover faults caused by dirt or by third party products 7 The warranty does not cover accidental damage 8 All claims for compens...

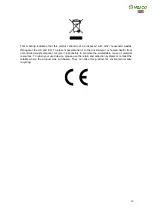
Page 19: ...harm to the environment or human health from uncontrolled waste disposal recycle it responsibly to promote the sustainable reuse of material resources To return your used device please use the return...

Reviews: