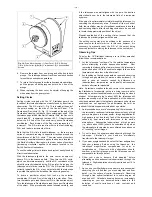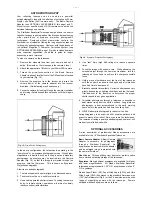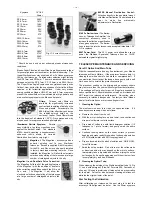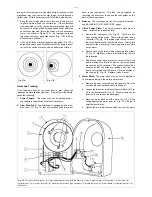
- 4 -
16" STARFINDER REFLECTING TELESCOPE:
INTRODUCTION
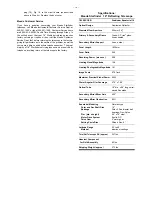
The 16" Starfinder Equatorial telescope will open up the skies
for a breathtaking array of visual observations. Galaxies,
nebulae, star clusters — in all their variations of form, color, and
extent — as well as the Moon, planets, comets and other
objects within the solar system, may be studied in great detail.
For those interested in photography, excellent results can be
obtained using the optional Meade camera adapter and a 35mm
camera body.
This manual is designed for the 16" Starfinder Equatorial
Reflecting Telescope. We urge the Starfinder user to read this
manual thoroughly, to become familiar with all of the Starfinder
options, so that the telescope may be used to its full potential.
PARTS LISTING AND ASSEMBLY
When first opening the packing boxes, note carefully the
following parts included with the Starfinder 16" Telescope:
Carton #1:
— Optical tube
— Mounting straps
— Secondary mirror assembly
Carton #2:
— Primary mirror mounted in its cell.
— Installation hardware
CAUTION: The primary mirror must be handled with special
care. Never touch its reflective surface or place the mirror
where it could be damaged. Save all original packing materials;
if it is ever necessary to ship the telescope, these materials will
help to assure that no shipping damage will occur.
Carton #3:
— Equatorial head with motor attached
— Strap mounting blocks
— Focuser
— 8 x 50mm viewfinder
— Pier
— Three tripod legs
— 25mm eyepiece
— All necessary hardware.
Carton #4:
— 25 lb counterweight
Carton #5:
— 40 lb counterweight
To assemble the telescope, follow these steps:
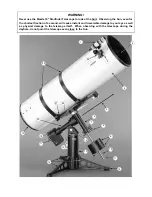
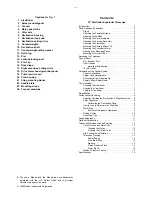
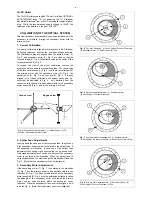
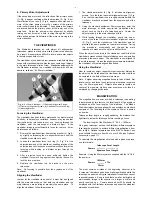
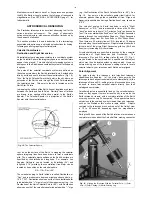
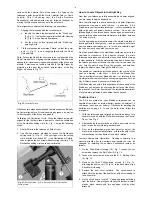
1. Tripod: Attach the tripod legs (16), Fig. 1, to the pier (13),
Fig. 1, using the wing nuts provided.
2. Attaching the Equatorial Head: Remove the equatorial
head from carton #3 and insert the lower portion of the pier
cap (15), Fig. 1, into the top of the pier (13), Fig. 1. Use the
three screws supplied in the pier cap to attach the pier to the
pier cap of the equatorial head. Thread the declination lock
knob (7), Fig. 1, into the machined housing located near the
lower end of the declination housing (6), Fig. 1.
3. Adjusting the Latitude:
Adjust the polar axis to your
approximate latitude by loosening the latitude locking bolt
(14), Fig.1. It will also be necessary to loosen the four hex
set screws located on the pier cap near the latitude locking
bolts. Rotate the mount about the lock bolt until the polar
axis (5), Fig. 1, points to Polaris. See page 9. Re-tighten
the latitude locking bolt and the four hex set screws.
4. Mounting the Counterweights: With a screwdriver, loosen
the panhead screw at the end of the declination shaft (10),
Fig. 1, and remove the counterweight safety washer (11),
Fig. 1. Slide the two counterweights (9), Fig 1, onto the
declination shaft (10), Fig 1, and lock them in place about
one quarter of the way up the shaft. It does not matter which
counterweight goes on first if the two counterweights are
placed next to each other on the shaft. If the two
counterweights are separated along the shaft, the heavier
counterweight should be placed on the shaft after the lighter
counterweight.
CAUTION: Be sure to secure the counterweight safety washer
(11), Fig 1, onto the end of the declination shaft by placing the
washer at the end of the shaft and replacing the panhead screw.
The counterweights should never be removed with the optical
tube in place!
5. Attaching the Focuser Assembly: To install the focuser
assembly, first lay the optical tube flat on a floor. Align the
holes in the focuser assembly (3), Fig. 1, with the pre-drilled
holes in the optical tube. From the provided hardware, place
the slotted pan head bolts through the holes. Carefully
reach into the optical tube and attach a hex jam nut and
washer to each bolt. Tighten the bolts, but do not
overtighten. Overtightening may result in damage to the
tube’s finish.
6. Attaching the Viewfinder: With the optical tube lying flat
on the floor, align the holes in the viewfinder bracket (1), Fig.
1, with the pre-drilled holes in the optical tube. From the
supplied hardware, place a button socket screw through
each of the holes. Carefully reach into the optical tube and
attach a washer and hex jam nut onto each screw. Tighten
the screws. As with the focuser, tightening to a firm feel is
sufficient. Aligning the viewfinder will be discussed later in
this manual.
7. Mounting the Primary Mirror Cell: Carefully remove the
primary mirror cell (19), Fig. 1, from carton #2. With the tube
lying flat on the floor, line up the colored mark on the mirror
cell with the colored mark inside the optical tube. Slide the
complete mirror cell into the rear of the telescope and
secure the cell to the tube with the supplied hardware.
8. Mounting the Secondary Mirror: From carton #1, carefully
remove the secondary mirror assembly from its separate
box. With the optical tube assembly lying flat on the floor,
grasp the secondary mirror assembly by the threaded rod
and, reaching between the spider vanes of the optical tube,
thread the threaded rod through the central hole in the
spider vane. Use the provided washer and locking nut to
secure the secondary mirror assembly in place. The slanted
secondary mirror should be positioned so that it can be seen
when looking through the focuser drawtube (24), Fig. 1.
Collimating (aligning) the secondary mirror with the primary
mirror is discussed later in this manual.
9. Attaching the Mounting Straps:
Attach the strap
mounting blocks (21), Fig, 1, to the saddle plate (22), Fig. 1,
using the wing nuts supplied on the strap mounting blocks.
From carton #1, remove the mounting straps (23), Fig. 1.
Attach each strap to a strap mounting block, the felt side
facing inside, with the two screws from the mounting block.
10. Mounting the Optical Tube: With the saddle plate (22),
Fig. 1, rotated to a horizontal position, CAREFULLY set the
optical tube assembly on the strap mounting blocks (21),
Fig. 1, and wrap the mounting straps (23), Fig. 1, around the
tube. Slide the stud of the mounting straps into the hole on
the mounting blocks and lock into place with the wing nut
provided. Tighten the wing nuts until the tube is secured
firmly and does not slide.
CAUTION: Since the telescope has yet to be balanced, the
tube may begin to move around either the declination axis or
polar axis, or both. Firmly tighten the declination lock knob (7),


