20
a.
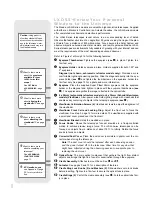
Autostar prompts you to enter the Country or State (listed alphabetically) of
the observing site. Use the Scroll keys to cycle through the database of
countries, states, and provinces. Press ENTER when the correct location
displays.
b.
Autostar then prompts you to enter the nearest city (listed alphabetically) to
the observing site. Use the Scroll keys to cycle through the database of
cities. Press ENTER when the correct city appears on screen.
9.
Autostar then prompts you to enter the model number of your telescope. Use the
Scroll keys to cycle through the list of telescope models. Press ENTER when the
correct model appears on the display.
Note: Autostar only prompts you to enter Country/State and City and
model number the first time it is activated. These prompts do not appear
again, unless you reset Autostar (see
RESET
, page 31). However, if you
need to enter this information (e.g., you change your geographic location),
you can do so by using the Site option of the Setup menu. See
ADDING
OBSERVING SITES
, page 32, for detailed information.
10. System Initialization is complete and the display reads "Align: Easy." After per-
forming the Initialization procedure, you MUST train your drive.
Training the Drive (Autostar Models Only)
Next, train the drive using Autostar. Perform this procedure the first time you use
Autostar with your telescope, after a Reset, or if you are experiencing any pointing
accuracy problems. Training the drive gives your telescope a higher degree of point-
ing accuracy.
Note: Use a terrestrial object, such as a telephone pole or lamp post, to
train the drive. It is best to perform this procedure during the daytime.
Complete this exercise once every 3 to 6 months to maintain the highest
level of telescope pointing accuracy.
1. If you have just performed
INITIALIZING AUTOSTAR
, go to step 2.
If you have not yet initialized Autostar, go to page 19 and follow the procedure
described in
INITIALIZING AUTOSTAR.
Then go to step 2 of this procedure.
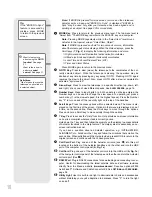
2. Keep pressing MODE until "Select Item: Object" displays.
3. Press the Scroll Up key once. "Select: Item: Setup" displays.
4. Press ENTER to access the Setup menu. "Setup: Align" displays.
5. Keep pressing the Scroll Up key until "Setup: Telescope" displays.
6. Press ENTER to access the Telescope menu. "Telescope: Focal Length" dis-
plays.
7. Keep pressing the Scroll Down key until "Telescope: Train Drive" displays.
8. Press ENTER to choose the Train Drive option. "Train Drive: Az/RA Train" dis-
plays.
9. Press ENTER to begin Az/R.A. (Right Ascension) training.
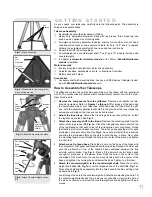
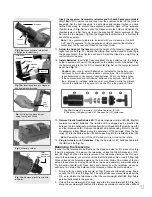
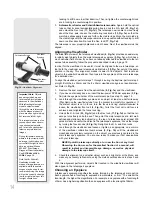
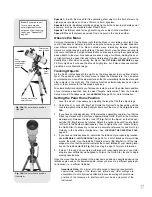
10. "Drive Setup: For this...." begins to scroll across the display. This is a reminder to
point your telescope at a terrestrial object. Loosen the R.A. and Dec. locks (17
and 33, Fig. 1d) and point the telescope at an object. Then re-tighten the locks.
Press ENTER when the telescope is pointing at the desired terrestrial object.
11. "Center reference object" displays. Center your target object using the Arrow
keys. When centered, press ENTER.
12. The telescope slews and "Press > until it is centered" displays. Press the Right
Arrow key until the target is centered again. Then press ENTER.
Note: If you pass the object when pressing the Arrow key, you cannot slew
the telescope back in the other direction. Press MODE until "Train Drive:
Az/RA Train" displays and begin the procedure over again.
13. The telescope slews and "Press < until it is centered" displays. Press the Left
Arrow key until the target is centered again. Then press ENTER.
14. "Train Drive: Az/RA Train" displays again. Press the Scroll Down key and "Train
Drive: Alt/Dec Train" displays. Press ENTER to begin Alt/Dec. (Declination) training.
Summary of Contents for LXD55 Series
Page 1: ...Meade Instruments Corporation Instruction Manual LXD55 Series Telescopes...
Page 2: ......
Page 63: ......

