36
"Hot Button" Menus
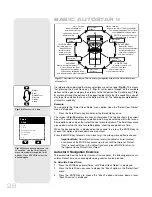
Two menus, six object libraries and two functions can be accessed directly using the
Number keys (commonly referred to as "hot buttons"). The two functions, the Speed
mode and the Utility light are described earlier in the manual.
Focus Control Menus:
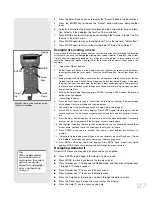
Press Number key "4" to select these menus directly from
Autostar II's keypad. Each time you press Focus, the key toggles between focus/focus
speed menus and the preset control menus. When “Focuser: Fast” displays, press the
Up or Down Scroll keys to select a focus speed (fast, medium, slow or fine). When
“Focuser: Position” displays, use the Up or Down Arrow keys to achieve fine focus of
the object.
You can toggle the Focus key to display the “Focuser: Preset” menus. The Focuser pre-
set menu allows you to assign nine focus positions. If you “park” the telescope, you can
set your own focus, focus for your observing partners and the focus for your camera
or imager. Other Preset menus allow you to select a focus you have assigned and also
to Sync on a Focus Preset. The Sync on a Focus Preset allows you retrieve focus posi-
tions when you
do not park
your telescope. See page 20 for more information. Also
see page 32 for information about parking your telescope.
Reticle Control Menu:
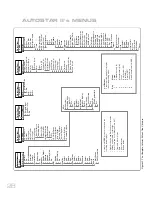
Press Number key "7" to select this menu directly from
Autostar II's keypad. "Reticle Control: Set Intensity" displays. Press ENTER. The
Intensity menu allows you to change the intensity of the Reticle Eyepiece Illuminator.
Use the Scroll keys to change the value. As you change the value, look through the
reticle to note how the Intensity changes.
Note
: You may continue to change the values using the Scroll keys (and thus
changing the intensity) until you press ENTER again. This allows you to
experiment with the intensity level until you decide which intensity level works
best for you. This feature operates in the same manner in the Rate and Duty
Cycle menus.
When you have finished adjusting the intensity, press ENTER. Press Number key "7"
again and the Rate menu displays. Press ENTER again. Use the Scroll keys to change
the value of the the rate at which the Reticle Eyepiece blinks. As you change the value,
look through the reticle to note how the Blink Rate changes.
When you have finished adjusting the rate, press ENTER. Next, Press Number key "7"
again and the Duty Cycle menu displays. Press ENTER again. The Duty Cycle menu
controls how long the Reticle Eyepiece Illuminator is on during a blink cycle. Use the
Scroll keys to change the value. As you change the value, look through the reticle to
note how the Duty Cycle changes. When you have decided on a Duty Cycle value,
press ENTER.
To exit the Reticle menu, press MODE once.
Object Catalogs:
See page 29 for more information.
Summary of Contents for RCX400
Page 73: ......

