4
QUICK-START GUIDE
Assemble Your Tripod
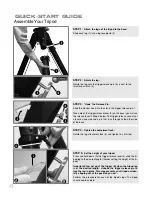
STEP 1:
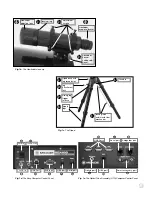
Attach the legs of the tripod to the base:
Slide each leg (1) into a leg receptacle (2) .
STEP 2:
Rotate the leg:
Rotate the leg until the trigger release pin (3) is next to the
thruster bar latch (4).
STEP 3:
“Hook” the Release Pin:
Slide thruster bar hook into the slot in the trigger release pin.1
Take note of the trigger release lever (5) on the base; you will use
the release lever in Step 5 below. The trigger release consists of
a lever on one side and a pin that runs through to the other side
of the base.
STEP 4:
Tighten the adjustment lock:
Rotate the leg attachment lock (6) and tighten to a firm feel.
STEP 5:
Set the height of your tripod:
Press and hold down (A) the trigger release lever (5) slide the tri-
pod leg to the desired length (thereby setting the height of the tri-
pod).
Important Step: Let go of the trigger (B) when the tripod leg
is at the desired length. Unhook the trigger release pin to
lock the leg in place. This step prevents your tripod acciden-
tally slipping out of the position you set .
Perform this procedure for each of the tripod’s legs. The tripod
should now be stable.
B
f
f
A
e
g
c
d
e
d
B
Summary of Contents for RCX400
Page 73: ......


