7
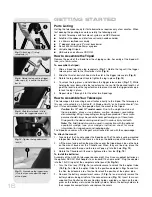
Point, Focus and Observe
STEP 14:
Tighten the R.A. and Dec. Locks:
Move the R.A. lock (27) and tighten to a firm feel. Rotate the Dec.
Lock (28) and tighten to a firm feel, also.
STEP 15:
Focus:
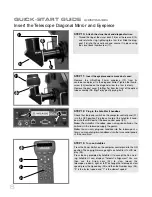
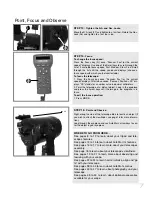
To change the focus speed:
Press the Focus key (2() once. “Focuser: Fast (or the current
speed)” displays. Use one of the Scroll keys to scroll through the
list of 4 available focus speeds: Fast, Medium, Slow, Fine. Scroll
through the list until the speed you desire displays (choose a
focus speed with which you feel comfortable).
To focus the telescope:
1. Press the Focus key once. “Focuser: Fast (or the current
speed)” displays. After two seconds, “Focuser: Position = XX” dis-
plays. “XX” stands for a number value in decimal millimeters.
2. Point the telescope at a distant object. Look in the eyepiece
and press the Arrow keys until the image in the eyepiece is in
focus.
To exit the focus operation:
1. Press MODE.
STEP 16:
Point and Observe:
Sight along the side of the telescope tube to locate an object (if
you wish to attach the viewfinder, see page 18 for more informa-
tion).
Look through the eyepiece and use AutoStar’s arrow keys to cen-
ter the object in your eyepiece.
WHERE TO GO FROM HERE...
See pages 8 to 12 to learn about your tripod and tele-
scope’s features.
See pages 13 to 15 to learn about AutoStar II’s features.
See pages 16 to 17 to learn more about your telescope’s
assembly.
See page 18 to learn about your telescope’s viewfinder.
See pages 19 to 21 to learn more about observing and
focusing with your scope.
See pages 22 to 24 to learn how to initialize, align and “go
to” with your telescope.
See pages 28 to 44 to learn about AutoStar’s menus.
See pages 45 to 47 to learn about photography and your
telescope.
See pages 48 to 50 to learn about optional accessories
available for your scope.
2&
2(
2*
Summary of Contents for RCX400
Page 73: ......


