background image

Power-On Mode

WebDAQ Series hardware can be configured to start automa cally when power is applied, instead of requiring

users to press the POWER bu on. This is useful if the WebDAQ is opera ng in a remote loca on and a power

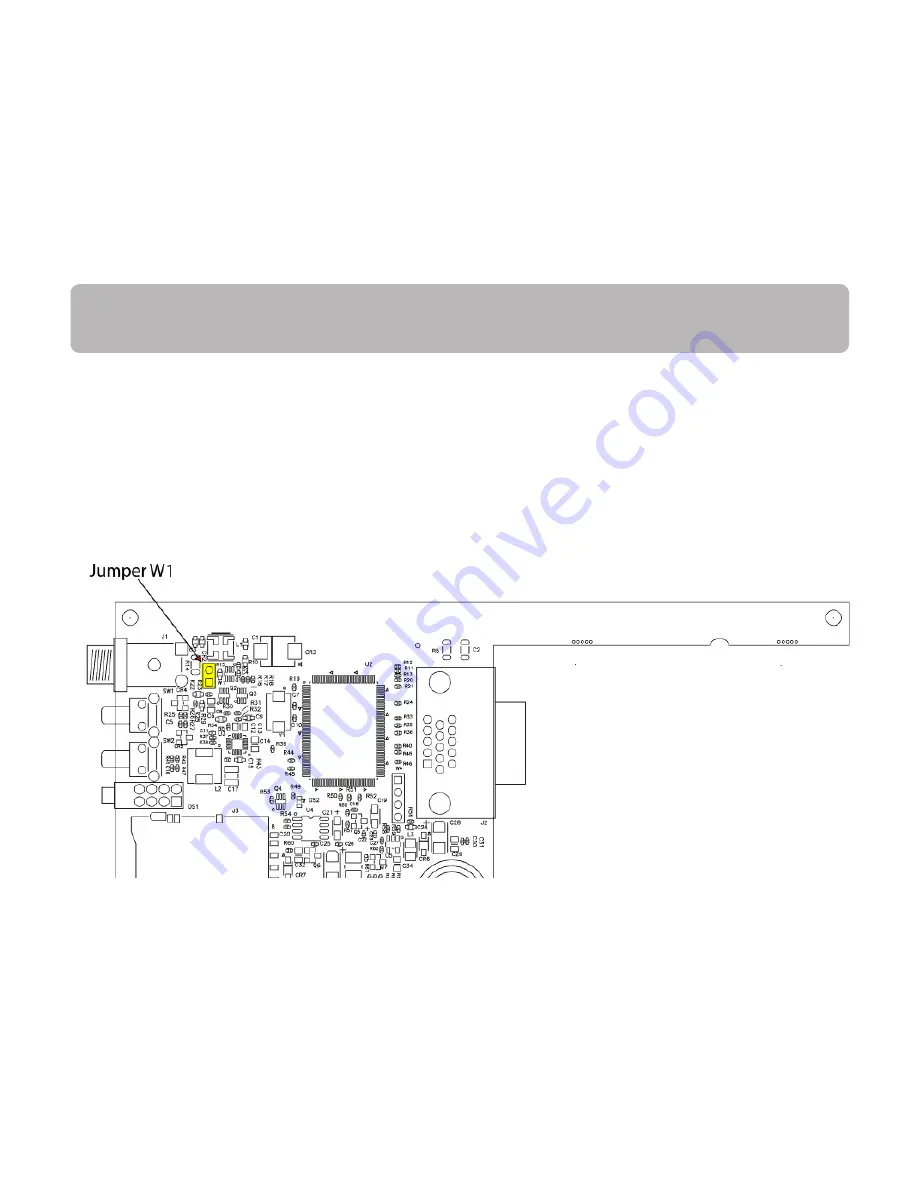
loss occurs. This "power-on mode" is enabled by removing a 2-pin jumper (labeled W1) from the WebDAQ

circuit board.
When jumper W1 is removed, the device does not shutdown completely unless the power adapter is

unplugged from the device or power source.
Perform the procedure below to remove jumper W1 from the WebDAQ circuit board and enable power-on

mode.

Cau on! The discharge of sta c electricity can damage some electronic components. Before removing

the WebDAQ device from its housing, ground yourself using a wrist strap or touch the computer chassis

or other grounded object to eliminate any stored sta c charge.

1. Power down the WebDAQ device and disconnect the power supply.
2. On the rear panel, remove the Ethernet cable, power cable, SD card, and any USB devices.
3. Remove the #6-32 ground screw.
4. Remove the nut and washer from the EXT PWR connector.
5. Remove the two front panel bezel screws and remove the front bezel.
6. Slide out the circuit board with the front panel intact.
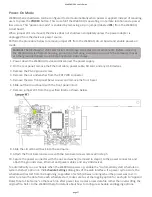
7. Remove jumper W1 from the specified loca on shown below.

8. Slide the circuit board back into the enclosure.
9. A ach the front bezel and secure with the two bezel screws removed in step 5.

10. Secure the power connector with the nut and washer (removed in step 4) to the power connector, and

a ach the ground screw, Ethernet and power cables, and any USB devices.

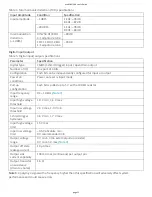
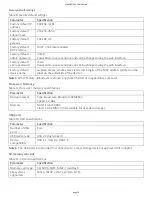
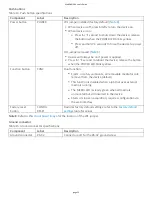
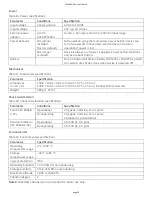
To automa cally run a schedule when the WebDAQ powers up, enable the "Automa cally start schedule on

system startup" op on on the Schedule Se ngs dialog box of the web interface. If a power cycle occurs, the

schedule will restart from the beginning, regardless of which job was running when the power was lost. In

order to retain the data from each schedule start, make sure to set the logging op on for each job to "Append

Date/Time to File Name" so that each run a er power loss creates a new data file rather than overwri ng the

original file. Refer to the WebDAQ help for details about how to configure schedule and logging op ons.

WebDAQ 504 User's Guide

page 17

Summary of Contents for WebDAQ 504

Page 1: ...any form by any means electronic mechanical by photocopying recording or otherwise without the prior wri en permission of Measurement Compu ng Corpora on No ce Measurement Compu ng Corpora on does not...

Page 2: ...for reaching Tech Support For interna onal customers contact your local distributor Refer to the Interna onal Distributors sec on on our website at www mccdaq com Interna onal Hazardous voltages Take...

Page 3: ...The WebDAQ is designed with the Raspberry Pi Compute Module featuring a quad core processor with speeds up to 1 2 GHz 1 GB RAM and 4 GB Flash memory Integrated opera ng system and web service The Web...

Page 4: ...e too large error is returned and the acquisi on stops Before star ng a logging session of this type reformat the media using a di erent le system such as NTFS Refer to the Frequently Asked Ques ons h...

Page 5: ...e the WebDAQ for wireless communica on Refer to the Con guring the WebDAQ for wireless communica on sec on for more informa on Connec ng directly to a PC Connect one end of the Ethernet cable to the c...

Page 6: ...indow and enter h p webdaq xxxxxx local where xxxxxx is the last 6 digits of the MAC address The MAC address is on a label at the bo om of the WebDAQ enclosure If your network is con gured for the zer...

Page 7: ...a ng system and restart the WebDAQ using the Power bu on Con guring the network router for communica on across networks To communicate with the WebDAQ over the internet from a computer connected to a...

Page 8: ...ngs To restore network con gura on and security se ngs to the factory default values use a paper clip to press the CONFIG RESET bu on When pressed the default network and security se ngs are wri en to...

Page 9: ...ger an alarm and be driven high or low when an alarm occurs BNC connectors Connect up to four analog inputs to the BNC connectors AI0 AI0 to AI3 AI3 All analog inputs are simultaneously sampled at rat...

Page 10: ...connec ng a grounded signal source to the WebDAQ 504 Figure 6 Connec ng a grounded IEPE sensor Figure 7 shows a diagram for connec ng a oa ng signal source to the WebDAQ 504 Figure 7 Connec ng a oa ng...

Page 11: ...d to reboot the device release the bu on when the POWER LED blinks yellow Refer to Power On Mode for the procedure to remove jumper W1 and enable Power On mode The WebDAQ device can also be restarted...

Page 12: ...duled start condi on is met wai ng for job start condi on to be met Blinking green Data is being acquired job start condi on is met O No error detected 3 ERROR Blinking yellow Error condi on is detect...

Page 13: ...data to a single le when logging to external media do not use media forma ed with the FAT32 le system FAT32 is limited to a 4 GB maximum le size If the log le on FAT32 media grows beyond that size a F...

Page 14: ...ly Asked Ques ons help topic for more informa on about le systems Analog input circuitry The analog input channels are referenced to chassis ground through a 50 resistor To minimize ground noise make...

Page 15: ...nd signals The lters discriminate between signals based on the frequency range or bandwidth of the signal The three important bandwidths to consider are the passband the stopband and the alias free ba...

Page 16: ...quency Logging data You can log up to 3 GB of data to internal WebDAQ storage To generate larger data les log data to external media with a storage capacity suitable for the acquisi on USB drives and...

Page 17: ...round screw 4 Remove the nut and washer from the EXT PWR connector 5 Remove the two front panel bezel screws and remove the front bezel 6 Slide out the circuit board with the front panel intact 7 Remo...

Page 18: ...ard with the front panel intact 7 Remove the ba ery by sliding it forward toward the slot and replace with a 3 V bu on cell ba ery type BR1225 CR1225 or similar 8 Slide the circuit board back into the...

Page 19: ...e selectable AC cuto frequency 3 dB 0 5 Hz 0 1 dB 4 6 Hz max Input range 5 V AC voltage full scale range 5 Vpk min 5 1 Vpk typ 5 2 Vpk max Common mode voltage range AI to earth ground 2 V max IEPE exc...

Page 20: ...voltage range Vcommon mode Vbias Vfull scale must be 0 to 19 where Vcommon mode is the common mode voltage applied to the WebDAQ 504 Vbias is the bias voltage of the IEPE sensor Vfull scale is the ful...

Page 21: ...nput mode Pull up con gura on Each bit is pulled up to 5 V with a 100 k resistor Input frequency range DC 10 kHz Note 3 Input high voltage threshold 1 9 V min 3 6 V max Input low voltage threshold 2 3...

Page 22: ...nego ated Connector RJ 45 8 posi on Cable length 100 meters 328 feet max Addi onal parameters HP Auto MDIX support Network con gura on Table 7 Network con gura on Parameter Speci ca on Network IP con...

Page 23: ...derside of the device Note 5 When factory defaults are restored any shared folders or mapped drives are reset Processor Memory Table 9 Processor memory speci ca ons Parameter Speci ca on Microprocesso...

Page 24: ...MEDIA Blinking yellow A job is con gured to log to external media but the job hasn t started yet push bu on will not let you eject media Steady yellow External media is inserted into the SD card slot...

Page 25: ...on bu on FUNC Dual func on Ejects or safely unmounts all removable media for safe removal from the device default This func on is disabled when a job that uses external media is running The MEDIA LED...

Page 26: ...Parameter Speci ca on Dimensions L W H 158 8 146 1 38 1 mm 6 25 5 75 1 50 in 178 8 146 1 38 1 mm 7 04 5 75 1 50 in includes BNC connectors Weight 680 g 1 50 lb Shock and vibra on Table 18 Shock and v...

Page 27: ...by regulated low voltage sources and electronics Cau on Do not connect the WebDAQ 504 to signals or use for measurements within Measurement Categories II III or IV Signal connector Table 21 Screw term...

Page 28: ...w Voltage Direc ve 2014 35 EU RoHS Direc ve 2011 65 EU Conformity is assessed in accordance to the following standards EMC Emissions EN 61326 1 2013 IEC 61326 1 2012 Class A EN 55011 2009 A1 2010 IEC...

Page 29: ...Measurement Compu ng Corpora on 10 Commerce Way Norton MA 02766 Phone 508 946 5100 mccdaq com support WebDAQ 504 User s Guide page 29...

Reviews: