NEED HELP? 1-800-832-2966
12
ASSEMBLY INSTRUCTIONS
Unboxing the Tiller
➢
The tiller comes over 90% assembled.
➢
Remove all parts and packaging components.
➢
Use a utility knife to cut all four vertical edges and lay the box side panels flat around the tiller.
➢
Remove any remaining packaging.
➢
Assembly can be done sitting on the cardboard to protect the finish.
Wheel Assembly
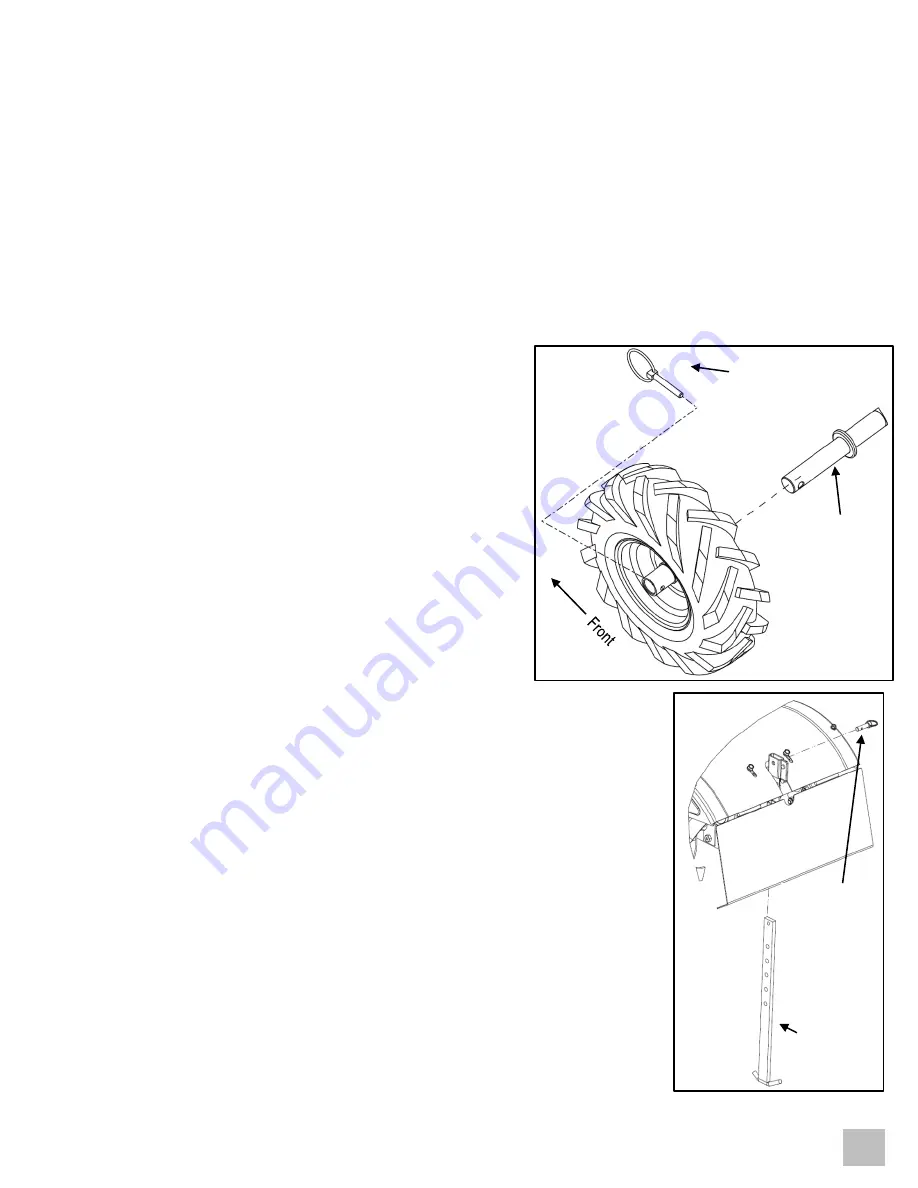
1) Ensure the cup washers are in place on the wheel axles.
2) The tiller wheels are directional. Ensure the tread faces as
shown for best performance.
3) Slide the wheel hub onto the wheel axle.
4) To engage in tilling mode, ensure the hub hole aligns with
the hole in the axle, and insert the lock pin through both
wheel and axle.
5) To enable transport mode, slide the wheel inboard towards
the unit and insert the lock pin in the axle only.
6) Rotate the ring into place to secure the lock pin.
Depth Regulator
1) Tip the tiller forward.
2) Lift the rear guard and insert the depth regulator into the bottom of the depth
regulator bracket.
3) Insert the locking pin through the bracket and depth regulator.
Depth
Regulator
Locking Pin
Locking Pin
Axle


