background image

Service manual 1533-2003-S

 95 of 108

Version 1.0.2/2020

Medema Production A/S

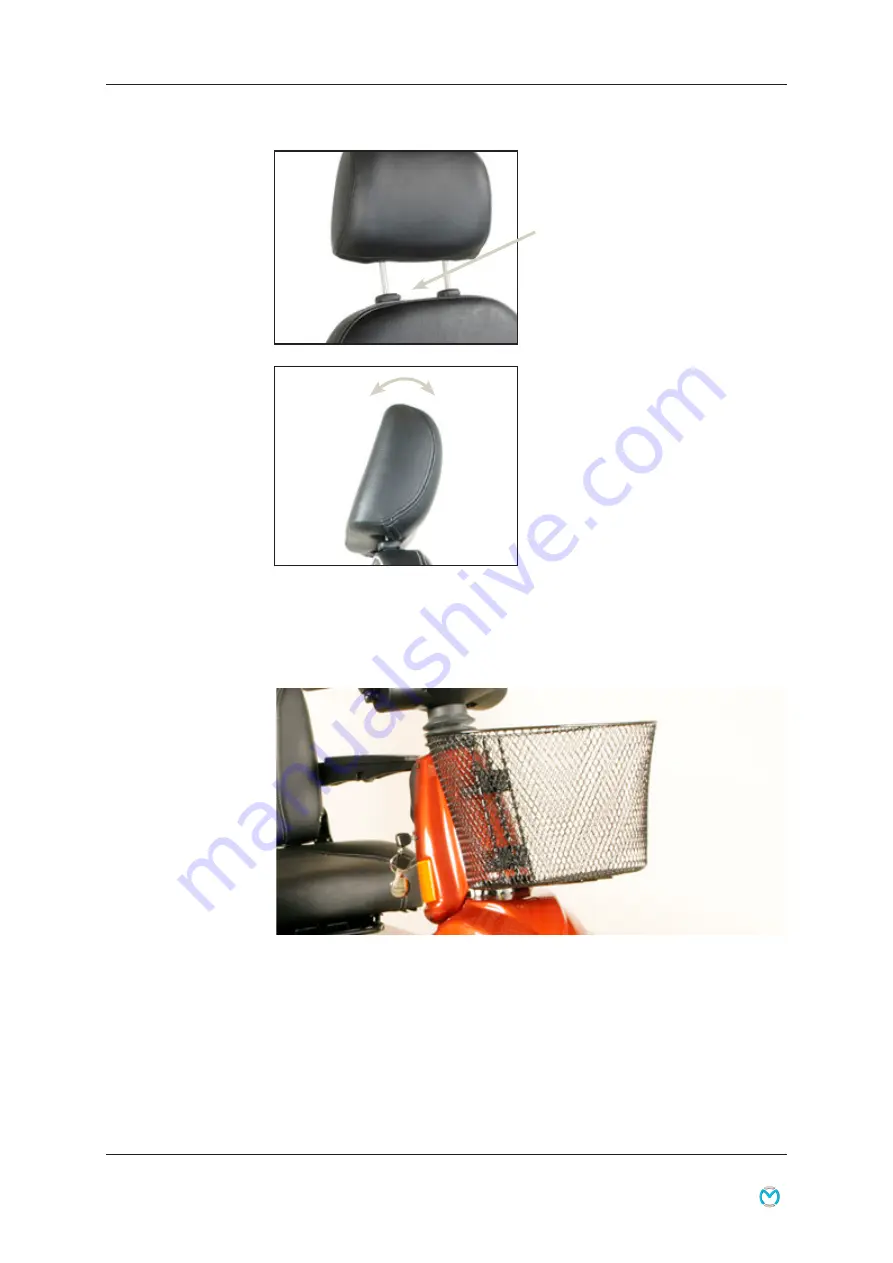
Height adjustment of 

headrest.

Press the button and the 

headrest can be raised and 

lowered as needed.

Adjustment of the headrest 

forward and backward.

The headrest can be tilted 

forward and backward as 

needed.

Basket in front

Mount the basket on the brackets (Click on) and now it is ready 

for use.

Baskets are part of a wide range of accessories. Contact your 

local dealer or Medema A/S. Se contact information on page two 

in this manual.

Summary of Contents for Mini Crosser X1 HD

Page 1: ...Service Manual Mini Crosser X1 HD GB medemagroup 1533 2003 S ver 1 0 2 February 2020...

Page 2: ...___ Delivery date ________________ Year 20______ This vehicle was supplied by Date Medema A S Engg rdvej 7 Snejbjerg DK 7400 Herning Denmark Phone 45 70 10 17 55 Mail info medema com Dealer For this p...

Page 3: ...ving the Mini Crosser X1 HD 18 Lap belt 21 Specific driving situations 23 Long hills difficult ground 25 Anti tilt wheels stabilisers 26 General care and maintenance 27 Insurance 28 Batteries 29 Batte...

Page 4: ...66 Replace headlights 68 Replace gas spring for steering collumn 70 Replace the front springs 71 Replace rear spring 72 Replace tail light 73 Replace batteries 74 Replace transaxle 75 Replace cable f...

Page 5: ...utmost importance that the servicing and safety check intervals are complied with as this minimises the risk of brake failure and short circuits in the wir ing which could generate heat and cause a fi...

Page 6: ...ing small print in the user manual we recommend that you visit our website where you can read this manual in PDF format You can enlarge the PDF manual on your PC monitor to suit your needs and prefere...

Page 7: ...t be lent to persons who are not completely familiar with it The vehicle is designed for one person only The Mini Crosser X1 HD has been designed for users weighing max weight of 250 kg Contagion A st...

Page 8: ...ul not to lift heavy parts such as the seat battery and motor gear incorrectly or drop them Make sure to raise one rear wheel off the ground so that the scooter cannot drive off accidentally Use profe...

Page 9: ...screwdrivers 10 15 20 25 slot Needle nose pliers Side cutting pliers Plastic hammer Set of punches Retractable knife Steel brush Water pump pliers Wire strippers Crimping tool Pliers for Molex 5556 5...

Page 10: ...the scooter is not going to be used for a long time it is advis able to protect the tyres by chocking the scooter up It is also a good idea to cover the scooter to protect it from dirt dust and sunlig...

Page 11: ...lly powered wheelchairs scooters and their chargers Requirements and test methods The product is risk analysed in accordance with the harmonized standard DS EN ISO 14971 2007 04 10 2 edition Medical d...

Page 12: ...ear warranty against breakage and corrosion of the undercarriage 4 For the warranty to cover batteries the charger used must be sold by Medema A S The fabric type and serial number must be indicated o...

Page 13: ...hitting obstacles The manufacturer accepts no liability in respect of the unauthor ised opening adjustment or modification of the control panel Lever for adjusting the angle of the handlebars Chargin...

Page 14: ...move forwards The more the arm is pressed the faster the Mini Crosser will move When the arm is released it will flip back to starting position of its own accord and the Mini Crosser will stop Activat...

Page 15: ...Adjustments prior to use Adjusting the height of the seat Lift both armrests up and fold the seatback Release the handle so the seat can turn Turn a little and lift the seat off Make sure you keep yo...

Page 16: ...release button again and make sure it is fitted in one of the 5 holes in the seat tube Loosen the counter nut Use spanner 17 mm Adjust the seat post to the desired position The seat post is marked wit...

Page 17: ...adjustment as an optional extra To raise the seat press the switch up To lower the seat press the switch down If the switch is released the seat will stop au tomatically See figure below For safety re...

Page 18: ...ic seat adjustment Make sure that nothing is trapped in the space between the seat and the chassis Avoid trapping anything when lowering the seat Release lever for seat rotation Release lever for seat...

Page 19: ...get out The height of the steering column can be adjusted approx 11 cm up down First remove the rubber plug covering the Allen screw Adjust the height using a 4 mm Allen key This applies to both the...

Page 20: ...ar of pro duction and serial number The same serial number can also be found on page two of this manual Please quote this number when making inquiries about servic ing spare parts etc Maximum user wei...

Page 21: ...raise the armrest For some users the assistance of an attendant can be recom mended The attendant should Take care not to injure him herself when lifting lowering supporting the user Make sure that th...

Page 22: ...only to alcohol but also to drugs and medicines Reduce speed immediately if you feel you are losing control Always use the indicators when changing direction Check that lights and indicators are worki...

Page 23: ...affic Set the Mini Crosser to low speed Drive forwards and backwards Gradually turn the speed selector up and feel the change in the speed of the Mini Crosser Practise starting and braking Get used to...

Page 24: ...s The traffic legislation for Mini Crossers varies from country to country Before starting to use the vehicle outdoors it is the user s responsibility to familiarise him herself with the relevant legi...

Page 25: ...ise can affect the Mini Crosser Sources of such noise include radio and television stations and amateur radio transmitters When driving in traffic Be particularly aware of the following when driving i...

Page 26: ...wards Accelerate moderately so that your vehicle can overcome the obstacle Do not stop halfway but reduce speed once the vehicle is up If the kerb is too high do not try again but find an alternative...

Page 27: ...t your vehicle can overcome the obstacle Do not stop halfway Reduce speed once the vehicle is up If you need to start on a hill accelerate slowly so as not to tip over backwards Down a ramp hill Check...

Page 28: ...motor from overheating there is a built in thermos witch which initially sets the Mini Crosser to half speed However if you carry on moving over difficult ground the Mini Crosser will at some stage st...

Page 29: ...ser is a very stable vehicle HOWEVER in the case of incorrect weight distribution or careless driving there is a risk of tipping over We therefore recommend fitting anti tilt wheels in such circum sta...

Page 30: ...e Mini Crosser in good condition safety wise we rec ommend the following regular checks Daily User Test the indicators and driving lights before using the Mini Crosser in the dark or poor visibility E...

Page 31: ...ety check intervals are complied with as this minimises the risk of brake failure and short circuits in the wiring which could generate heat and cause a fire For further information see the Service Ma...

Page 32: ...g dry maintenance free batteries The max charging current is 12 A If charging is to take place outdoors an enclosed charger with out a fan should be chosen The battery indicator shows how much power i...

Page 33: ...r should be charged when the vehicle is not in use The type of charger supplied by the factory works in a way that it automatically switches over to trickle charging very little electricity consumptio...

Page 34: ...the cable terminals Polarity of charging plug NEUTRIK NC3MX charging plug Connect the charging plug to the 3 pin socket on the steering column The charging socket is located under the protective cover...

Page 35: ...oth If necessary wipe dry with a chamois leather Wipe the covers dry and polish with car wax IMPORTANT Never use high pressure cleaner or hose as it could damage the Mini Crosser s electronics Note If...

Page 36: ...s Catalogue for disassembly NB The rear and front wheels on the 4W MUST always be removed using the five bolts NEVER undo the actual flange using the bold in the centre See the Spare Parts Catalogue N...

Page 37: ...eter shaft Function test Turn the scooter on while the accelerator is activated The scoot er must not be able to go The battery indicator should go up and down With the scooter turned on press the acc...

Page 38: ...ld of one wheel at a time Lift it up and down to see if there is any play in the bearings in the transaxle If there is the whole unit should be replaced Power consumption Power consumption on a level...

Page 39: ...nt fork is a bit stiff the seal rings can be lubricated with a little grease On models with an 8 mm bolt going into the steering shaft from the alu minium bottom section of the steering column The bol...

Page 40: ...lace Cables plugs Check that the cables are firmly in place and not sticking out in such a way as to catch on something or get trapped Check that the plugs are firmly in place Battery straps Check tha...

Page 41: ...e must be turned off See page 10 Driving the Mini Crosser Release the handbrake Contact supplier Contact supplier Remove the charging plug Driving speed is too low The speed selector is on slow The el...

Page 42: ...rging process Check again after half an hour Contact supplier Push the charging plug all the way in and repeat the charging process The ready lamp on the charger lights up even when partly discharged...

Page 43: ...Not in use 6 lamps The S180 is prevented from driving Inhibit 2 is active This may be due to the battery charger being connected the plug to the thermal switches being disconnected a fault in the ther...

Page 44: ...to change the speed which can only be done using the PC program Please note that the speed deceleration throttle gain and mo tor compensation settings must not be increased They have a major influenc...

Page 45: ...PC program an OEM version and a dealer version The OEM version gives complete access to all settings parameters The dealer version gives limited access Before programming can com mence the five pin p...

Page 46: ...ogramming the scoot er should be switched off with the key After reassembling the 5 pin connector the scooter can be switched on age available containing PC program cable and USB to seri al adapter SR...

Page 47: ...nformation about the vehicle via PC Double clicking on the S 180 program icon displays the follow ing screen Press Continue to continue The red down arrow shows that the program can see that the contr...

Page 48: ...as been driven Controller Info Displays control system specific information such as the identification number Protect Allows PC Programmer to be secured using a password Once the program has been prot...

Page 49: ...ays control system specific information such as the identification number Protect Allows PC Programmer to be secured using a password Once the program has been protected can only Open Close Read From...

Page 50: ...on such as the identification number Protect Allows PC Programmer to be secured using a password Once the program has been protected can only Open Close Read From Write To and Program attached control...

Page 51: ...control system specific information such as the identification number Protect Allows PC Programmer to be secured using a password Once the program has been protected can only Open Close Read From Writ...

Page 52: ...gainst mains faults It is located under the rear cover The main fuse protects against short circuits in the main current circuit The fuses are located under the rear cover behind the batteries Fuse ty...

Page 53: ...A fuse Charging Item No 1505 1228 20 A Fuse 2 1 x 10 A fuse Control system Item No 1505 1225 10 A Main fuses 100 A fuse type DIN 2581 100 A Item No 1505 1170 Summary of battery connections Fuses and e...

Page 54: ...areas on the scooter where they are to be used The table on the next page Open panel for access shows when the control panel has to be opened The below numbers refer to the socket on the printed circ...

Page 55: ...slope This function is only designed for use when pushing the Mini Crosser on a flat road Electric safety brake if the brake is somehow disengaged on a slope hill the Mini Crosser will brake automatic...

Page 56: ...d but not drive itself Electronic The yellow electronic disengagement button is placed on the back of the vehicle This only works when the scooter is turned on NOTE Don t ever disengage on sloping ter...

Page 57: ...e Mini Crosser slightly take hold of it between the rear lights and by the front bumper Important If you drop the Mini Crosser from a height of half a metre or more there is a risk that the gears in t...

Page 58: ...lts Dahl Engineering belt set for securing in motor vehicles ALWAYS use four belts at the back and two at the front The belts must always be attached to approved fittings in the vehicle and the four e...

Page 59: ...533 2003 S 59 of 108 Version 1 0 2 2020 Medema Production A S Greater than the anchorage points on the Mini Crosser Attachment point Attachment point Greater than the anchorage points on the Mini Cros...

Page 60: ...pendently restrained in the actual motor vehicle in accordance with traffic legislation rules Contact your local dealer or Medemea A S for more information Example Restraining the passenger with a sta...

Page 61: ...rosser can be towed or pushed The Mini Crosser must al ways be turned off and the motor brake disengaged during towing See the section on Brakes If the Mini Crosser is to be towed secure a rope to the...

Page 62: ...tart Changing the wheels on the 4W model Remove the hubcap 5 mm Allen key Undo the five bolts Take the wheel off When the wheel is put back on the spring washers must be refitted between the wheel rim...

Page 63: ...re before the tube is re placed Pump air into the tube so that it is positioned cor rectly in the tyre but do not fill it up completely yet In this way the tube will not get jammed when the flange is...

Page 64: ...edema Production A S Replace the wigwag potentiometer Start by removing the rubber caps or side mirrors if fitted Four screws are removed The panel can now be lifted Remove the gas grip First loosen t...

Page 65: ...potentiometer is now free New potentiometer Mount in reverse order When the throttle handle is mounted hold it in position full speed when you tighten the stop screw again This means that the four fi...

Page 66: ...duction A S Replace the speed potentiometer Start by removing the rubber caps or side mirrors if fitted Four screws are removed The panel can now be lifted Lift the cover off with a screwdriwer Use a...

Page 67: ...J10 on the circuit board New speed potentiometer set Mount in reverse order First the washer then the nut and last the threaded rod Mount the knob with washer and nut Turn the knob all the way to eith...

Page 68: ...ing the rubber caps or side mirrors if fitted Four screws are removed The panel can now be lifted Dismantle the nessecary plugs from the board All plugs has numbers Follow the Scheme on the inside of...

Page 69: ...e removed The panel can now be lifted Dismantle the necessary plugs from the board All plugs has numbers Follow the Scheme on the inside of the head when mounting the new head Dismantle the plugs for...

Page 70: ...Production A S The circuit board is now free Mount a new print in reverse order Remember the plastic washers under the nuts when mounting Mount the plugs in the circuit board again Follow the Scheme...

Page 71: ...ht The headlight is attached with a fitting on the back of the screen A single finger screw holds it firmly in place Remove the screw Remove the headlight Detach the plug and it is free to change New...

Page 72: ...1533 2003 S 72 of 108 Version 1 0 2 2020 Medema Production A S Mount the finger screw again The headlight can be adjusted up down by turning this screw Adjust the headlight so it isn t blinding but l...

Page 73: ...Remove the six screws that keep the cover in place When the cover is loosened turn it almost 90 and slide it of the handle The cover is still attached by a cable but there is access to the gas spring...

Page 74: ...he front springs It is not necessary to remove any covers to replace the front springs Remove the screws at the top And on the bottom Now the spring can be replaced Don t remove both front springs at...

Page 75: ...d then in the bottom The spring can now be removed and replaced with a new Mount the new spring in reverse order Remove the rear cover Remove the stopper and slide of the rubber Unscrew the three scre...

Page 76: ...rmrests up and fold the seat completely Release the seat turn turn the seat a little and lift it of Remove the thumbscrew and remove the battery cover Turn the nut until the tail light is loose Remove...

Page 77: ...s up and fold the seat completely Release the seat turn turn the seat a little and lift it of Remove the thumbscrew and remove the battery cover Disconnect the poles Remove the battery straps Tilt the...

Page 78: ...rmrests up and fold the seat completely Release the seat turn turn the seat a little and lift it of Remove the thumbscrew and remove the battery cover For safety reasons disconnect one of the poles Ra...

Page 79: ...Cut the cable ties that keep the cable in place Remember new cable ties when mounting again The cable is free Remove both rear wheels Remove the cover key 17 Remove the three screws that hold the brak...

Page 80: ...emove the screws from this side first When all four screws are removed the transaxle can be removed and replaced with a new one Mount in reverse order On a new transaxle the note is taped in place Rem...

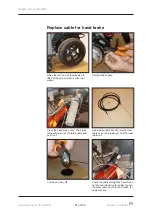
Page 81: ...ove the rear wheel Cut the brake cable Press the hand brake once The brake cable will poke out Grab the cable and pull it out A new bake cable Mostly only the inner cable need to be replaced Pull the...

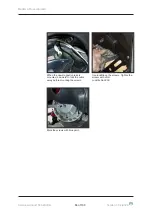
Page 82: ...ear wheel Lead the cable through the adjustment screw And through the small hole Adjust the brake with the tool while turning the hub There must be no sound from the hub When the hub just turn without...

Page 83: ...ee screws Now there is access to the magnetic brake Remove the three screws to dismantle the magnetic brake They where all greased with locktite when they were mounted Check the distance to the magnet...

Page 84: ...ion 1 0 2 2020 Medema Production A S When the new magnetic brake is mounted be aware to tuck the cable away before mounting the screws Use locktitie on the screws Tighten the screws with 4 Nm Locktite...

Page 85: ...A Hour meter 5A Horn 10A Light 20A Charging In both sides is a main fuse fixed with cable ties When replaced a new protection is heated in place Replace fuses For safety reasons disconnect one of the...

Page 86: ...here are four coals Turn of the lit Remove the rear cover Remove the stopper and slide of the rubber Unscrew the three screws Unplug all electric connectors and the cover is free Lift the armrests up...

Page 87: ...it needs replacing No matter if it is a Schmid or Mini Crosser transaxle the rule is that a coal should be replaced if worn down to 10 mm Full length Blow the hole clean before a new coal is fitted Th...

Page 88: ...turn the seat a little and lift it of Remove the thumbscrew and remove the battery cover For safety reasons disconnect one of the poles Remove the rear cover Remove the stopper and slide of the rubber...

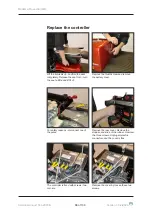
Page 89: ...cables so the screw has access to the mounting hole Fix the cover Mount the other plugs Tighten with 5 Nm Dismantle all the plugs The controller are to be removed now Mount a new controller in the sa...

Page 90: ...030 mm 1400 mm X1 HD 400 mm X1 HD 320 mm 135 mm 1090 mm 610 mm 175 mm 660 mm 526 mm 460 mm Service manual 1533 2003 S 90 of 108 Version 1 0 2 2020 Medema Production A S Dimensioned drawing Mini Crosse...

Page 91: ...side it must be pushed forward in order to rotate the seat instead of pulling back Out in adjustment of the lever for rotating the seat Lift the seat off the vehicle Loosen the two Allen screws and t...

Page 92: ...bw adjustment of the seat Pull the lever up to release the seat on the slide rail Then the seat can be moved forward or backward as desired with 200 mm of travel When the lever is released the seat wi...

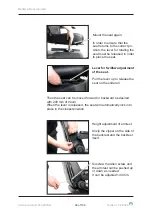
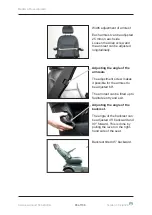
Page 93: ...by pulling the lever on the right hand side of the seat Backrest tilted 45 backward Adjusting the angle of the armrests The adjustment screw makes it possible for the armrest to be adjusted 60 The arm...

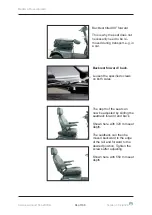
Page 94: ...transport e g in a car The depth of the seat can now be adjusted by sliding the seatback forward and back Shown here with 320 mm seat depth The seatback can then be moved backward to the edge of the...

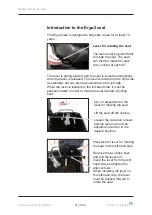
Page 95: ...d and lowered as needed Adjustment of the headrest forward and backward The headrest can be tilted forward and backward as needed Basket in front Mount the basket on the brackets Click on and now it i...

Page 96: ...s and four Allen screws Unzip the zipper and position the brackets in front of the two predrilled holes Mount the basket on the brackets and now it is ready for use Remember to insert a locking split...

Page 97: ...e locking at each 45 The lever is spring loaded and the seat is locked automatically when the lever is released Lever for fore aft adjustment of the seat Pull the lever up to release the seat on the s...

Page 98: ...ed by turning the handle counter clockwise Headrest The headrest can be adjusted up down in steps Flame resistance The Mini Crosser seat s flame resistance has been tested in accordance with DS EN 102...

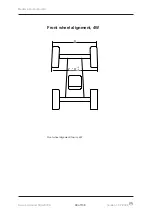
Page 99: ...A A 2 0 Service manual 1533 2003 S 99 of 108 Version 1 0 2 2020 Medema Production A S Front wheel alignment 4W Front wheel alignment toe in 4W...

Page 100: ...m Max speed Option 1 Option 2 Option 3 10 km t 13 km t 15 km t Braking distance 10 km h 13 km h 15 km h 2 0 meter 2 8 meter 3 5 meter Controller S 200 KW transaxle 0 7 kW Turning Circle radius 330 cm...

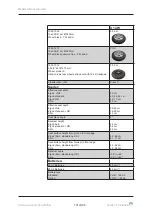
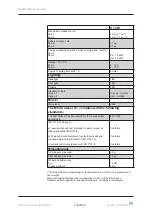
Page 101: ...o2 standard Ergo2 HD Eblo 35 cm 40 45 50 cm 60 70 cm 50 cm Effective seat depth Ergo2 child Ergo2 standard HD Eblo 20 43 cm 32 55 cm 43 cm Seat plane angle 3 Backrest height Ergo2 barn Ergo2 standard...

Page 102: ...s with the following standards The Mini Crosser has been tested for the requirements described in EN 12184 ISO 7176 15 Annex A a requirements and test methods for static impact an fatique strengths IS...

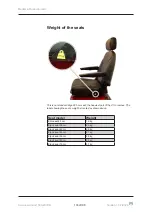
Page 103: ...ur standard Ergo2 45 cm seat the heaviest part of the X1 to remove The label showing the seat s weight is located as shown above Seat model Weight Eblo seat 45 cm 19 kg Ergo2 seat 35 cm 20 kg Ergo2 se...

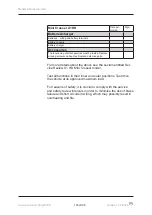
Page 104: ...4W Front suspension Front wheel mounts Controls control unit Lights blinkers emergency stop lights and horn Seals Gas regulation and control lever Max speed potentiometer Motor gears brake transaxle...

Page 105: ...ce missing screws and handles Replace defective parts For more details about the above see the section entitled Ser vice Review X1 HD Mini Crosser model Test all functions in their inner and outer pos...

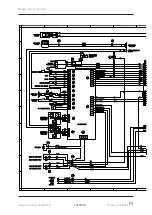
Page 106: ...0V V O ON N O OF FF F S SW WI IT TC CH H H HA AZ ZA AR RD D R RE EV VE ER RS SE E O OP PT TI IO ON N L LI IG GH HT T K KE EY YS SW WI IT TC CH H 5 5 4 4 3 3 2 2 1 1 R RE EV VE ER RS SE E S SW WI IT T...

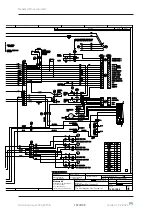
Page 107: ...5 1 17 7 1 1 2 2 4 4 3 3 1 16 6 5 5 1 10 00 0 A A B BR RA AK KE E R RE EL LE EA AS SE E 1 12 2 V V 1 12 2 V V 8 8 1 10 0 1 11 1 B BR RA AK KE E B BE E 4 4 0 0 X X2 2 4 4 3 3 7 7 6 6 5 5 4 4 3 3 2 2 1...

Page 108: ...medemagroup...

Reviews: