DMR160
User’s Guide
V2.0
14
Connecting the DMR160
Use this procedure when you first purchase the
DMR160
and when you are ready to install the hardware
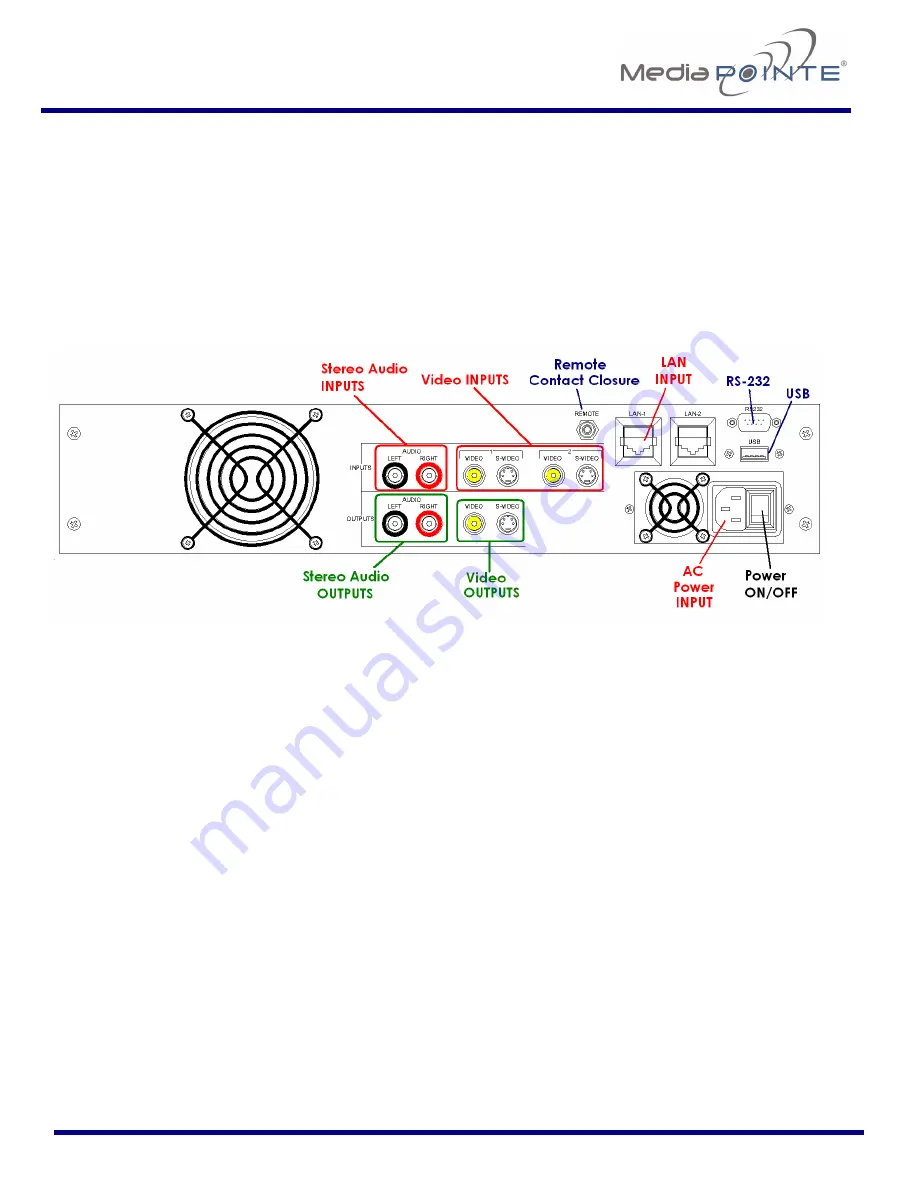
at your site. This section shows the back panel and explains how to connect the separate input
connections to the unit. For clarity purposes,
INPUTS
are shown in RED
,
OUTPUTS
are shown in GREEN
and
CONTROL
ports are shown in
BLUE
.
The Rear Panel
AC Power Input
– insert the included IEC cable to the AC power input plug. Make sure the Power on/off
switch is in the off position before plugging in the power cable.
Video Inputs
– Video inputs 1 and 2 on the
DMR160
can be set from the Web portal to be either
composite or S-video inputs.
Stereo Audio Input
– there are two, line level stereo audio inputs that use standard RCA connectors.
LAN Cable Input
– insert the included standard 10/100Mb CAT-5e LAN cable into the connector labeled
LAN1
on the
DMR160
. The connector labeled
LAN2
is reserved for future use.
The above listed cables are all that are necessary to archive and stream video. The remaining cables and
connectors not mentioned above are for alternate methods of control or for viewing the output of the
DMR160
locally; i.e. connecting a local monitor.


