Chapter 2 - Installation
Hardware Installation
10
Mediatrix 4400 – Digital Gateway
Hardware Installation
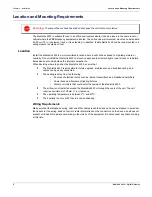
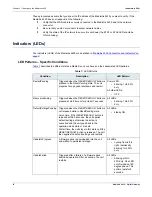
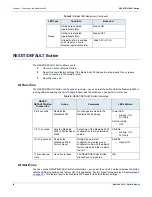
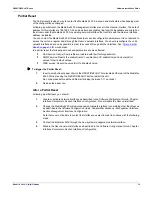
This section describes how to set the connectors of the Mediatrix 4400.
“Appendix B - Cabling Considerations” on page 27
for more details on the cables the Mediatrix 4400 uses.
Connecting Cables
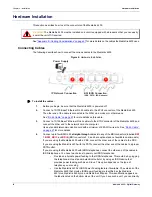
The following describes how to connect the various cables to the Mediatrix 4400.
Figure 6:
Hardware Installation
To install the cables:
1.
Before you begin, be sure that the Mediatrix 4400 is powered off.
2.
Connect a 10/100 BaseT Ethernet RJ-45 cable into the
ETH1
connector of the Mediatrix 4400.
The other end of the cable is connected to the WAN via a modem or other means.
for more details on this cable.
3.
Connect a 10/100 BaseT Ethernet RJ-45 cable into the
ETH2
connector of the Mediatrix 4400 and
connect the other end to the network card of a computer.
Use a standard telecommunication cord with a minimum of 26 AWG wire size. See
for more details.
4.
Connect up to four BRI RJ-45
straight-through
cables into any of the BRI connectors
(labelled
BRI
1
,
BRI 2
,
BRI 3
, and
BRI 4
)
(BRI connectors 2, 3, and 4 are optional and not available on all models).
If you are using the Mediatrix 4400 with a PBX, connect the other end of the cables to the PBX.
If you are using the Mediatrix 4400 with the PSTN, connect the other end of the cables to a proper
PSTN outlet.
If you are using the Mediatrix 4400 with ISDN telephones, connect the other end of the cables to
ISDN telephones. You have two choices to power your ISDN telephones.
•
Provide an alternate power feeding to the ISDN telephones. This could be by plugging
the telephones into a standard electrical outlet or by using an ISDN device that
provides power feeding such as an S-bus. This option depends on the type of
telephone you are using.
•
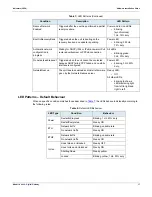
Use the Mediatrix 4400’s ISDN Power Feeding feature if available. The versions of the
Mediatrix 4400 that provide ISDN power feeding are identified as the Mediatrix
4401
plus
, Mediatrix 4402
plus
, and Mediatrix 4404
plus
. This identification appears on
the label located on the bottom side of the unit. If you have such a unit, you can directly
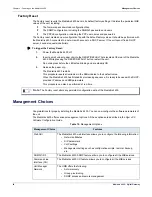
Caution:
The Mediatrix 4400 must be installed on a circuit equipped with a breaker so that you can easily
power the unit off if required.
ETH1
1
I
R
B
2
I
R
B
3
I
R
B
T
L
U
A
F
E
D
4
I
R
B
/
T
E
S
E
R
c
d
V
2
1
ETH2
Power Supply
IP Network Connection
BRI ISDN Connection
(PBX, PSTN, ISDN phones)
2
4
3
Summary of Contents for Mediatrix 4401
Page 6: ...Contents vi Mediatrix 4400 Digital Gateway ...
Page 22: ...Chapter 2 Installation Hardware Installation 12 Mediatrix 4400 Digital Gateway ...
Page 40: ...Appendix B Cabling Considerations RJ 45 Cable 30 Mediatrix 4400 Digital Gateway ...
Page 46: ...Appendix C Standard Hardware Information Warranty 36 Mediatrix 4400 Digital Gateway ...
Page 50: ...Appendix D Glossary Wide Area Network WAN 40 Mediatrix 4400 Digital Gateway ...
Page 52: ...Appendix E List of Acronyms 42 Mediatrix 4400 Digital Gateway ...


