background image

ASSEMBLY PROCEDURE


PART 2 - FOLDING

Remove the accessories and lower down the 
handle if necessary. Lift the crossbar locking 
mechanism to release belt on the mesh seat 
to release the crossbar lock. Fold the frame as 
shown on left (Figure 4). Push the two push 
handles together. Release the front and rear 
wheel folding mechanism knobs and rotate 
the rear wheel arms inward, replace folding 
mechanism knobs and attach hook and loop to 
rear legs.

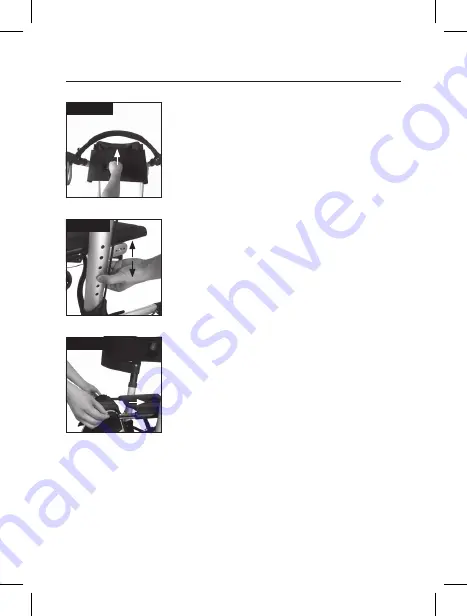
PART 3 

Adjusting the height level of the handles to fit 
different users. Press the buttons for handgrips 
and pull the handgrip upwards or downwards. 
As the handle moves, release the buttons. This 
automatically locks in the next possible height. 
Repeat this process until the desired height is 
reached. (Figure 5)

PART 4

Attach the bag to the hook of the seat frame. 
The Personal Item Bag can be easily detached 
when using. (Figure 6)

Figure 5

Figure 6

Figure 4

Summary of Contents for 002-703

Page 1: ...IONAL ADJUSTABLE WALKER Usage and Maintenance Instructions Instruction Manual N B This equipment must be installed by a competent person Do not exceed the weight limit stated doing so could put the us...

Page 2: ...se or combine bags and or baskets from other manufacturers When not in use simply fold the Walker and store The Walkers are designed to be used both inside and outside the home ASSEMBLY INSTRUCTIONS C...

Page 3: ...anism knobs Figure 1 5 Rotate the front wheel arms forward Figure 2 6 Insert and tighten front wheel folding mechanism knobs firmly ensuring proper alignment 7 Pull the two push handles apart 8 Open t...

Page 4: ...rear wheel arms inward replace folding mechanism knobs and attach hook and loop to rear legs PART 3 Adjusting the height level of the handles to fit different users Press the buttons for handgrips and...

Page 5: ...up the brake again you will hear a slight click as the park disengages BRAKE ADJUSTMENT Your Walker brake system will require periodic adjustment To adjust the brakes loosen Nut B and then screw unsc...

Page 6: ...on standard pavements or at home It should not be used on rough terrain or pot holed surfaces The use of your Walker on these surfaces can seriously compromise your safety and may damage your Walker...

Page 7: ...ul your warranty and may seriously compromise your safety 7 We suggest that you check your Walker visually every day We recommend that you should have your Walker serviced every three months or less i...

Page 8: ...perly please send your device to our repair center for evaluation If your product cannot be repaired or serviced we will reserve the right to change it for a similar or newer model Please note that a...

Reviews: