After Sales
23
Step 3
After the login procedure the Windows
®
desktop appears on your screen. This can be
adjusted so that the screen of your computer looks different, however basic operation is
guaranteed. You will find a brief overview on the following pages.
PLEASE NOTE!
Windows might update and configure data (e.g. by means of
new updates) in the first days after the initial installation. This
could lead to delays during shutting down and starting up the
notebook computer. Do not switch off the laptop/notebook
prematurely for this reason. This could have a negative effect on
the installation.
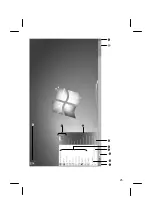
Short Description of the Windows
®
Desktop
Start Button
Clicking the Start button brings up a menu where you can access help, software
programs, files, and settings
All Programs
All of the software programs installed on your notebook are ordinarily listed here. Click
All
Programs
to reveal an extensive menu.
Taskbar
You can start programs and switch between already active programs using the taskbar
beneath the screen. You can place every program in the taskbar under Windows® 7, so
that you can always open it with a single click. Furthermore, you can rearrange the
symbols on the taskbar by clicking on them and dragging them to the desired position.
Move the cursor over the symbols, and the system will display a miniature of every file or
window open in the program. When you move your cursor over the miniature, the system
will display a full-screen preview of the particular window. If you move the cursor away
from the miniature, the full-screen preview will close.
Windows
Search
Windows Search
helps you find almost all data located on the notebook, quickly and
easily. With Windows® 7, you get search results with greater relevance, and they are easier
to understand.
Program Bar
The most commonly used software programs are listed here. The operating system
recognises all this automatically. Clicking on an entry with the right mouse key enables
you to decide which entry on the list to keep or to remove. The program linked to the
input is not erased.
Summary of Contents for Akoya P7815
Page 26: ...After Sales 25...
Page 89: ...88...


