background image


M

M

A

AIIN

N  

C

C

O

OM

MP

PO

ON

NE

EN

NT

TS

S


49 

W

IRELESS 

LAN


Wireless LAN is an optional feature. This function allows you to 

create a wireless network link with an access point or directly 
with another wireless-enabled PC. 

You can enable or disable the wireless LAN function by turning 
the Wireless switch to the ON or OFF position, refer to 

Ö

 p. 14

.   

Â


ATTENTION

: Make sure the Wireless LAN option 

is switched OFF in any environment where it 
might interfere with critical and sensitive devices, 

e.g., on aircraft, in hospitals and other medical 
centres, etc. 

C

ONDITIONS 


An access point is a wireless transmitter that communicates with 

your Notebook and controls access to the network connection 
(e.g., a home network or a broadband connection such as DSL).  
Wireless access points are often found in offices, airports, univer-
sities or Internet cafés. They offer access to networks or to the 

Internet. 

Access authorizations

 are normally needed. A fee may 

be required to use a public access point. To set up a wireless net-

work to share Internet access, files, and printers at home, you will 
need an access point, a router, and a broadband (DSL or cable) 

modem. Some access points can also serve as a router and/or a 
broadband modem. Check with your retailer or Internet Service 

Provider to find the best solution for your needs. A link to another 
computer with wireless LAN functionality can also be created 

without an access point

. This will allow you to share files, but 

you will need an access point and a router to share an Internet 
connection. 
The wireless network link works according to standard 

IEEE 

802.11g

 which is also compatible with the IEEE 802.11b stan-

dard. The standard 802.11a is not supported. If encrypted trans-
mission is used, this must operate according to the 

same princi-

ple on all devices

. Encryption is a method of protecting the net-

work from unauthorized access. The transmission speed (max. 54 

Mbps) can vary according to the 

distance

 and 

loading

 of the 

partner. 

Summary of Contents for Akoya XL

Page 1: ...help functions As a general rule you can access help functions by pressing F1 on the keyboard These help functions are available to you when you use the Microsoft Windows operating system or the various application programs Windowsxp invites you to a tour notes on the task bar to famil iarize yourself with the operating system We listed further useful sources of information starting on page 54 AUD...

Page 2: ... free to contact a customer service representative with any questions relating to this Notebook Copyright 2005 Medion All rights reserved Microsoft MS DOS and Windows are registered trademarks of Microsoft Corporation in the U S and other countries Pentium is a registered trademark of Intel Corporation The names of actual companies and products mentioned herein may be the trademarks of their respe...

Page 3: ...HE NOTEBOOK 13 Open Notebook 13 Front and Rear View 14 Side Views 15 Device Indicators 16 Wireless LAN 16 Suspend Sleep Mode 16 Battery 16 Hard Drive Optical Drive Access Indicator 16 Num Lock 16 Capital Lock 16 Scroll Lock 16 GETTING STARTED 19 The Windows XP Desktop 21 POWER SUPPLY 23 On Off button 23 Power Adapter 24 Battery Operation 25 Inserting the Battery 25 Removing the battery 25 Charging...

Page 4: ...ion of a blocked Disc 41 Playing Music CDs 42 Playing DVD Movies 42 Writing Discs 42 THE SOUND CARD 44 External Audio Ports 44 MODEM 45 Modem port 45 THE NETWORK 46 What is a network 46 Fast Ethernet Network 46 What do you need for networking 47 Troubleshooting within the Network 48 Wireless LAN 49 Conditions 49 THE PC CARD SLOT 50 Use of PC cards 50 Installing a PC card 51 Removing a PC card 51 C...

Page 5: ...s Update Information for Data Security 65 SYSTEM RECOVERY 66 Restoring Microsoft Windows XP 66 System Restore 67 Limits of Restore Factory Settings Restore option 3 68 Performing the Restore 69 TROUBLESHOOTING 70 Localize the Cause 70 Check Cables and Connections 70 The Power On Self Test POST 70 Errors And Possible Causes 71 Additional Support 72 Driver Support 72 MAINTENANCE 73 Maintenance Instr...

Page 6: ...vi Electromagnetic Compatibility 79 Electrical Safety 80 Ergonomics 80 Noise Emission 80 FCC Compliance Statement 81 Macrovision Statement 82 Declaration of Conformity 82 WARRANTY 84 INDEX 87 ...

Page 7: ...vii ...

Page 8: ......

Page 9: ... A AN ND D M MA AI IN NT TE EN NA AN NC CE E C Ch ha ap pt te er r 1 1 Safety and Maintenance Subject Page Data Security 3 Set up Location 7 Ambient Temperature 7 Power Adapter 8 Modem 9 Touch Pad 9 Battery Operation 10 ...

Page 10: ...S SA AF FE ET TY Y A AN ND D M MA AI IN NT TE EN NA AN NC CE E 2 ...

Page 11: ...penings of the Notebook This may lead to electric shock electrical short circuit or fire that will damage your Notebook DO NOT cover the slots and openings of the Notebook These openings are for ventilation purposes Covering these vents may lead to overheating This Notebook is NOT designed for use within indus trial environments DATA SECURITY The supplier does not assume liability for data loss or...

Page 12: ...r cord from the socket contact Customer Service 1 866 633 4660 do not restart unless you have contacted Customer Service How important is the information you will be storing on your Notebook You need to guard against the loss of your data by making backup copies You can backup your data onto CD or DVD which is dependent on the optical drive configuration of your Notebook and the quantity of data I...

Page 13: ... near a swimming pool Avoid using a telephone modem other than a cordless type during an electrical storm There is a remote risk of electric shock from lightning Do not use the telephone modem to report a gas leak in the vicinity of the leak Lithium batteries cannot handle intense pressure high temperatures or fire Danger of explosion if replaced incorrectly Replace batteries with a com patible ty...

Page 14: ...e laser even when wearing eye protection TFT DISPLAY SAFETY To avoid damage to the TFT Display never open it a full 180º Do not forcibly open it In order to avoid damage to the display do not touch it with your fingers or sharp objects Never lift the Notebook by the TFT Display doing so could break the hinges There is a risk of injury if the TFT display breaks Use protective gloves to pack up the ...

Page 15: ...alanced and vibration free surface Do not leave the base of your Notebook on your lap or any part of your body for a long period of time while the Notebook is turned ON or is charging The Notebook can become very warm while it is turned on or charging and can cause discomfort or injury from heat exposure AMBIENT TEMPERATURE Notebook operation is most reliable at an ambient temperature between 41 a...

Page 16: ...0V65W LISHIN0335A2065 1A325 operating at AC 115V 60 Hz In European countries use the Notebook at AC 220 240V 50 Hz For details on power consumption please refer to the rating plate on the rear of your Notebook If you are unsure of the type of power supply available at the point of use ask your local power company If travelling ensure that use the proper power cord or adapter for the area Contact C...

Page 17: ...DEM If your system has a modem please make sure you connect it to an analog telephone line only Connecting to a digital PBX a digital line designed for broadband services or ISDN a shared service line or a payphone will damage the modem or the devices to which it is connected TOUCH PAD Light pressure with the tip of your finger is all that is required to operate the touch pad Because the touch pad...

Page 18: ... before recharging it Replace the battery only with the same type or an equivalent type recommended by the manufacturer Charge the battery only until the battery charging light goes out Also refer to the instructions under Checking the Battery Level on page 27 for instructions on checking the battery level Only change the battery when the unit is switched off Batteries are classified as special wa...

Page 19: ...V VI IE EW WS S O OF F T TH HE E N NO OT TE EB BO OO OK K C Ch ha ap pt te er r 2 2 Views of the Notebook Subject Page Open Notebook 13 Front And Rear View 14 Side Views 14 Device Indicators 16 ...

Page 20: ...V VI IE EW WS S O OF F T TH HE E N NO OT TE EB BO OO OK K 12 ...

Page 21: ... E N NO OT TE EB BO OO OK K OPEN NOTEBOOK 1 2 3 11 10 9 8 4 4 5 6 7 1 Display latch 2 Microphone 3 TFT display Ö p 29 4 Stereo speakers 5 Keyboard Ö p 32 6 Touch pad and keys Ö p 33 7 Device indicators Ö p 16 8 Power ON OFF Ö p 23 9 Silent mode button 10 Internet quick key 11 E Mail quick key ...

Page 22: ...WS S O OF F T TH HE E N NO OT TE EB BO OO OK K 14 FRONT AND REAR VIEW 1 2 3 4 5 1 External monitor VGA Ö p 29 2 Battery pack 3 Kensington port safety lock port Ö p 75 4 4 in 1 card reader 5 Wireless ON OFF switch ...

Page 23: ... 11 1 LAN port RJ 45 Ö p 46 2 Modem port RJ 11 Ö p 45 USB port Ö p 52 3 Optical Drive Ö p 39 4 PC card slot PCMCIA type II Ö p 50 5 Microphone in Ö p 44 6 Audio in Ö p 44 7 SPDIF out port 8 Ventilation grill 9 IEEE 1394 FireWire Ö p 53 10 USB port Ö p 52 11 Power socket Ö p 23 12 TV S Video port ...

Page 24: ...y is low Constant GREEN BLUE Battery is full OFF No Color Battery is not installed 4 HARD DRIVE OPTICAL DRIVE ACCESS INDICATOR This LED lights when the Notebook is accessing the hard drive or optical 5 NUM LOCK This LED lights when NUM Lock has been activated It sets the keyboard so that numbers are assigned to certain characters simplifying numerical data input 6 CAPITAL LOCK This LED lights when...

Page 25: ...te er r 3 3 Handling Subject Page Getting Started 19 On Off Button 23 Power Adapter 24 Battery Operation 25 Power Management 28 Opening and Closing the Display 29 Screen Resolution 29 Connecting an External Monitor 29 Keyboard 32 Touchpad 33 ...

Page 26: ...H HA AN ND DL LI IN NG G 18 ...

Page 27: ...hat is stored on it The software will prompt you to do this when necessary Step 1 Before starting the Notebook please insert the battery For further information read the section titled Power Supply starting on page 23 Open the display see page 29 and switch on the Note book using the On Off switch see page 13 If the battery level is insufficient connect the power adapter Note Make sure there is no...

Page 28: ...inue button you progress to the next window License Agreement The greeting procedure also displays the license agreement Please read this carefully It contains important legal informa tion on the use of your software In order to see the full text use the mouse and the scroll bar on the right side of the screen to move downwards until you have reached the end of the document You accept the agreemen...

Page 29: ...king the Start button brings up a menu where you can access help software programs files and settings For more information click Windows XP Tour on the Start menu 1 Program Bar The most commonly used software programs are listed here 2 All Programs All of the software programs installed on your Notebook are ordinarily listed here Click All Programs to reveal an ex tensive menu 7 9 10 8 2 1 3 5 4 6...

Page 30: ... about Win dows XP and which programs are running 6 Desktop Icons Desktop icons link to their respective programs To start a program double click its desktop icon 7 Logged in User This tells you which user is logged in to your Notebook 8 Control Panel You can use the icons in Control Panel to change the ap pearance and functionality of Windows XP These icons represent options for configuring your ...

Page 31: ...eld down for longer than 4 seconds it will force the Notebook to power down without going through the operating system shut down process This may be useful if your computer has crashed or stalled WARNING Do not switch off your Notebook while the hard disk or the optical drive is running and the corre sponding media activity LEDs are lit Otherwise data may be lost To protect the hard disk you shoul...

Page 32: ...he power adapter is connected to the side of the Notebook The adapter provides the Notebook with power and also charges the battery The power supply indicators of the Notebook see page 13 provide details on the operating state The battery is also being charged when you are working on your Notebook with the power adapter The power adapter is still live if the Notebook is not connected with it You s...

Page 33: ... 10 are followed INSERTING THE BATTERY 1 Slide the battery until it clicks into place and automatically locks REMOVING THE BATTERY 1 Slide the battery latch to the left to release 2 Pull and remove the battery when the battery latch is in a released position 1 2 WARNING Do not remove the battery while the Notebook is running on battery power This in creases the possibility of losing data ...

Page 34: ...on without using any application and no power adapter As soon as the battery is empty your Notebook will enter the sleep mode We recommend doing this procedure every time you think the battery power is losing efficiency BATTERY POWER A fully charged Li Ion battery will provide power for some hours of operation However the battery life will vary according to how the power saving functions are set t...

Page 35: ...symbol superimposed over it Further information on power settings can be obtained by double clicking on the sym bol NOTE If you ignore the warning signal when the battery level is low your Notebook goes into suspend mode Depending on the BIOS OS setting this will be Save to Disk or Save to RAM WARNING If the battery is empty your data will not be retained for long in Standby Save to RAM mode WARNI...

Page 36: ... into and come out of standby mode but uses more power than suspend sleep mode SUSPEND SLEEP MODE The sleep mode is an alternative to a complete shutdown of the Notebook In this mode all data from RAM system and graphic data are copied to the hard disk as a file As soon as the data has been safely saved the Notebook powers down When the Notebook is switched on again this file is written back to RA...

Page 37: ...Even slight pressure may break or dam age the TFT display SCREEN RESOLUTION The integral screen has a native resolution of 1280 x 800 pix els Using a higher resolution can lead to distortion of the dis play especially with text Using a lower resolution may cause the display to use only a portion of the screen area CONNECTING AN EXTERNAL MONITOR The Notebook has a port for connecting an external mo...

Page 38: ...y will be switched off Adjust the display settings following the external monitor specifica tion Press Fn F4 once more and both displays are switched on Press Fn F4 again to deactivate the external monitor The Notebook display will be switched on 2 Extend your Desktop This option extends the picture from your internal monitor to your external monitor Windows can be switched from one monitor to the...

Page 39: ...lay n Check the option extend my Windows desktop onto this monitor o and press ok To deactivate the extension uncheck the option ex tend my Windows desktop onto this monitor You can change the resolution and color depth for either display in this screen However you may have to decrease the depth of color if you increase the resolution since the video memory has a limited capacity n o ...

Page 40: ...3 Turns ON OFF the audio battery warning beeping signal Fn F4 Toggles the display screen between internal moni tor external monitor and simultaneous display Fn F5 Increases the volume Fn F6 Decreases the volume Fn F7 Increases screen brightness Fn F8 Decreases screen brightness Fn NumLock Enables the embedded numeric keypad The num bers are printed in the upper right corner of a key in a color dif...

Page 41: ...ball point pen or other object on the touch pad as this could damage or cause a malfunction of your touch pad Below the touch pad are the left and right mouse buttons which can be used as on a normal mouse You can also perform a di rect click or double click using the touch pad by tapping the surface briefly once or twice In the Windows Control Panel you will find a number of useful settings that ...

Page 42: ...H HA AN ND DL LI IN NG G 34 ...

Page 43: ...I IN N C CO OM MP PO ON NE EN NT TS S C Ch ha ap pt te er r 4 4 Main Components Subject Page Hard Drive 37 Optical Drive 39 Sound Card 44 Modem 45 Network 46 PC Card Slot 50 Connection Options 52 Software 55 ...

Page 44: ...M MA AI IN N C CO OM MP PO ON NE EN NT TS S 36 ...

Page 45: ...ome of the space on your hard drive is already taken Whenever the computer is accessing the hard disk the corre sponding LED illuminates see page 16 WARNING Never switch off the computer while the busy indicator is lit since this may result in loss of data If you are looking for a file on the hard drive and you know the name go to Search on the Start menu to find the file Following is some general...

Page 46: ...rd disk drive partition for your Note book It is where your program files settings and docu ments are stored as well as files necessary for running Windows XP C Program Files Includes files belonging to software pro grams C Windows The main directory for Windows XP C Documents and Settings Includes the settings and documents for all users D Includes files for restoring hardware components and soft...

Page 47: ...uration dependent If the opti cal drive in your Notebook is a Super Drive it is ca pable of reading writing and rewriting to CD and DVD The instructions in this section that pertain to writing to CD will also apply to writing to a DVD HANDLING DISCS To maintain the life of CD and DVD discs observe these guide lines Avoid radiation by direct sunlight UVA UVB Avoid scratches and damage to the disc s...

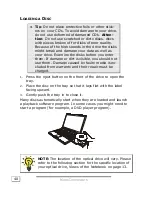
Page 48: ... dirt is visible you should not use them Damage caused by faulty media is ex cluded from warranty and their repair must be charged 1 Press the eject button on the front of the drive to open the tray 2 Place the disc on the tray so that it lays flat with the label facing upward 3 Gently push the tray in to close it Many discs automatically start when they are loaded and launch a playback software p...

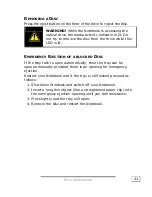
Page 49: ...t EMERGENCY EJECTION OF A BLOCKED DISC If the tray fails to open automatically then the tray can be opened manually provided there is an opening for emergency ejection Restart your Notebook and if the tray is still locked proceed as follows 1 Shut down Windows and switch off your Notebook 2 Insert a long thin object like a straightened paper clip into the emergency ejection opening until you feel ...

Page 50: ... increase Notebook performance you may also wish to purchase a plug in MPEG2 decoder card which has its own decompression processor and will thus free the Notebook s processor NOTE The decoding software included with your Note book may be changed for regional DVD decoding up to five times after which the drive will only play DVD movies for the region setting last entered WRITING DISCS You can use ...

Page 51: ...tions Under Tasks on the Gen eral tab select Show common tasks in folders 3 In the Copy Items dialog box click the CD RW and then click Copy 4 Double click My Computer then the CD RW Windows dis plays a temporary area where the files are held before they are copied to the CD Verify that the files and folders that you intend to copy to the CD appear under Files Ready to be written to the CD 5 Under...

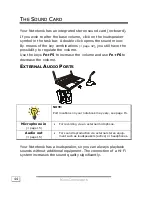
Page 52: ...ility to regulate the volume Use the keys Fn F5 to increase the volume and use Fn F6 to decrease the volume EXTERNAL AUDIO PORTS NOTE Port locations on your notebook may vary see page 15 Microphone in Ö page 15 For recording via an external microphone Audio out Ö page 15 For sound reproduction via external stereo equip ment such as loudspeakers active or headphones Your Notebook has a loudspeaker ...

Page 53: ...the voltage levels of digital telephone systems such PBX or lines such as ISDN or Broadband services MODEM PORT Insert one end of the RJ11 connection telephone plug connec tor into the modem network interface and the other into an analogue telephone socket that is easily accessible NOTE Do not place the Notebook in Suspend or Sleep mode if you are connected to your Internet provider since this wil...

Page 54: ...in a network and save their data on a central server Users can share one modem among computers for Internet access Two or more computers can be connected to play network games or share data FAST ETHERNET NETWORK Your PC has a Fast Ethernet Network connection You can use this to connect to a network Connect one end to the RJ45 connection Western plug at the network interface of your Notebook Ö p 15...

Page 55: ...dard 2 The network cards must be connected You need a Shielded Twisted Pair cable CAT5 that has an RJ 45 connector If you want to directly connect two PCs you need a Cross Link ca ble If more PCs must be connected you need a supplementary dis tributor Hub or Switch and a Patch cable 3 All connected PCs need a network operating system Win dows can act as a network operating system 4 All networked P...

Page 56: ...ferent speed e g 10 instead 100 Mbit and your network computer is unable to recognize this If necessary set the network driver to the compati ble speed If two PCs should be linked you require a cross link cable otherwise use a patch cable In addition check the protocols and the configu ration The data transmission is incorrect or very slow What might be the problem Maybe you have the wrong cable U...

Page 57: ...nternet Access authorizations are normally needed A fee may be required to use a public access point To set up a wireless net work to share Internet access files and printers at home you will need an access point a router and a broadband DSL or cable modem Some access points can also serve as a router and or a broadband modem Check with your retailer or Internet Service Provider to find the best s...

Page 58: ...for data storage If you use such cards with your Notebook the system assigns the card a drive name so that you may access the re sources The PC card drive in your Notebook supports PCMCIA Type II and CardBus Type I cards USE OF PC CARDS In order to run a PC card special software is needed drivers etc The card manufacturer usually supplies this software Support for the card port is a component of W...

Page 59: ...used When the card is fully inserted two audible signals will be heard provided it has been correctly recognized and success fully configured If only one signal is heard this signifies a problem with the card recognition In this case follow the instructions that accompany your new PC card REMOVING A PC CARD To remove your PC card 1 Press the eject button next to the slot  Attention The Eject Butt...

Page 60: ...pheral de vices to your PC You can use any USB device with any USB port 2 USB ports are located on the back panel of the Note book and 1 USB port on the front side of the Notebook for your convenience Some USB devices require that you reinstall soft ware drivers when you connect the device to a different USB port than the one originally used This can be avoided by al ways using the device with the...

Page 61: ...NE EN NT TS S 53 IEEE 1394 FIREWIRE IEEE 1394 optional feature also known as iLink or Fire Wire ports provide an easy and high performance way of connecting high speed storage imaging and many new types of audio video devices easily ...

Page 62: ...n It can be found with the CDs in the accessory box that came with your PC WINDOWS XP TOUR Windows XP includes a tour that you can take to familiarize your self with the operating system This tour can usually be found by clicking on the Start menu You can also find the tour by selecting All Programs then Accessories MICROSOFT INTERACTIVE TRAINING Training is the most powerful way to acquire skills...

Page 63: ...ation information refer to the documentation that came with the software program Here is a typical installa tion procedure 1 Load the software program installation disc in the combo drive 2 Most installer programs start automatically after a few moments If the installer program does not start automatically you can manually start it by double clicking My Computer and then double clicking the drive ...

Page 64: ...install your software To set file signature verification options for Windows XP 1 Click Start then Control Panel Double click System 2 On the Hardware tab select Driver Signing 3 Under File Signature Verification select one of the following Ignore allows all device drivers and software to be installed on this PC re gardless of whether they have a digital signature Warn displays a warning message w...

Page 65: ...roduct ID How ever activation needs your unique Product ID that can be found on the Certificate of Authenticity sticker on your Notebook housing When you call please inform the agent that you are running an OEM SLP version of the software THE BIOS SET UP PROGRAM In BIOS setup Basic Configuration there are a number of con figurable parameter settings available for your Notebook For example you can ...

Page 66: ...ress Enter While in a menu follow these instructions Press the cursor up down keys to move between parameters Press the cursor left right keys to change the value of a pa rameter Press Esc while you are in any of the menus to return to the main menu Note If you are unsure if your parameter settings are correct you should load the Set up Defaults ...

Page 67: ...F FI IR RS ST T A AI ID D C Ch ha ap pt te er r 5 5 First Aid Subject Page FAQ 61 Data and System Security 63 System Recovery 66 Troubleshooting 70 Maintenance 73 ...

Page 68: ...F FI IR RS ST T A AI ID D 60 ...

Page 69: ...u install the software to another computer What is the Windows activation Your operating instructions include a chapter about this subject How do I perform a data backup Use the program Backup for this It is important that you follow the operating instruc tions of these programs Make a backup and another backup of selected data to an external medium CD R CD RW DVD R DVD RW SD card etc to familiari...

Page 70: ...s the last resort Read chapter System recovery on page 66 con cerning the possible alternatives Why is the boot partition missing when booting from the support application CD The first partition is formatted with the file system NTFS Compared to FAT32 this file system offers more security and a more efficient access However NTFS partitions can only be read from operating sys tems supporting this T...

Page 71: ...art menu You should make a backup disk with all your passwords and the operating system s original configuration MAINTENANCE PROGRAMS You can avoid some hardware and software errors with disk maintenance programs such as Disk Defragmenter and Disk Cleanup The program System Information can also be help ful since it gives you detailed information about your system configuration You will find these ...

Page 72: ...operating system programs or hardware compo nents will be classified as an important update and automati cally selected for installation for you Important updates will be provided to remove known problems and to protect the Notebook against known security risks Carry out four simple steps to download the updates needed and to keep your computer on the current status of technology 1 Open Windows Up...

Page 73: ...net Explorer Version numbers of additional software programs Plug Play identification key of the hardware devices Windows Update will stand up for the protection of your private data and will not record your name address email address or other forms of personal data The information collected will only be used during the time that you are visiting the website It will also not be stored  The update...

Page 74: ...Support Disc including the ability to restore you entire system to its original factory settings RESTORING MICROSOFT WINDOWS XP Windows XP System Restore allows you to set recovery points This feature enables you to take a snapshot of the cur rent system configuration which you can return to should an application device or driver cause instability in the system While Windows XP automatically creat...

Page 75: ...ys tem Restore did not solve the problem then you should use the Application Support Disc provided by Medion to restore your system This recovery mode provides several options There are three options for restoring your system 1 Recovery of start up files Use this option to restore the start up files This option is most useful when a virus has corrupted certain files necessary for your computer to ...

Page 76: ...omputer will be erased and will need to be reinstalled Everything on the C Local Disk partition will be erased This includes all of your documents and settings Tampering with the Recover E hard disk drive or its contents will make it more difficult to restore your Notebook Do not alter resize or delete the Recover E hard disk drive Also do not alter or delete the files on the Recover E hard disk d...

Page 77: ...ication Support disc and restart reboot the Notebook Caution Do not use the Medion Product Recovery CD ROM a Windows XP CD for restoring Windows XP itself for restoration purposes This disc does not restore the original factory setup of the Notebook 3 Select the option Boot from CD ROM from the first screen 4 Use the arrow keys to read through the license agreement and then press the Esc key to pr...

Page 78: ...ged up If you are operating the Notebook with the power adapter check the electrical socket power cord and all switches in the circuit of the electrical socket Switch off the Notebook and check all cable connections Check the connections to peripherals Do not exchange ca bles even though they may look similar The polarity in the cables may be different When it is confirmed that the Note book has p...

Page 79: ...an operating system on that floppy Remove the disk and press any key No data can be accessed from the optical Drive Check whether the CD is inserted correctly Is the CD ROM displayed in Windows Explorer If so test another CD The Printer does not work Check the printer cable Do a Printer Self Test Should several pieces of equipment be operating from the same port check all peripherals and reinstall...

Page 80: ...he problem If you have been given a customer number previously please have this available DRIVER SUPPORT This Notebook has been extensively tested in our laboratories with a large number of compatible devices It fulfils all required stan dards and complies with the standard Designed for Windows which certifies utmost compatibility However the software drivers for individual components are updated ...

Page 81: ...NOT use CD ROM cleaning disks or similar products that clean the lens of the laser to clean your CD ROM CD RW DVD DVD RW drive Before cleaning always remove the power adapter plug and all connecting cables Only use a damp lint free cloth to clean the Notebook CARE OF THE TFT DISPLAY Always close the Notebook when not in use Avoid touching or scratching the surface of the screen as it is easily dam...

Page 82: ...Fully charge your battery and any spare batteries immedi ately before a long journey Should you need to ship your Notebook always use the original packaging and make certain the shipper knows the contents contain fragile electronic equipment Wait until the Notebook has reached ambient room tem perature before turning it on or connecting it to the power adapter Drastic variations in temperature and...

Page 83: ...have the possibility to cancel it In this case please call your service centre To protect your data from unauthorized access you can also use the security option of Windowsxp See also chapter Data and System Security p 63 USING A SAFETY LOCK You can prevent theft by using a so called Kensington lock which can be bought at your local retailer The cable wraps around an object and the T shaped end in...

Page 84: ...ire Keep away from children Danger of explosion if replaced incorrectly Only replace with a compatible type CR2032 as rec ommended by the manufacturer Lithium Batteries are hazardous waste and need to be disposed of properly If necessary we will take back your used CMOS lithium battery Notes on Laser Radiation Laser devices of Laser Class 1 to Laser Class 3b may be used in the Notebook Where the N...

Page 85: ...A AP PP PE EN ND DI IX X 77 C Ch ha ap pt te er r 6 6 Appendix Subject Page Standards 79 Warranty 84 Index 87 ...

Page 86: ...A AP PP PE EN ND DI IX X 78 ...

Page 87: ...ase EN 61000 3 3 Limits Limitation of voltage fluctuations and flicker in low voltage supply systems for equipment with a rated current up to 16 A Keep the Notebook at least one meter approximately three feet away from high frequency and magnetic interference sources e g televisions loudspeaker cabinets mobile tele phones etc in order to avoid malfunctions and or loss of data Please note that only...

Page 88: ...office work with visual dis play terminals VDTs Visual display requirements EN ISO 9241 8 Ergonomic requirements for office work with visual dis play terminals VDTs Requirements for displayed col ors NOISE EMISSION ISO 7779 ISO 9296 Acoustics Measurement of airborne noise emitted by information technology and telecommunica tions equipment This PC fulfills the requirements of noise emissions accord...

Page 89: ... user is encouraged to try to correct the interference by one or more of the following measures Reorient or relocate the receiving antenna Increase the separation between the equipment and receiver Connect the equipment into an outlet on a circuit differ ent from that to which the receiver is connected Consult the dealer or an experienced technician for help Changes or modifications not expressly ...

Page 90: ...Parts 2 and 15 for Class B Personal Com puters We Medion USA Inc Located at 1001 Bayhill Dr Ste 155 San Bruno CA 94066 Fax 650 875 1106 for conformity is sues only Declare under sole responsibility that the product identified herein complies with 47CFR Parts 2 and 15 of the FCC rules as a Class B digital device Each product marketed is identical to the representative unit tested and found to be co...

Page 91: ...its radioelectriques depassant les limites applicables aux appareils numeriques de Classe B prescrites dans le reglement sur le brouillage radioelectrique edicte par le Ministere des Communications du Canada Trade Name Medion Type or Model Number MD95393 UIM2010 Party Responsible MEDION USA Inc Executed on 21st of April 2005 at San Bruno Copyrights Microsoft Windows Windows Media and the Windows l...

Page 92: ...ance cali bration or site preparation e defects resulting from any misuse abuse acci dent neglect negligence or any use other than in accordance with the handling or operating instructions provided by MEDION f defects resulting from expo sure to unusual physical or electrical stress or from any operation other than in accordance with the published environmental specifications for the product TO TH...

Page 93: ... Please note the following Be sure to keep your purchase receipt in a safe place MEDION at its option may require a copy of the receipt to validate the warranty period effective date i e date of purchase Warranty liability only applies to material or factory faults It does not apply to damage due to breakage for example a crack in the housing Our service includes unit exchange or send in repair Un...

Page 94: ...e network LAN port is working properly No network connec tivity issues are supported Making Copies of This Manual This manual contains information protected by law All rights are reserved Copyright law prohibits duplicating this information in mechanical electronic or any other form without the written approval by the manufacturer ...

Page 95: ...ery level 27 Cleaning agents 73 Cleaning and Care 73 Click 32 Clone desktop 30 Connection options 52 Connectors External monitor 29 Modem 45 PC card 50 USB 52 Control panel 22 Copyright ii D Data and system security 63 Data entry 32 Data security 3 63 Deleting files 38 Desktop 21 Digital Signatures 56 Directories 38 Disc Drive 39 Discs Handling 39 Loading 40 Playing DVD movies 42 Playing music CDs...

Page 96: ...ns 37 HD See Hard drive help 54 Help with software 55 I Icons 22 IEEE 1394 15 53 Indicators Capital Lock 16 Hard disk drive access 16 Num Lock 16 Scroll Lock 16 Information about your PC 22 Inserting the battery 25 Installing a PC card 51 K Kensington lock 75 Keyboard 32 L Laser radiation 76 License agreement 20 M Main components 35 Main Operation 24 Maintenance 73 Care of the TFT display 73 Clean...

Page 97: ... Main Operation 24 PowerDVD 42 Program bar 21 Programs Installing 67 Location 38 Q Quality ii R Recovery 66 Factory settings 67 Windowsxp 66 recovery points 66 Removing a PC card 51 Repairs 74 Restoring 66 Limits 68 Running the Bios Setup 57 S Safety Data 38 Safety and maintenance 1 Safety instructions 3 Additional safety instructions 5 Ambient temperature 7 Battery operation 10 Cabling 9 Data sec...

Page 98: ...and repairs 74 Use of PC cards 50 Using a safety lock 75 V Views Battery charge indicator 13 Device indicators 13 IEEE 1394 15 Infrared Port 14 Keyboard 13 LAN Port RJ 45 15 Line out 14 Microphone 13 Microphone in 14 Modem Port RJ 11 15 Monitor external 14 Open notebook 14 PC card slot PCMCIA 15 Power ON OFF 13 Stereo speaker 13 TFT Display 13 Touchpad 13 USB port 15 Views of the notebook 11 Voyan...

Reviews: