background image

BASIC FUNCTIONS

33

P

Plla

ay

yiin

ng

g  a

an

n  a

au

ud

diio

o  C

CD

D

With  the  Disc  tray  OPEN,  place  a  music  CD  onto  the  tray
with the label facing uppermost.
Press  EJECT  to  close  the  tray.  There  will  be  a  short  delay
while  the  DVD  Player  identifies  the  disc.  PLAY will  appear
briefly  on  the  screen  and  the  CD  will  automatically  begin
playing from the first track.The current track number and the
number of tracks will be displayed on the screen.

While the DVD Player is playing a music CD there are
several functions you can use.

•  P

PL

LA

AY

Y

Press this button to start play.

•  S

ST

TO

OP

P

Press this button to stop play. To start the disc
play from the beginning, press PLAY.

•  P

PA

AU

US

SE

E This function stops play, to start play again

press the PAUSE button again or PLAY.

•  F

FA

AS

ST

T  F

FO

OR

RW

WA

AR

RD

D  A

AN

ND

D  B

BA

AC

CK

KW

WA

AR

RD

D

Press  these  buttons  to  search  forward  or  backwards.  There
are  four  speeds  and  each  press  of  the  button  increases  the
speed  as  shown  by  the  number  next  to  the  icon  on  the
screen.  This  function  is  useful  when  you  are  searching  a
small area of play. Press PLAY to resume normal playback.

•  S

SK

KIIP

P  F

FO

OR

RW

WA

AR

RD

D  A

AN

ND

D  B

BA

AC

CK

KW

WA

AR

RD

D

Press these buttons to skip to the start of the next track or the
start of the previous track.

•  M

MU

UT

TE

E Press  the  MUTE  button  to  silence  the  play,  press

again to restore the sound.

•  N

NU

UM

MB

BE

ER

R

The number buttons on the remote control panel allow you
to  select  a  track  directly.  Input  the  track  number  and  press
PLAY to start play.

•  D

DIIS

SP

PL

LA

AY

Y

Press DISPLAY on the Remote Control repeatedly during play

to  show  the  remaining  and  elapsed  single  and  total  time

information on the current CD.

P

Plla

ay

yiin

ng

g  a

a  M

MP

P3

3  d

diissc

c

Once  the  MP3  disc  is  inserted  there  will  be  a  short  delay

while the DVD Player identifies the disc.

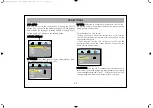
A disc  menu  containing  all  the  folders  on  the  disc  will  be

displayed  on  the  screen.  Press  the  PM  button  to  change

between play list, folder and file list views. File list displays

all the files on the disc without the folder divisions.
Use  the  DVD  arrow  keys  to  navigate  between  tracks  and
press the ENTER button to begin playback.

F

FA

AS

ST

T::  You can search through an MP3 track    

with the speed search buttons in either 
direction. Each subsequent press will change
the speed at which the track is searched. The 

choices are 2x, 4x, 8x, 16x and 32x. To return 

to normal speed playback, press the “ENTER”button

065001057390 20" LCD LOCDVT ING  8/9/06  11:41  Page 33

Summary of Contents for MD 30021

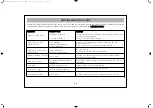
Page 1: ...065 001 057 390 INSTRUCTION MANUAL MD 30021 20 LCD DVD TV 065001057390 20 LCD LOCDVT ING 8 9 06 11 41 Page 1 ...

Page 2: ... FUNCTIONS MENUS 15 VOLUME ADJUSTMENT MENU EQUALIZER HEADPHONE 15 PICTURE SETTINGS MENU PROGRAM TABLE 16 SETTINGS MENU 17 PROGRAM SETTINGS 18 EXTERNAL DEVICE MODES 21 TELETEXT 22 DVD PLAYER 24 REMOTE CONTROL DVD FUNCTIONS 25 PLAYING DVD s 26 DVD SETTINGS 27 BASIC FUNCTIONS 31 PICTURE PLAYBACK 34 DIVX PLAYBACK 35 TROUBLESHOOTING 36 TECHNICAL SPECIFICATIONS 38 CONTENTS 065001057390 20 LCD LOCDVT ING...

Page 3: ...D Player You can adjust all commands related to video and audio by means of the on screen menus On Screen Display You can save up to 100 channels in the VHF UHF and S bands Thanks to the automatic channel search you can find the required channel easily save and name it ATS The falling asleep mechanism makes the automatic switching of the equipment off for you possible after a preselectable time in...

Page 4: ...spects of infrared remote control battery disposal Please dispose of depleted batteries responsibly and ensure you follow the battery manufacturers disposal instructions V VE EN NT TI IL LA AT TI IO ON N The slots and openings on the TV are for ventilation Please ensure that there is enough space to allow for adequate ventilation around the TV at least 10cm Do not block or cover these holes as ove...

Page 5: ...n 9 9 Headphone in AV in S Video in B BA AC CK K 1 10 0 Aerial in 1 11 1 Scart in Using this entry you can connect to your TV such devices as computer decoder and VCR 1 12 2 Component Audio in L R 1 13 3 Component YPbPr input 1 14 4 PC input 1 15 5 PC Audio in 1 16 6 DC 12V in DC 12V EURO AV Y PC INPUT PC AUDIO IN R L AUDIO IN Pb Pr IN 10 11 12 13 14 15 16 1 2 4 5 8 6 7 9 3 3 P P MENU V V SOURCE 0...

Page 6: ...button 11 Status button i 12 Volume setting button DUAL I DUAL II Stereo Mono DUAL I II ST MONO Memory Button in Mono Models 13 To reach Setup Menu 14 AV Button 15 Blue button incred stereo mono normal Audio select 16 Yellow button 17 Green button Picture preliminary values 18 Red button Volume preliminary values 19 Picture format selection In some models 20 DVD TV Button Switches between TV and D...

Page 7: ...se your Remote Control for a long time remove the batteries N No ot te e Your Remote Control controls your TV at 7 meters far and 30 degrees of an angle B BA AT TT TE ER RY Y I IN NS SE ER RT TI IO ON N 1 1 5 5V V A AA AA A x x 2 2 p pi ie ec ce es s Remove battery cover Place the batteries properly Close the cover 065001057390 20 LCD LOCDVT ING 8 9 06 11 41 Page 7 ...

Page 8: ...connect the plug refer to Fig A 1 into the aerial input of the set Alternatively you may connect the aerial via a video recorder by using the video recorder Rf Input and Rf Output connections as shown AERIAL Socket Fig A 1 Coaxial cable 75 ohm Fig A 2 Back cover AERIAL Connection with video recorder RF input RF output EURO AV R L AUDIO IN Aerial input Scart socket 065001057390 20 LCD LOCDVT ING 8 ...

Page 9: ...put channel in Channel 0 on your LCD TV N No ot te e Not all VCRs necessarily have this facility V VC CR R A AN ND D D DV VD D P PL LA AY YE ER R O OP PE ER RA AT TI IO ON N B BY Y U US SI IN NG G T TH HE E E EU UR RO O S SC CA AR RT T S SO OC CK KE ET T Connect the SCART socket on your VCR or DVD Player to the SCART Socket on your LCD TV Select AV Channel on your LCD TV by pressing the AV selecti...

Page 10: ...tput you can connect this to your LCD TV s YPbPr input using 3 Way chinch cable by refering connector colours This method will carry the image to your LCD TV For audio connection use a 2 Way AV connecting lead to connect left and right audio outputs to your LCD TV s left and right audio inputs Select YPbPr Channel on your LCD TV by pressing AV selection key on your Remote Control handset L DC 12V ...

Page 11: ...r TV for a start time use stand by button which is on the remote control or on TV N No ot te e R RC C m me ea an ns s R Re em mo ot te e C Co on nt tr ro ol ll le er r 1 1 P PR RO OG GR RA AM M N NU UM MB BE ER R S SE EL LE EC CT TI IO ON N You can select the program you want by increasing the program number pressing the P button Select the program no 0 9 with the single number keys 0 9 on the Rem...

Page 12: ...evices connected through the scart Video DVD VCD etc Each time you press the AV button the modes that you can connect to your device are displayed 8 8 A AU UT TO OM MA AT TI IC C S SH HU UT T O OF FF F If the Tv receives no signal for 5 minutes it will automatically switch to Stand By This feature is not enabled in AV mode 9 9 M Me en nu u B Bu ut tt to on n When you press this button you can reac...

Page 13: ...o highlight setting icon and enter the menu with V button 3 Choose Language option with P P button and adjust you rdesired menu language with V V button 4 Use P P button for Country option and choose the country s abbreviation with V V button 5 Press MENU button to return to the main menu 6 Use P P button to highlight Program Settings and enter the menu with V button 7 Use P P button to highlight ...

Page 14: ...left hand corner Use P P V V for changing the menu language and the manual adjustments processes at Program adjustments Menu Use P P V V for changing the order of the program naming the program deleting the program and skipping process at Program table Menu These processes had been mentioned at further pages Leave this menu pressing TV button 065001057390 20 LCD LOCDVT ING 8 9 06 11 41 Page 14 ...

Page 15: ...VL property This is not shown on the menus This is for automatic volume limitation i e it keeps the volume level at the optimum level when shifting from one channel to another Because of this the volume comes after the display in case a channel is shifted E Eq qu ua al li iz ze er r You can enter the Equalizer menu with the V button while you are in the Equalizer line When you are in this menu you...

Page 16: ...umber and name in the program table appear in different colors You can access to other channels using P and V buttons in the program table 3 3 1 1 Blue button is for naming When pressing the blue button in the current channel a small box appears The character can be changed pressing P buttons You can access to the following or previous characters using V buttons When the naming is over press the b...

Page 17: ... the channel again in the prog table 4 4 S SE ET TT TI IN NG GS S M ME EN NU U In this menu 4 4 1 1 S So ou ur rc ce e O OS SD D The source OSD option can be adjusted as Open Closed It provides continuous display of the current channel 4 4 2 2 L La an ng gu ua ag ge e Using this option you can change the language in the menus 4 4 3 3 C Co ou un nt tr ry y Your apparatus finds the channel and choos...

Page 18: ...own on the screen You can leave this menu pressing TV button 4 4 5 5 2 2 R Re em mi in nd de er r T Ti im me er r You can adjust the recall period between 5 to 120 minutes with the V button At the end of the set period a warning message appears on the screen Pressing any button this message will disappear Reminder time may be increased or decreased by 5 minutes steps 4 4 5 5 3 3 O OF FF F T Ti im ...

Page 19: ...o Prog Frequency Fine Tuning AFC Skip and Lock P Pr ro og gr ra am m n nr r Shows the number of the current channel The Prog No can be changed using V and numbers P Pr ro og gr ra am m n na am me e The name of the current channel appears Press V to enter the channel name You can change the character using P buttons You can access the following and previous characters using V When the naming is ove...

Page 20: ...rates ON OFF When ON Its follows or corrects the possible small frequency distortions in the channels L Lo oc ck k This provides locking of the current channel When the locked channel is accessed a password is asked If the password is entered correctly the password which is entered at the option of child lock the channel appears After entering the password the channel appears To remove child lock ...

Page 21: ... option is added When the Audio is On you can hear the sound of your computer from the TV speakers When it is off you cannot hear your computer s voice from your TVs speakers I In n t th he e P Pi ic ct tu ur re e M Me en nu u dyn skin tone option has been removed Position Video noise Auto adjust Information Factory and Color temp options have been added P Po os si it ti io on n Adjust horizontal ...

Page 22: ...de this mode displays the timer of your TV set on the upper right corner of the screen In the Teletext mode this is used for a direct access to the subpages of the current page F Fo or r E Ex xa am mp pl le e You are in the teletext page No 500 If the message 1 9 appears Pressing teletext timer button in this case the S S marks will replace the teletext page number Using the number 0 to 9 on the R...

Page 23: ...s su ub b p pa ag ge e If a teletext page has subpages such subpages are displayed from time to time In such a case this button is pressed to hold that page continuously on the screen When the page is held pressing HOLD the HOLD script appears on the upper left corner of the screen Pressing this button again will release the page from the hold position 9 9 I In nd de ex x H Ho om me e P Pa ag ge e...

Page 24: ...TAL AUDIO AND DIGITAL VIDEO SYSTEMS AMONG ITS FEATURES ARE LANGUAGE SELECTION SUBTITLE SELECTION ABILITY TO PLAY DVD SLOW AND FAST MOTION DISPLAY IN VARIOUS SPEEDS VIEWING FROM DIFFERENT CAMERA ANGLES IF THIS FEATURE IS INCLUDED ON THE DISC 065001057390 20 LCD LOCDVT ING 8 9 06 11 41 Page 24 ...

Page 25: ...sk menus 1 12 2 S SE ET TU UP P b bu ut tt to on n To enter and exit the DVD set up menus 1 13 3 A AR RR RO OW W b bu ut tt to on ns s To navigate up down left right in menu 1 14 4 S SU UB B b bu ut tt to on n To change subtitle language 1 15 5 A AU UD DI IO O b bu ut tt to on n To change spoken language 1 16 6 D DI IS SP PL LA AY Y b bu ut tt to on n To get information about the playing DVD 1 17 ...

Page 26: ...of the movie by pressing the PAUSE button To restart playback press the PLAY button 7 7 You can stop the movie by pressing the STOP button If PLAY is then pressed the movie will start from where it was last stopped To stop the playback completely so it wont start again from where it was stopped the STOP button must be pressed twice S SK KI IP P You can skip chapters either forwards or backwards by...

Page 27: ...u choose one of the formats of 4 3 4 3 format you can watch the entire picture with a black band on the upper and lower parts Selecting 4 3 format 16 9 format in your TV set the picture entirely covers the screen but you cannot see the entire picture on the screen P PA AS SS SW WO OR RD D For the DVD contents level Parental Lock restriction you should assign a 4 digit numerical password Factory de...

Page 28: ...register this player with the DivX R Video On Demand format To learn more go to www divx com vod R RE ES SU UM ME E When you close and restart the played film this function provides beginning from the stopped part D DE EF FA AU UL LT T If you confirm the OK option at this function by pressing ENTER the set returns to factory set values SYSTEM SETUP RESTORE TV SYSTEM TV TYPE PASSWORD RATING DIVX R ...

Page 29: ...le e i if f s so ou un nd d s su ub bt ti it tl le e a an nd d m me en nu u l la an ng gu ua ag ge e o op pt ti io on ns s a ar re e a av va ai il la ab bl le e o on n t th he e d di is sk k LANGUAGE SETUP OSD LANGUAGE AUDIO LANG SUBTITLE LANG MENU LANG ENGLISH GERMAN SPANISH FRENCH ITALIAN TURKISH DUTCH LANGUAGE SETUP OSD LANGUAGE AUDIO LANG SUBTITLE LANG MENU LANG ENGLISH GERMAN SPANISH FRENCH I...

Page 30: ... GS S D DO OW WN NM MI IX X At this point there are some settings you should do when you connect the analog DVD audio outlets of your set to an equipment AUDIO SETUP LT RT STEREO VSS DOWNMIX AUDIO OUT 065001057390 20 LCD LOCDVT ING 8 9 06 11 41 Page 30 ...

Page 31: ...itles Every subsequent press of this subtitle button will change the language until there are no more languages to display After this point is reached the subtitles will be turned OFF A AU UD DI IO O pressing the AUDIO button will change the current audio language This feature is dependant on the audio language tracks that are recorded on the disc M MU UT TE E With this button you can instantly tu...

Page 32: ... YO OU UR R K KN NO OW WL LE ED DG GE E In certain situations the DVD player is unable to carry out specific instructions If you issue a command to the DVD player and it is unable to carry out that function a Ø Ø icon will be displayed on the screen Play control keys Play Stop Skip Pause etc will not function while in the DVD Player Set Menu This menu must be exited before these buttons will becom...

Page 33: ...A AR RD D A AN ND D B BA AC CK KW WA AR RD D Press these buttons to skip to the start of the next track or the start of the previous track M MU UT TE E Press the MUTE button to silence the play press again to restore the sound N NU UM MB BE ER R The number buttons on the remote control panel allow you to select a track directly Input the track number and press PLAY to start play D DI IS SP PL LA A...

Page 34: ...skip press SKIP You can select desired MP3 track directly by using numerical buttons 0 9 Usage of menu functions are some as the other CDs J JP PE EG G F Fi il le es s The JPEG format developed by the Joint Photographic Experts Group is currently the most popular format for compressing and saving image files It uses high efficiency compression data to compress images up to 15 20 times The JPEG for...

Page 35: ...on the remote control Some functions will work as above S SE EA AR RC CH H If there is more than one film on the disc you can make the selection of the film by using the Search button Press Search button and enter the number of the film that you prefer to watch on yhe line which displays ont he screen Afterwards use Enter button for confirmation The choosen film will begin Your apparatus supports ...

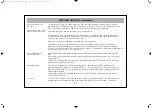
Page 36: ...ss turned down Tv switched to AV Set not tuned in Aerial not connected Poor signal AV source not connected or turned on Colour control not set Set may need fine tuning Poor Signal R Re em me ed dy y Check all connections ensuring the connector to the mains socket is firmly engaged Turn Tv on with On Off button Press P or P buttons or numeric button on the R C Adjust brightness Select TV or press a...

Page 37: ...ith regionality coding 2 Imported discs with a coding other than 2 will not play in this machine This is not a fault The remote handset Replace the batteries Depleted batteries will shorten the range of the remote and are more likely to does not operate leak Ensure there is nothing blocking the path between the remote and the remote sensor e g DVD drawer coffee table etc The remote control sensor ...

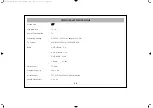
Page 38: ...e AC 230V 50Hz by adapter 12V DC TV System MULTI SYSTEM NTSC PLAYBACK Band VHF 1 Band 2 4 VHF III Band 5 12 UHF Band 21 69 S Band S1 S41 Aerial Input 75 ohm Program Capacity 100 AV Picture Panel TFT LCD Panel 640 x 480 resolution Sound Output rms 2 x 2 W 065001057390 20 LCD LOCDVT ING 8 9 06 11 41 Page 38 ...

Page 39: ...065001057390 20 LCD LOCDVT ING 8 9 06 11 41 Page 39 ...

Reviews: