PCF Pro User Manual
DOC01851
Page 30 of 74
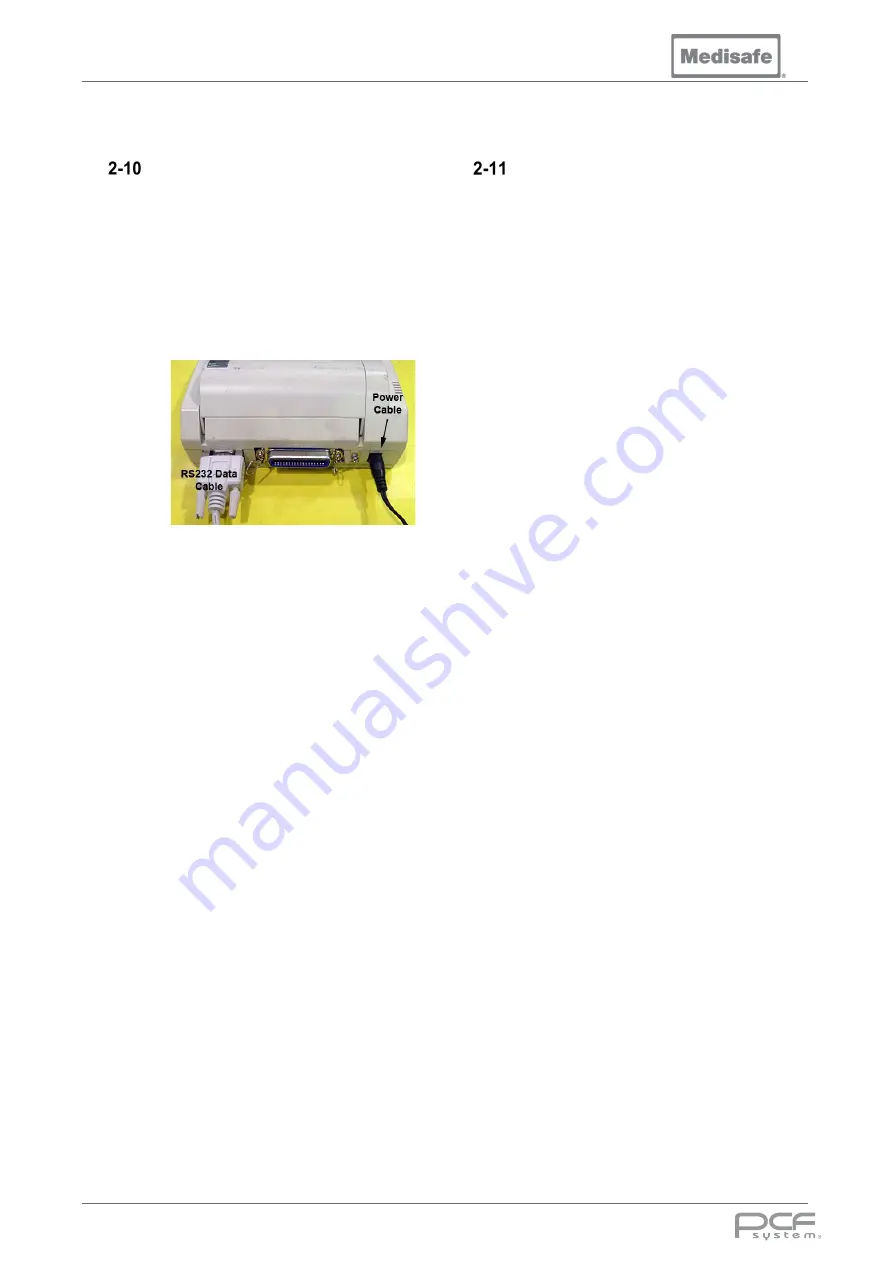
Connecting to the RS232 Port
Thermal Printer
21. Identify the RS232 Data Cable
supplied, and plug the correct end
into the socket located at the lower
right hand side at the rear of the unit.
22. Connect the other end of the RS232
data cable into the connector on the
rear of the thermal printer.
23. Plug the printer power supply cable
into the rear socket of the printer,
and connect the mains power cable
into a suitable mains supply outlet,
then switch on the printer.
Note:
When the printer paper shows red
stripes, this indicates the paper is about to
runout, and must be replaced. Once the paper
has been changed press the online button, the
green led will illuminate and printing will
resume.
The printer can store more than 10 cycles in
memory when the paper has run out. If the
power is not removed when changing the
paper, the stored cycles will be printed after
the paper has been changed.
Data Logging PC
Wash cycle data is sent from the serial port to
a printer, however, as an alternative data may
be sent to a logging device or computer via the
serial port using a serial data logging program
of your choice.
Note:
Only IEC/EN60950-1 certified
equipment should be connected.
Connect a suitable RS232 Null modem cable
between the data port on the rear panel and a
COM port on your PC. Run your serial data
logging program, ensuring it is configured in
the following manner:
•
Baud Rate –
19200bps
•
Data Bits –
8
•
Parity –
none
•
Stop Bits –
1
•
Flow Control –
none
•
Handshaking –
off
•
Buffer size > 500
•
Append line feed to cartridge return
Summary of Contents for PCF Pro
Page 1: ...DOC01851 PCF Pro User Manual...
Page 7: ...DOC01851 Page 7 of 74 1 Introduction 1 Introduction User Manual...
Page 19: ...DOC01851 Page 19 of 74 2 Installation 2 Installation User Manual...
Page 26: ...PCF Pro User Manual DOC01851 Page 26 of 74 Installation Drawings Rear View Showing Services...
Page 27: ...PCF Pro User Manual DOC01851 Page 27 of 74 Front View...
Page 29: ...PCF Pro User Manual DOC01851 Page 29 of 74 Left Side View Lid Open...
Page 31: ...DOC01851 Page 31 of 74 3 Operation 3 Operation User Manual...
Page 55: ...DOC01851 Page 55 of 74 4 Troubleshooting 4 Troubleshooting User Manual...
Page 59: ...DOC01851 Page 59 of 74 5 Technical 5 Technical User Manual...
Page 65: ...DOC01851 Page 65 of 74 6 Appendices 6 Appendices User Manual...


