© MEDISTIM 2015
19
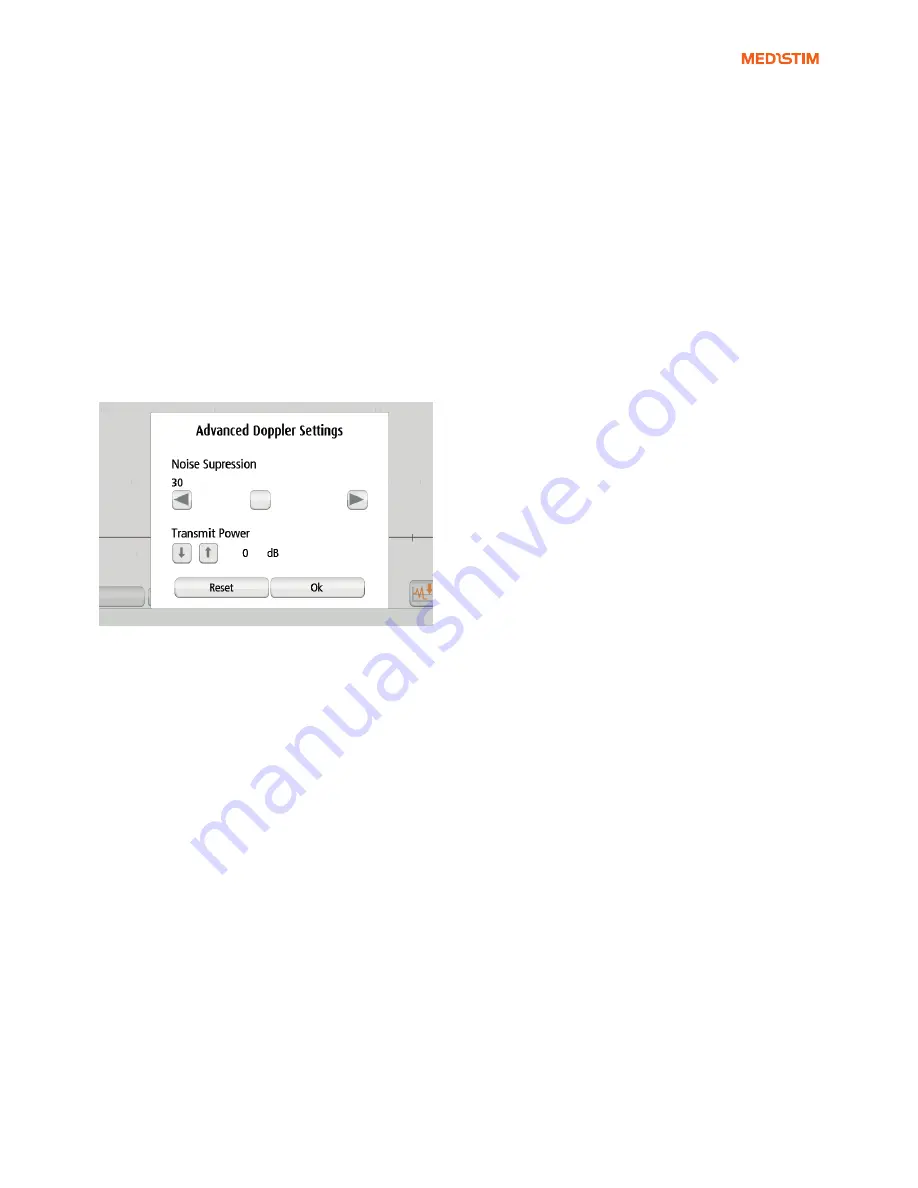
Turn on the VeriQ™ and insert a Doppler probe. Enter the
Doppler settings panel.
Press the ”Advanced” button. The ”Noise Suppression set-
ting” should now be visible.
The slider indicates the level of noise reduction to be applied
to the measurement. A negative value will make the measure-
ment more sensitive to weak signals and noise, and a large
positive value will make it less sensitive. Setting the noise
reduction too high may cause problems calculating mea-
surement parameters, as the measured signal is interpreted
mostly as noise. Similarly, setting the value too low will result
in much noise being incorporated into the calculations. Adjust
the slider so that the probe stops measuring the environmen-
tal noise.
The noise reduction value can at any time be readjusted if the
value initially chosen is causing problems or the environment
changes.
5.11 Data Management
All measurements are stored in a database associated with
the patient’s record. The capacity of the database is typically
about 40,000 records, depending on the number of measure-
ments stored per patient.
5.11.1 Search function
With the option of multiple search criteria, any desired record
is easily found. To search for a particular patient, operation
date or surgeon, go to the ”Home” data screen and select
”Search”. The screen ”Search Criteria” appears. Search for
a particular patient by entering parts of the patient name, the
patient ID number, the birth date, the gender, the operation
date or the surgeon. Press ”Perform Search”. Choose the
desired patient record from the list that appears by pressing
on the name - a green check appears - and pressing ”Select
Patient”.
Note
The project can be used to identify patients part of a study
making search easier.
5.11.2 Edit, print, delete and export measurements
To access a patient’s measurements, make sure the name of
the patient is selected, and go to the “Archive” screen. View
the desired measurements by pressing on the curves.
Press the ”Edit” button and edit the curves by either scrolling
the flow curve backwards, dragging the baseline up or down,
changing the scale of the measurements, or editing the ves-
sel name.
The scale and the position of the baseline cannot be changed
on Doppler measurements. Move between the selected
measurements by pressing the arrows visible at the bottom
of the screen. To store the edited curves, press the ”Save”
button. The old measurement will then be overwritten.
To print measurements, select the measurements to print
by pressing on the curve and pressing the ”Print” button.
To change the number of measurements visible on a print-
ed page, change the setting under ”Report Settings” in the
system settings.
To delete, select the measurements by pressing on the curve
and then press the ”Delete” button The question ”Delete
selection?” will appear, press “OK”.
To export measurements in a PDF format, select the desired
measurements and press the ”Export report” button. The
screen ”Specify File-name and Folder” will appear. Choose
the desired folder into which the file is to be exported, specify
the name of the file and press ”OK”. The report can be
exported to the hard disk, an external USB or LAN storage
device.
The full screen can be exported as a picture file for inserts
into presentations or other documents. Press the screen
capture button for the edit screen and follow the dialog box
to store the picture file on a removable media.
5.11.3 Export and import data
It is possible to export either the entire patient database, or
portions of it, for backup purposes. This can be done by us-
ing an external USB or LAN storage device. To export single
patients, choose Advance Mode under System settings to
gain access to the export function. Go to the ”Patient data”
screen and obtain the full list of patients by pressing ”Search”
and then ”Perform Search”.
Under the heading “Export”, select the desired patient data
and press “Export”. Multiple patients can be selected.
Choose the desired folder under ”Specify Filename and Fold-
er” and press ”OK”.
On the advanced systems settings page there is an option
to export various types of data, including the entire patient
database. The data available for export is:
• Entire patient database
•
Language files
• System settings
•
GUI configuration
• Probe usage information


