background image

HUSH endura

SPRINTER

5. Spraying

You should now be ready to spray your client. Good quality results with your Hush Sprinter™ spray tanning system are a 

combination of careful preparation of your client, a proper spraying environment, a basic knowledge of the solution you will 

be using and how these solutions work with your Hush Sprinter™ spray tanning system.

1. You are now ready to begin spraying. 

2. The ON/OFF Switch is located at the side of the Hush Sprinter™ Unit. Turn it on. You will hear a sound similar to a 

vacuum cleaner. You may also notice that air is now blowing out of the front of the Hush Sprinter™ Spray Gun. This is 

correct. Air will continually flow from the air cap of the Hush Sprinter™ Spray Gun as long as the Hush Sprinter™ Unit is 

running and the air hose is connected.

3. Your Hush Sprinter™ motor unit is set for the perfect atomisation of spray tan solution.

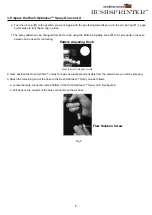
4. Open the Solution Flow Screw as described in item 4 and set the Pattern Adjustment Knob.

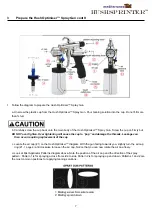
5. Set the mist pattern you wish to use by adjusting the air cap to the desired position. Refer to the spray gun pattern 

diagram on page 7/8.

6. Direct the Hush Optimiser™ Spray Gun to the area of the body that you want to start spraying. 

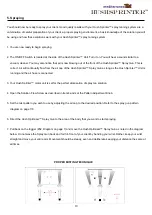
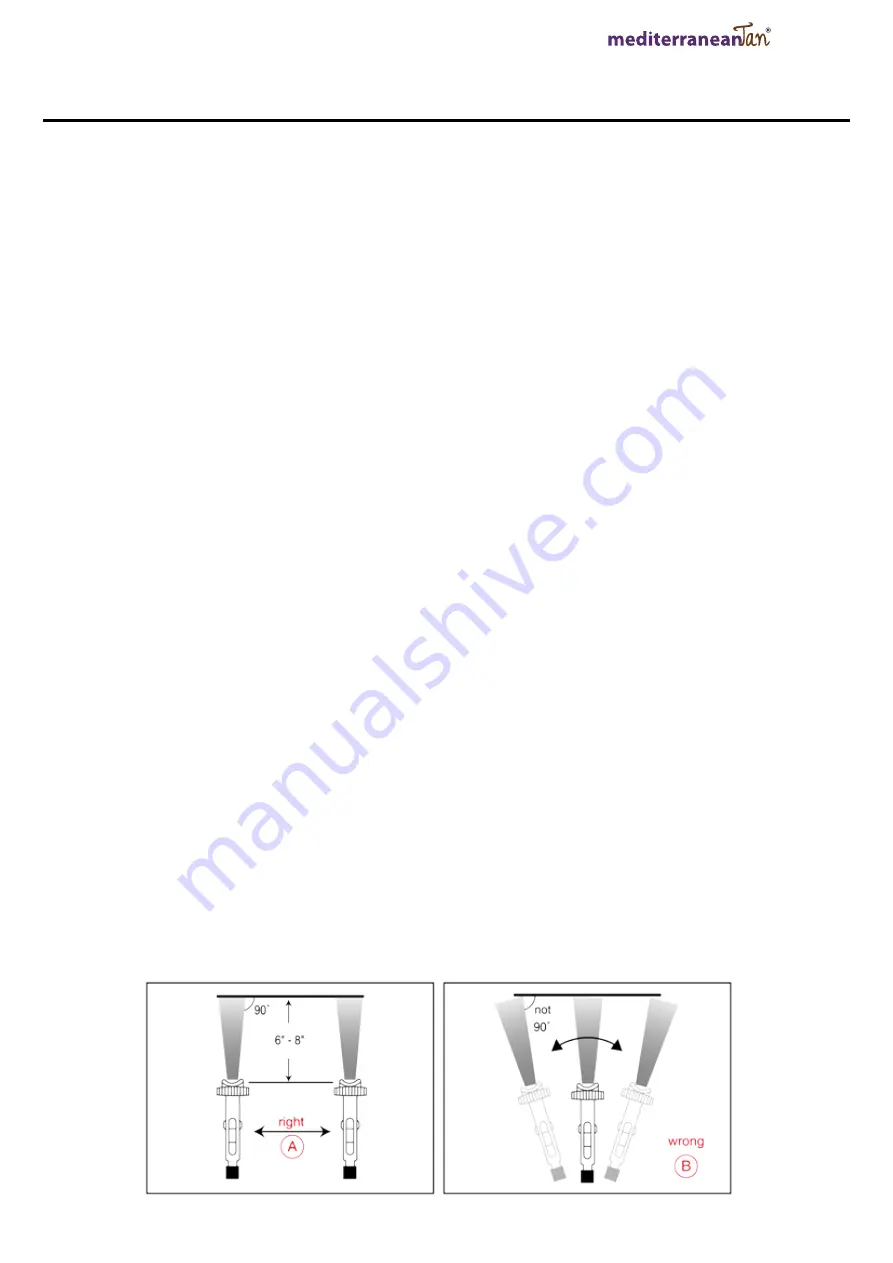
7. Pull back on the trigger (#32, Diagram on page 7) and move the Hush Optimiser™ Spray Gun as noted in the diagram 

below. Do not wave the Spray Gun back and forth in front of your client by bending your wrist. Rather, keep your wrist 

straight and move your entire arm. Movement should be steady, even and deliberate, keeping your distance the same at 

all times.


5  

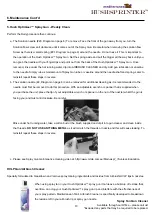
Spraying/Misting 


a.  You are now ready to begin misting. 


b.  The ON/OFF Switch is located under the carry handle of the  Turbo Unit. Turn it on. You will hear a 

sound similar to a vacuum cleaner. You may also notice that air is now blowing out of the front of the 

      Spray Gun. This is correct. Air will continually flow from the air cap of the Spray Gun as long as the      
       Turbo Unit is running and the air hose is connected. 
 

c.  Open the Solution Flow Screw as described in item 4. 


d.  Set the mist pattern you wish to use by adjusting the air cap to the desired position. Refer to Mist 

Pattern Diagram. 


e.  Direct the Spray Gun to the area of the body that you want to start spraying. 


f.  Pull back on the trigger (#13) and move the Spray Gun as noted in the diagram below. Do not wave the 
      Spray Gun back and forth in front of your client by bending your wrist. Rather, keep your wrist straight 

and move your entire arm. Movement should be steady, even and deliberate, keeping your distance the 
same at all times. 


PROPER MISTING TECHNIQUE 


10

Summary of Contents for HUSH SPRINTER

Page 1: ...aire Pty Ltd Unit 5 32 Essington Street Grovedale 3216 email info solaire com au Ph 1300 650 079 www solaire com au INSTRUCTION MANUAL TANNING SYSTEM FOR PROFESSIONAL USE ONLY DO NOT USE EQUIPMENT BEF...

Page 2: ...ty Information 4 2 Set up and operate your Hush Sprinter Spray Tan System 5 3 Prepare the Hush Optimiser Spray Gun 6 4 Adjusting the Hush Optimiser Spray Gun 9 5 Spraying 10 6 Maintenance 11 7 Trouble...

Page 3: ...MediterraneanTan provides a superior performance delivering a flawless tan through a powerful yet whisper quiet motor The name says is all Sprinter when performance is required Hush Sprinter By MEDIT...

Page 4: ...uge 100 cord 10 Gauge 4 1 General Safety Information cont d Tipping the Spray Gun causes the Spray Gun to clog Dried spray material also clogs the pressure delivery tube and fittings The Spray Gun doe...

Page 5: ...your airflow pressure If you have just finished spraying the connector may be hot Allow the Hush Sprinter unit to cool down for about 10 minutes before disconnecting the air hose from the Hush Sprinte...

Page 6: ...HUSH endura SPRINTER 3 Prepare the Hush Optimiser Spray Gun 6...

Page 7: ...rn the air cap ring 1 1 page 6 anti clockwise to loosen the air cap Notice that you can now rotate the air cap freely d Look at Mist Applicator Patterns diagram above Note the position of the air cap...

Page 8: ...g knob 12 A circle pattern as seen below can be used for contouring 2 Next position the Hush Sprinter unit as far away as practical and possible from the area where you will be spraying 3 Attach the r...

Page 9: ...Gun at a slow steady speed keeping the distance of the Spray Gun the same throughout the application This will ensure perfect results It is actually very easy Practice Practice Practice 8 It is best t...

Page 10: ...to start spraying 7 Pull back on the trigger 32 Diagram on page 7 and move the Hush Optimiser Spray Gun as noted in the diagram below Do not wave the Spray Gun back and forth in front of your client b...

Page 11: ...ing solution either close the cup with a lid or pour the remaining solution into a proper storage container d Rinse the cup under hot running water until clean e Turn the gun upside down and allow hot...

Page 12: ...needle must first be removed to do this procedure With an adjustable wrench or spanner that is supplied when you purchase the unit place the tip of your adjustable wrench or spanner on the nut of the...

Page 13: ...nch or spanner tighten Solution Needle Packing Screw 28 Diagram on page 6 Do not over tighten This can cause Solution needle to stick and not spring back Try spraying again If leaking continues the So...

Page 14: ...HUSH endura SPRINTER 7 Hush Optimiser Spray Gun Problems 14...

Page 15: ...HUSH endura SPRINTER RECORD OF Hush Sprinter USE MODEL SERIAL DATE PURCHASED DATE HOURS OF USE TOTAL HOURS 15...

Page 16: ...HUSH endura SPRINTER RECORD OF Hush Sprinter MAINTENANCE DATE MAINTENANCE PERFORMED 16...

Page 17: ...time to make sure you look after your investment Please ensure you read the instructions carefully and complete the spray tan gun maintenance and equipment care training module at www solaire com au...

Page 18: ...ntact you to discuss after they have assessed the claim Mediterranean Tan will extend the warranty on equipment as provided by the Manufacturers Instruction Manual of the goods Mediterranean Tan Pty L...

Reviews: