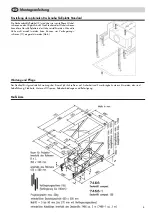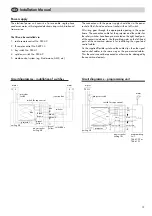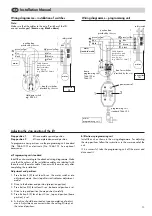
11
Installation Manual
GB
Safety instructions
Only authorized and competent staff are allowed to mount or
repair the ceiling lift.
It is indespensable to read the installation manual carefully
and to heed the safety instructions!
When operating the lift observe the local safety rules and the
specific regulations of your country for lecture or conference
rooms.
Keep clear when the lift is on its way down.
The construction of the ceiling must hold at least ten times the
weight of the projector and the lift.
Whenever people work on the lift, they must not leave any
objects (e.g. tools) back that could fall down.
Keep away from the movable parts (e.g. the concertina
elements). You could suffer serious injuries.
Do not keep inflammable materials close to the lift when it is in
upward position.
The lift weighs ca. 26 kg. Take suitable safety measures (e.g. a
working platform, a block and tackle, a prop).
Only an electrician is allowed to connect the lift to the mains
(VDE 0100).
When connecting the unit to the mains a relais that separates
all the wiring and whose gap between the contacts is at least
3 mm must be installed inbetween in order to reach a com-
plete power cut (VDE 0700).
Unplug before maintenance works.
Install the main switch in sight distance of the device in order
to be able to observe the lift when it is in operation.
The minimum distance between the lift in its lowest position
and the floor should not be less than 2.5 m.
Damages due to vandalism, wrong handling, false wiring and
ensuing consequences are not covered by the warranty.
Caution:
Due to the construction the rope is normally wound up
one-ply on the drum.
Before switching the lift on for the first time make sure that
the rope lies one-ply on the drum and does not intersect.
In case of an intersection lower the lift completely and let it
move upwards cautiously.
A safety switch stops the lift on its way down when hitting
an obstacle.
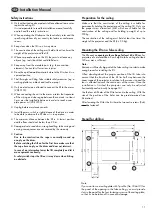
Preparation for the ceiling
Make sure that the construction of the ceiling is suitable for
permanently holding the projector and the ceiling lift. Only use
the proper screw dimensions (M8) which are suitable for the
construction of the ceiling and for holding a weight of up to
200 kg.
The construction of the ceiling must hold at least ten times the
weight of the projector and the lift (4 x 50 kg).
Mounting the lift on a false ceiling
The lift needs an
opening in the ceiling of at least 60 x 50 cm
. For
projectors of not more than 6.5 cm height a false ceiling of at least
120 mm mm is sufficient.
Note:
Remove a sufficiently big part of the false ceiling in order to make
enough room for installing the lift.
When deciding about the proper position of the lift, take into
account that the front bar of the lift lies half way between the
zoom range of the projector in relation to the screen size and the
lens is directed towards the centre axis of the screen. Once the
installation is finished the projector can only be adjusted
horizontally and vertically (see page 15).
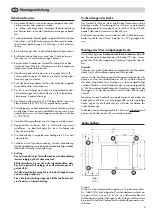
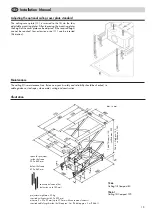
Use the four drill-holes of the lift to fasten it to the ceiling. With the
stencil the position of the holes can be pre-determined (see
illustration).
After lowering the lift for the first time the two centre screws (5+6)
must be fastened!
Stencil for drilling
Note:
If you want to use a ceiling plate with T-profile (No. 7466-10) for
the panel of the opening in the false ceiling, you must provide
slots in the panel for the four fastening screws of the ceiling plate,
so that it can be taken off in case of a damage.
3
5
1
2
6
4
Summary of Contents for 22483
Page 22: ......

