background image

10     MEDLINE 

|


MDS806150N | PIC-00270 (Rev: 07-19-16)

1-800-MEDLINE (633-5463)  

|

  medline.com     11

General use Instructions

Safety Lap Belt Use

The lap belt is provided to help the rider be safe and well positioned in the wheelchair. The lap belt should be initially fitted by a qualified 

healthcare professional or dealer. While sitting back in the chair, it should be adjusted to be sufficiently tight around the rider’s pelvis to keep 

from sliding down without causing discomfort.  There should be sufficient room to slide a hand between your body and the belt.  Adjust belt so 

that it buckles in the front.

Warning:  

•    The lap belt should be checked each time used for proper fit. A loose lap belt could cause the user to slip between the belt and seat and risk  

    suffocation or serious injury.

•    Check belt and hardware regularly to be sure it is securely attached and not frayed. Replace belt if worn or torn.

Anti-Tippers

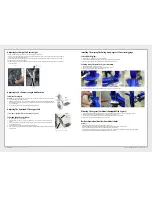
•    Rear anti-tippers help keep the chair from tipping and are recommended attachments for additional safety (Fig 7). The use of anti-tippers is 

    required on Excel Recliner models.

Warning On Use Of Anti-Tippers:

•    Anti-tippers must be fully engaged. Ensure the release button of the anti-tipper fully protrudes out of the hole on the bottom of the   

    wheelchair frame.

•    Ensure both anti-tippers are adjusted to the same height.

•    A 1.5-2” clearance between the bottom of the anti-tipper wheels and the ground/floor must 

       be maintained at all times.

Installing Anti-Tippers (Included With Recliner Models)

1. 

  Depress the release buttons (Fig 8) and insert the anti-tippers with the anti-tipper wheels   

    pointing toward the ground/floor into the wheelchair frame tubing. 

2. 

  Ensure that the release button of the anti-tipper fully protrudes out of the hole in the 

    bottom of the wheelchair frame tubing.

3. 

  Adjust anti-tippers as necessary making sure there is a 1.5-2”/38-50 mm clearance to the    

   ground.

Important Notes:    

There are potential finger pinch point areas at moving parts and between the seat frame and 

the seat cradles on some models.   When opening the wheelchair, take care not to place your 

hand or fingers between the seat frame and the seat cradles (if present) or on any other moving parts.  

ALWAYS keep hands and fingers away from moving parts.  DO NOT sit in the wheelchair until the seat is completely in the open position.  Risk of 

injury may occur if care is not taken.

Opening And Folding The Wheelchair

To Open The Chair

1. 

Hold onto one armrest and push the opposite side to open the chair.

2.

  With your fingers and thumbs pointed towards the inside of the wheelchair, push downward on the seat to ensure the wheelchair is fully  

  open. Make sure the seat tubing rests completely inside the seat cradles (if equipped). 

 CAUTION:

 Pinch points exist. Keep hands and fingers away from any moving parts.

Alternative Method To Open The Chair:

1. 

Tilt the chair to one side by grasping the hand grip or arm nearest to you.

2. 

With fingers pointed away from the seat rail, push down on one side of the seat frame / rail until the wheelchair is fully open. Keep hands  

  and fingers away from any moving parts.

Recliner Models Only:

3.

  Secure the stabilizer bar (Fig 9).  The bar should already be attached on the left side  

  of the chair. Push the notched part of the stabilizer bar flush with the stabilizer bar  

  connection on the right back cane and hand tighten the triangular thumb screw.

4.  

Keep push canes even at all times.

To Close / Fold The Chair

(Recliner Models Only) First, loosen the thumb screw on the right side of the stabilizing 

bar.  Swing the stabilizing bar down and to the left side. 

1. 

Ensure the swing-away leg or footrests are in the forward and locked position.

2.

  Fold the footplates up to the vertical position.

3.

  Using both hands, grasp the center of the seat upholstery at the front and back edge  

  and lift the seat up.  

Alternative Method To Close The Chair:

1. 

Ensure the swing-away leg or footrests are in the forward and locked position.

2.

  Fold the footplates up to the vertical position.

3. 

Grasp the handles/straps on each side of the seat.

4. 

  Pull up until the chair is fully closed.

Wheel Locks

Push forward toward front of chair to lock.

 Wheel Lock Warnings

Check the wheel locks to ensure proper function before using the chair.  Wheel locks should embed into the wheel at least 1/8”/3.2 mm 

when engaged.

Engage the wheel locks on both wheels before entering the chair, leaving the chair, leaning forward in the chair or while being transported 

in an elevator or a wheelchair lift.

Check to make sure that the legrests do not unlock the wheel locks when they are swung back.

DO NOT

 use the wheel locks to stop the wheelchair from moving.  Wheel locks are not brakes.  

DO NOT

 use the wheel locks to slow your 

descent down an incline.

Fig.9
Stabalizer 
Bar

Fig. 8

Release 
Buttons for
Height
Adjustment

Fig. 7 

Anti-Tipper

Summary of Contents for Excel 2000 Extra Wilde

Page 1: ...ica Excel K2B MEDLINE STANDARD MANUAL WHEELCHAIRS USER GUIDE FAUTEUILS ROULANTS MANUELS STANDARD MEDLINE MANUEL DE L UTILISATEUR GU A PARA EL USUARIO DE SILLAS DE RUEDAS MANUALES EST NDAR DE MEDLINE E...

Page 2: ...rest Removable desk length arms swing away footrest Removable desk length arms elevating legrest Removable desk length arms swing away footrest Removable desk length arms elevating legrest 300 lbs MDS...

Page 3: ...replaced at Medline s option This warranty does not cover device failure due to owner misuse or negligence or normal wear and tear All warranty claims must include the product in question unless othe...

Page 4: ...er to use good body mechanics Contact with water or excess moisture may cause the non aluminium wheelchairs to rust or corrode DO NOT use the chair in a shower pool or other body of water Avoid excess...

Page 5: ...or going up or down steps should be received from a health care professional familiar with wheelchair use and practiced before attempting to transport on stairs If at all possible an alternate means o...

Page 6: ...he open position Risk of injury may occur if care is not taken Opening And Folding The Wheelchair To Open The Chair 1 Hold onto one armrest and push the opposite side to open the chair 2 With your fin...

Page 7: ...ise or lower the legrest pad assembly as needed to provide maximum support of the thighs on the seat upholstery Installing Removing The Swing Away Legrest Footrest Riggings To Install The Riggings 1 H...

Page 8: ...sharp edges and loose fasteners Ensure that everything works and the chair rolls straight without drag and does not pull to one side Replace or tighten parts as needed Inspect for bent frame and cross...

Page 9: ...sure they are clean and work freely X X Ensure stabilizer bar engages securely X X FRONT CASTERS AND REAR WHEELS Inspect wheel fork assembly for proper tension by lifting the chair and spinning the ca...

Page 10: ...lables en hauteur Accoudoirs courts amovibles repose pieds pivotants Accoudoirs courts amovibles repose pieds r glables en hauteur 300 lb MDS806250NEV MDS806300NEV MDS806150EV MDS806200EV MDS806250EV...

Page 11: ...nce ou l usure normale Le produit concern doit tre inclus toutes les r clamations au titre de la garantie sauf autorisation contraire de Medline Pour de plus amples renseignements sur votre fauteuil r...

Page 12: ...ssive N utilisez PAS le fauteuil sous une douche dans une piscine ou dans tout autre plan d eau vitez l humidit excessive ne laissez pas le fauteuil dans une salle de bains humide pendant que vous pre...

Page 13: ...rofessionnel de la sant ayant t form l utilisation du fauteuil roulant et s tant exerc au pr alable au transport de patient dans des escaliers Dans la mesure du possible il est recommand d utiliser un...

Page 14: ...teuil roulant avant que le si ge soit compl tement ouvert Des blessures pourraient s ensuivre Ouverture et fermeture du fauteuil roulant Pour ouvrir le fauteuil 1 Saisissez un accoudoir et poussez l a...

Page 15: ...si ge Installation retrait des m canismes de montage des repose jambes repose pieds pivotants Pour installer les m canismes de montage 1 Maintenez le m canisme de montage des repose jambes sur le c t...

Page 16: ...fonctionne correctement et que le fauteuil roule librement sans frottement et qu il ne tire pas d un c t ou de l autre Remplacez ou resserrez les pi ces au besoin V rifiez que le ch ssis et les barre...

Page 17: ...ison pour s assurer qu il est propre et qu il fonctionne librement X X S assurer que la barre de stabilisation s enclenche correctement X X ROULETTES AVANT ET ROUES ARRI RE V rifier la tension de l en...

Page 18: ...V MDS806450EV Excel K2B Asiento de 16 18 y 20 de ancho Brazos con longitud de escritorio desmontables reposapi s abatibles Brazos con longitud de escritorio desmontables reposapiernas de elevaci n Bra...

Page 19: ...encia del propietario ni el desgaste normal A menos que Medline autorice lo contrario todos los reclamos de garant a deben incluir el producto en cuesti n Para obtener m s informaci n sobre su silla d...

Page 20: ...esiva puede provocar xido o corrosi n en las sillas de ruedas que no son de aluminio NO use la silla de ruedas en duchas piscinas ni otros recintos con agua Evite el exceso de humedad ejemplo no deje...

Page 21: ...con el uso de sillas de ruedas debe ense ar t cnicas para subir o bajar pelda os las cuales deben practicarse antes de intentar el transporte por escaleras De ser posible se recomienda usar un medio...

Page 22: ...te abierto Podr an producirse lesiones si no se procede con cuidado C mo abrir y plegar la silla de ruedas Para abrir la silla 1 Sujete un reposabrazos y empuje el lado opuesto para abrir la silla 2 C...

Page 23: ...ra brindar el m ximo soporte a los muslos en el tapizado del asiento Instalaci n retiro de los montajes de los reposapiernas reposapi s abatibles Para instalar los montajes 1 Sostenga el montaje del r...

Page 24: ...s lados Reemplace o apriete las piezas seg n sea necesario Inspeccione que el armaz n y las barras transversales no est n doblados Armaz n y refuerzos transversales Verifique que el armaz n y los refu...

Page 25: ...reclinaci n para asegurarse de que est n limpios y funcionen libremente X X Cerci rese de que la barra estabilizadora se enganche firmemente X X RUEDECILLAS DELANTERAS Y RUEDAS TRASERAS Levante la sil...

Page 26: ......

Page 27: ...sentant de compte pour obtenir des renseignements suppl mentaires Nous nous r servons le droit de corriger toute erreur qui aurait pu se glisser dans ce feuillet d instructions 2016 Medline Industrie...

Reviews: