D-0126021-A
18
Printing
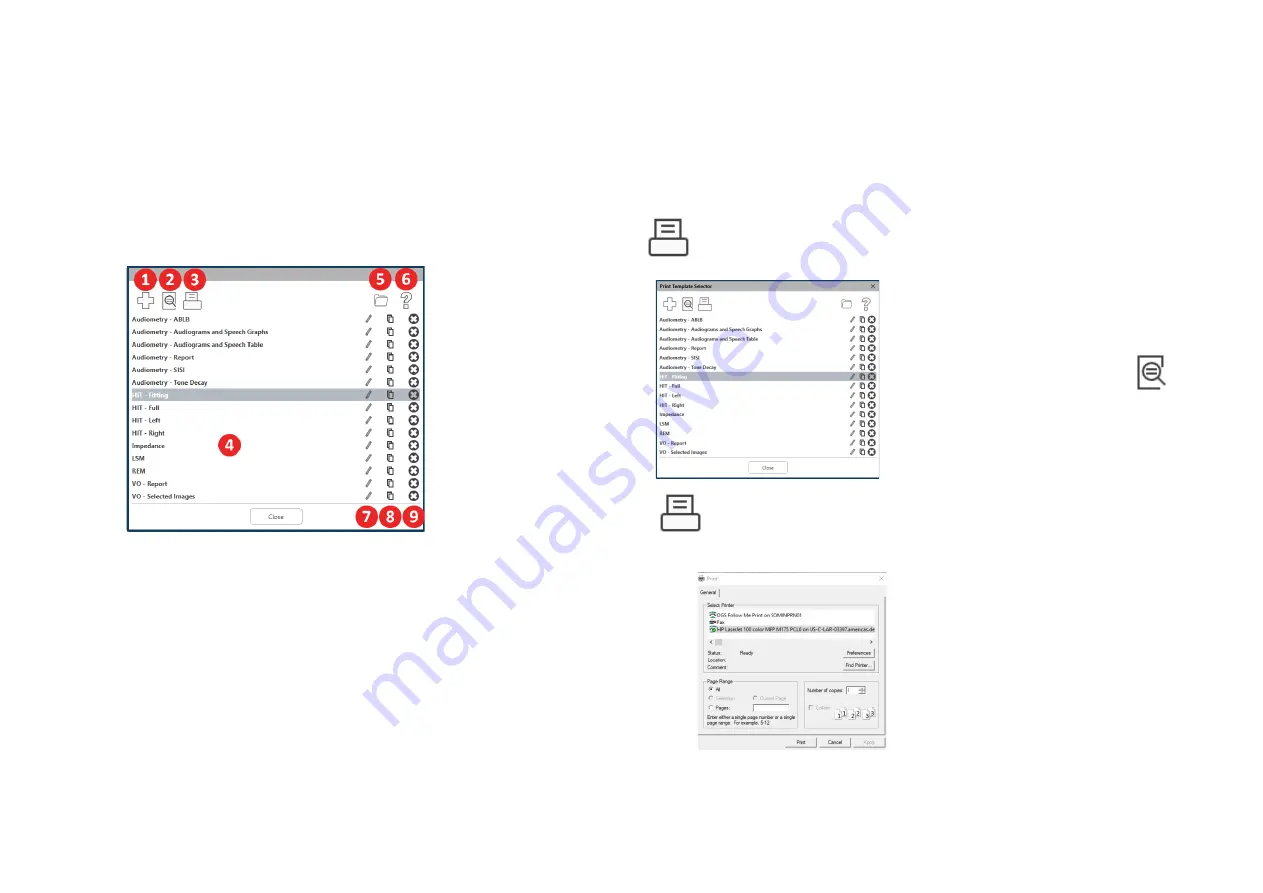
Printing within the MedRx Studio software. You can use the templates
provided at installation or create your own templates to suit your needs.
Icons in the Print Window
1.
Create a new template.
2.
Preview template icon.
3.
Print template icon.
4.
Select the template you would like to use.
5.
Shortcut to templates folder on your desktop.
6.
Studio Help icon.
7.
Edit the template with the pencil icon. Editing a template will open
the print editor and allow you to adjust print elements.
8.
Duplicate existing templates icon.
9.
Delete template icon.
To Use an Existing Print Template
1.
Click the print icon in the top tool bar or hold down the Ctrl key
and click the P key on your keyboard.
2.
Select the template you would
like to use.
3.
Click the print
preview icon to see
the patient’s data & images on
the template before printing.
4.
Click the print icon.
5.
The printer options box will
pop-up.
6.
Click print.
7.
Or click Ctrl+Shift+P to print
the modules default template.


