EN
42
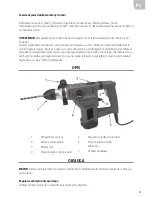
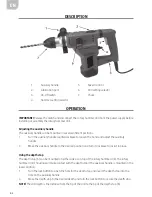
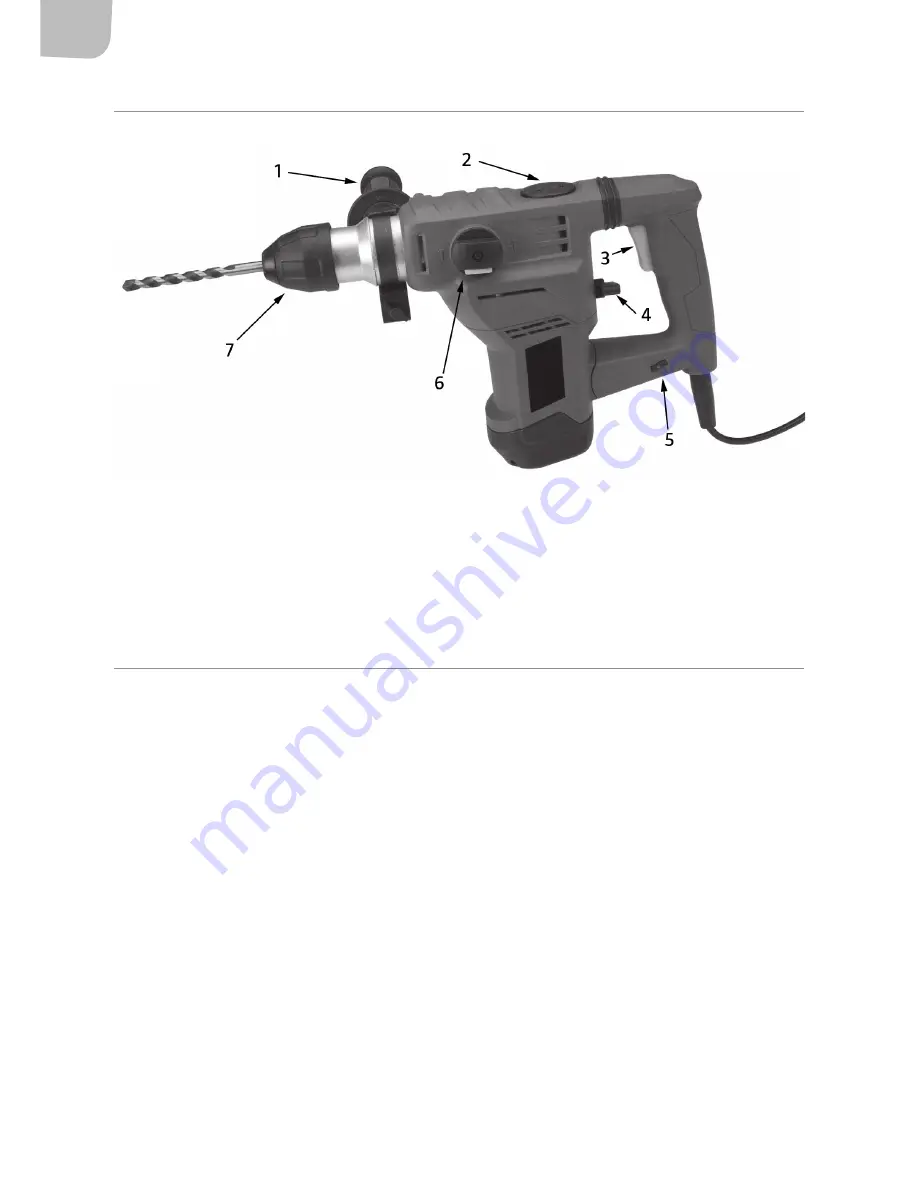
DESCRIPTION
1.
Auxiliary handle
2.
Lubrication port
3.
On-Off switch
4.
Hammer setting selector
5.
Speed control
6.
Drill setting selector
7.
Chuck
OPERATION
IMPORTANT!
Release the switch and disconnect the rotary hammer drill from the power supply before
installing or assembly the rotary hammer drill.
Adjusting the auxiliary handle
The auxiliary handle can be mounted in several different positions.
1.
Turn the auxiliary handle counterclockwise to loosen the band and adjust the auxiliary
handle.
2.
Move the auxiliary handle to the desired position and turn it clockwise to lock it in place.
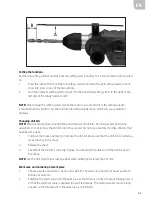
Using the depth stop
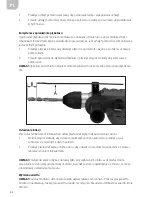
The depth stop (A) can be mounted on either side or on top of the rotary hammer drill. The rotary
hammer drill’s housing will make contact with the depth stop if the auxiliary handle is mounted in the
lower position.
1.
Turn the lock button to open the hole for the depth stop and insert the depth stop into the
hole on the auxiliary handle.
2.
Move the depth stop to the desired depth and turn the lock button to secure the depth stop.
NOTE!
The drill depth is the distance from the tip of the drill to the tip of the depth stop (B).

