ENGLISH
23
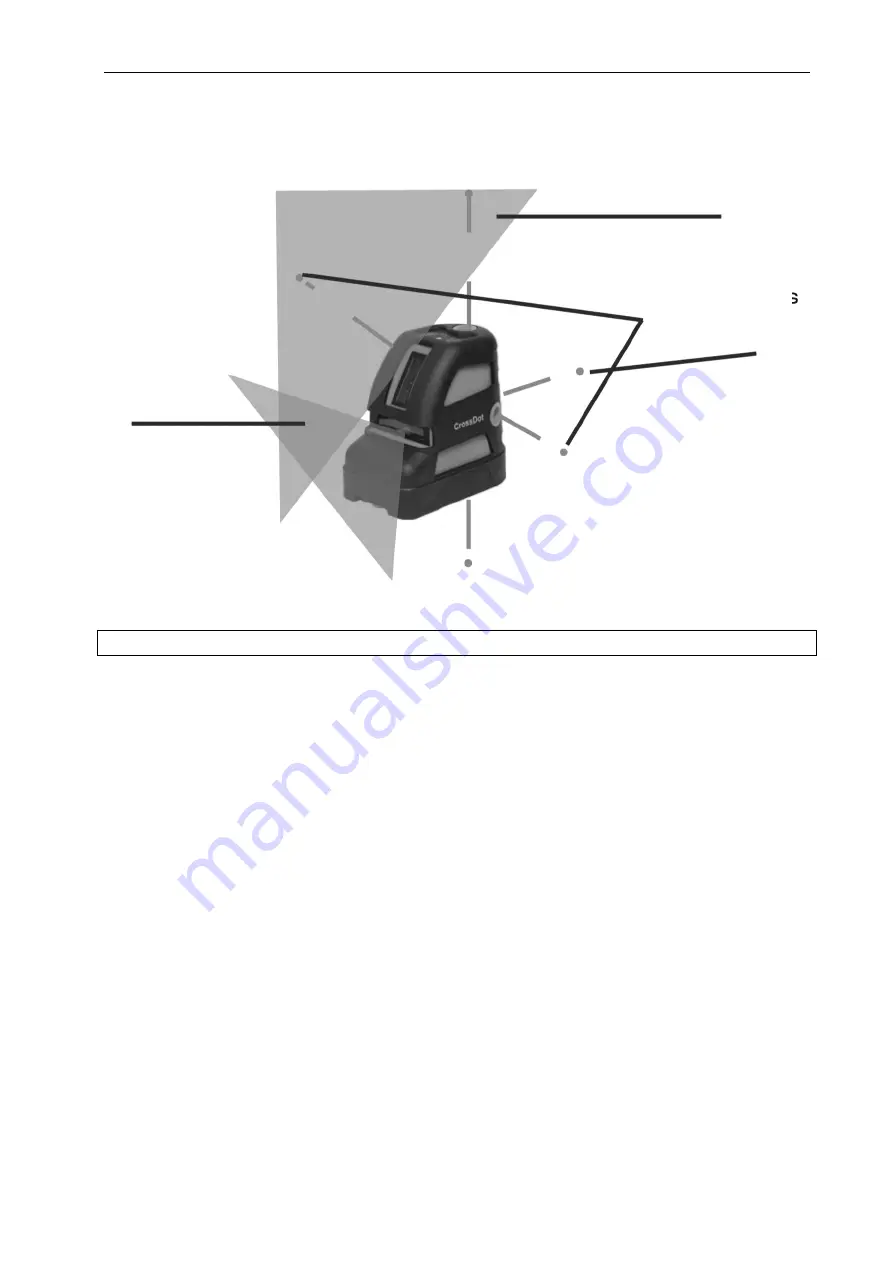
Laser lines and points
USE
Replacing the batteries
Carefully open the battery compartment locking mechanism (underneath the appliance). Insert 3 alkaline
AA batteries with the correct polarity. Close the battery compartment.
NOTE:
Remove the batteries from the appliance if it is not going to be used for some time.
Checking the precision of the instrument (left, right, forwards)
1.
Checking the alignment of the laser beams.
Place the appliance between two walls at a relative distance of 5 m.
Start the appliance and mark the point A1 on the wall where the horizontal and vertical laser lines
cross each other.
Turn the appliance 180° and mark the corresponding intersection point, A2, between the laser lines
on the opposite wall.
Place the appliance 0.5 m from the first wall.
Point the appliance at the wall on which point A1 is marked. Mark the line intersection point B1 on
the wall.
Turn the appliance 180° and mark the corresponding intersection point, B2, between the laser lines
on the opposite wall.
The appliance complies with its specified precision if (A1 – B1) – (A2 – B2) < 2 mm. If the gap is
more than 2 mm, hand in the appliance to an authorised service centre.
Use the same method to check the positions for the front, left and right laser points. If the gap is
more than 3 mm, hand in the appliance to an authorised service centre.
Vertical line
Zenith point
Horizontal
line
Plumb point
Front point
Front point


