2.2 Network Settings
When connecting the NetAgent
A
for the first time, ensure IP address and other
network setting are correctly entered in order to login to the NetAgent
A
’s webpage via
browser or HyperTerminal
When select to obtain IP address by DHCP or BOOTP, IP address and other network
parameter will be assign by the network
NetAgent
A
offers 4 network protocols - HTTP / HTTPS / TELNET / SSH for
management with security consideration.
If any change on port number, the it require
to enter the full IP address with port number in order to login
For example
:
HTTP port number change to 81
The full address to be enter on browser should be ”http://X.X.X.X:81” (X.X.X.X is
the IP address of the NetAgentA)
For Example
:
Telnet port number change to 24
The full address to be enter on HyperTermnal should be
”http://X.X.X.X 24” (X.X.X.X is the IP address of the NetAgentA)
When password of the NetAgent
A
is enabled, it is necessary to enter the correct
password before making any configuration change and firmware upgrade
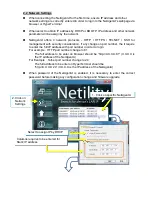
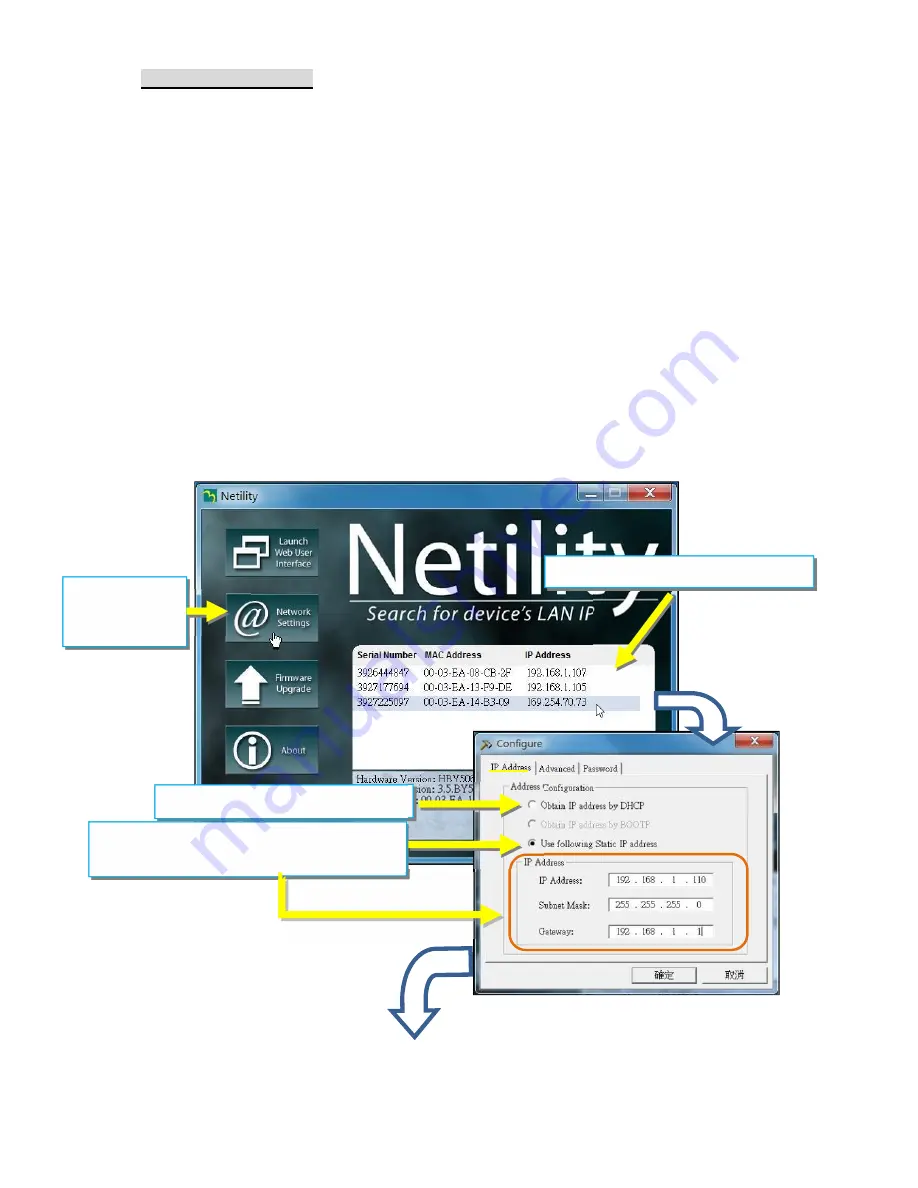
1. Click on specific NetAgentA
2. Click on
Network
Settings
Select to assign IP by DHCP
Columns requires to be entered for
Static IP address


