background image

Safety Instruction   

continued

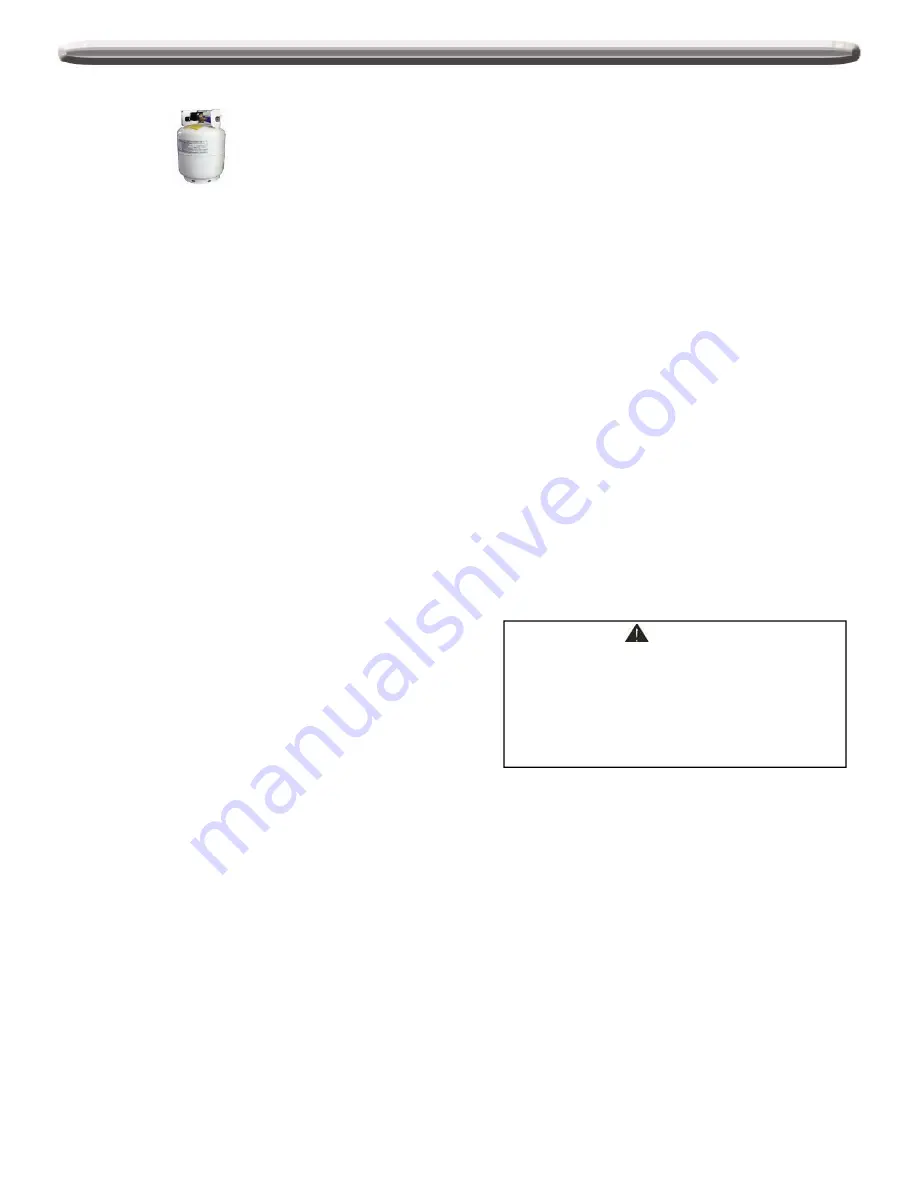
LP-Gas Supply System

The gas must be turned off at the supply cylinder when the  
outdoor cooking gas appliance is not in use.

LP gas tank must be stored outdoors in a well-ventilated area 
and out of reach of children. Disconnected LP gas tanks must 
not be stored in a building, garage or any other enclosed area.

If the information  is not followed exactly, a fire resulting in 
death or serious injury could occur.

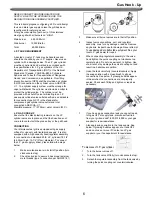
A 20lb tank of approximately 12 inches in diameter by 18-1/4 
inches high is the maximum size LP gas tank to use.

This safety feature prevents the tank from being overfilled, 
which can cause malfunction of the LP gas tank, regulator 
and/or grill.

The LP gas supply cylinder to be used must be constructed 

Do Not obstruct the flow of ventilation air around the gas grill 
housing. Only use the regulator and the hose assembly 
supplied with your gas grill. Replacement regulators and hose 
assemblies must be those specified in this manual.

The regulator and hose assembly must be inspected before 
each use of the grill. If there is excessive abrasion or wear or 
if the hose is cut, it must be replaced prior to the grill being put 
into operation.  The replacement hose assembly shall be that 
specified by the manufacturer.

Pressure regulator and hose assembly supplied with the 

and marked in accordance with the  specifications for LP –
Gas cylinder of the U.S. Department of Transportation (DOT) 
or the  National Standard of Canada ,CAN/CSA –B339, 
Cylinders, Spheres and Tubes for Transportation of 
Dangerous Goods and Commission .

The LP gas tank must have a shutoff valve terminating in an 
LP valve outlet that is compatible with a Type 1. LP gas 
supply cylinder must have a  shut off valve terminating in a 
valve outlet specified for connection type QCC1 in the 
standard for compressed gas cylinder valve outlet and inlet 

ti

ANSI/CGA V 1

li

bl

LP

l

outdoor cooking gas appliance must be used. Never 
substitute other types of regulator. Contact customer service 
for manufacturer specified replacement parts.

This outdoor cooking gas appliance is equipped with a 
pressure regulator comply with the standard for Pressure 
Regulating Valves for LP Gas ANSI/ UL 144.

Do not use briquettes of any kind in the grill.

The grill is designed for optimum performance without the use 
of briquettes. Do not place briquettes on the radiant as this will 
block off the area for the grill burners to vent. Adding 
b i

tt

d

i

iti

t

d k

b

d

connection ANSI/CGA-V-1 as applicable. LP gas supply 
cylinder must be fitted with an Overfill Protection Device 
(O.P.D) The LP gas tank must also have a safety relief 
device that has a direct connection with the vapor space of 
the tank.

The tank supply system must be arranged for vapor 
withdrawal.

The LP gas tank used must have a collar to protect the tank 
valve.

Place dust cap on cylinder valve outlet whenever the cylinder 
is not in use Only install the type of dust cap on the cylinder

briquettes can damage ignition components and knobs, and 
void the warranty. 

Keep the back and side  cart free and clear from debris. 

Never use the grill in extremely windy conditions. If located in 
a consistently windy area (oceanfront, mountaintop, etc.) a 
windbreak will be required. Always adhere to the specified 
clearance.

Never use a dented or rusty propane tank.

While lighting, keep your face and hands as far away from the 
grill as possible.

Burner adjustment should only be performed after the burner

is not in use. Only install the type of dust cap on the cylinder 
valve outlet  that is provided with the cylinder valve. Other 
types of cap or plugs may result in leakage of propane.

Never

connect an unregulated LP gas tank to your gas grill. 

This outdoor cooking gas appliance is equipped with a high 
capacity hose/regulator assembly for connection to a 
standard 20lb. Liquid propane cylinder.

Have your LP gas tank filled by a reputable propane gas 
dealer and visually inspected and re-qualified at each filling.

Do not store a spare LP gas cylinder under or near this  
appliance

Burner adjustment should only be performed after the burner 
have cooled.

WARNING

Your grill will get very hot. Never lean over the 
cooking area while using your grill. Do not touch 
cooking surfaces, grill housing, lid or any other grill 
parts while the grill is in operation, or until the gas 
grill has cooled down after use.

Failure to comply with these instructions may

appliance.

Never fill the cylinder beyond 80 percent full.

Always keep LP gas tanks in an upright position.

Do not store or use gasoline or other flammable vapors and 
liquids in the vicinity of this or any other appliance.

Storage of an outdoor cooking gas appliance indoors is 
permissible only if the cylinder is disconnected and removed 
from the outdoor cooking gas appliance.

When your gas grill is not in use the gas must be turned off at 
LP gas tank.

Failure to comply with these instructions may 
result in serious bodily injury.

Grease is flammable. Let hot grease cool before attempting 
to handle it. Avoid letting grease deposits collect in the 
bottom of the grill bowl assembly and the grease tray at the 
bottom of the grill’s firebox. Remove the grease from the 
bottom of the grill bowl assembly and grease tray often.

PROPER PLACEMENT AND CLEARANCE OF GRILL 

Never use your gas grill in a garage, porch, shed, 
breezeway or any other enclosed area. Your gas grill is 
to be used outdoors only.
Do Not install this unit into combustible enclosures. 
Minimum clearance from sides and back of unit to 
combustible construction, 24 inches (61cm) from sides 
and 24 inches (61cm) from back.  

DO NOT

use this appliance under overhead combustible 

surfaces.  This outdoors cooking gas appliance is not 
intend to be installed in or on recreational vehicles and/or 
boats

.

4

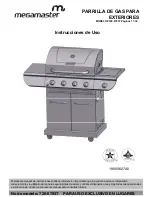
Summary of Contents for 720-0783T

Page 1: ...2 GRIL À GAZ EXTÉRIEUR MODÈLE 720 0783T Pages 34 52 19000627A0 Model No 720 0783T FOR OUTDOOR USE ONLY This instructions manual contains important information necessary for the proper assembly and safe use of the appliance Read and follow all warnings and instructions before assembling and using the appliance Keep this manual for future reference ...

Page 2: ... using a ball valve it shall be a T handle type A flexible gas connector when used must not exceed 3 feet reproductive harm Safety Instruction DANGER WARNING If you smell gas 1 Shut off gas to the appliance 2 Extinguish any open flame 3 Open lid 4 If odor continues keep away from the appliance and immediately call your 1 Do not store or use gasoline or other flammable liquids or vapors in the vici...

Page 3: ... at least once a month in late summer or early fall when spiders are most active Also perform this burner tube cleaning procedure if your grill has not been used for an extended period of time A clogged tube can be lead to a fire beneath the grill Code ANSI Z223 1 NFPA 54 Storage and Handling of Liquefied Petroleum Gases ANSI NFPA B149 2 or CSA B149 1 Natural Gas and Propane Installation Code and ...

Page 4: ... have a collar to protect the tank valve Place dust cap on cylinder valve outlet whenever the cylinder is not in use Only install the type of dust cap on the cylinder briquettes can damage ignition components and knobs and void the warranty Keep the back and side cart free and clear from debris Never use the grill in extremely windy conditions If located in a consistently windy area oceanfront mou...

Page 5: ...be referred to a qualified technician Children should not be left alone or unattended in an area periodically for optimum performance The burners will only operate in one position and must be mounted correctly for safe operation Clean the grill with caution To avoid steam burns do not use a wet sponge or cloth to clean the grill while it is hot Some cleaners produce toxic fumes or can ignite if ap...

Page 6: ...nge for vapor withdrawal The cylinder must include a collar to protect the cylinder valve The cylinder must be provided with a shut off valve terminating in an L P gas supply cylinder valve outlet specified as applicable the soap solution with a clean brush to all gas connections See below If growing bubbles appear in the solution the connections are not properly sealed Check each fitting and tigh...

Page 7: ...gh heat for searing and proper browning Most foods are cooked at the HIGH heat setting for the entire cooking time However when grilling large pieces of meat or poultry it may be necessary to turn the heat to the lower setting after the initial browning This cooks the food through without burning the outside Foods cooked for a appear where a leak is present 3 If a leak is present immediately turn ...

Page 8: ...ve 3 Push and turn corresponding burner control knob to the while pressing the ignition button to light the burner 4 Once the burner is lit release the ignition button and knob 5 If burner does not light up turn the knob to O and repeat the lighting procedure TO MATCH LIGHT THE BURNER 1 If the burner will not light after several attempts then the burner can be match lit before using the match allo...

Page 9: ...P IN THE OFF POSITION MAKE SURE THE RANGE TOP BURNER IS COOL BEFORE REMOVAL GRILL BURNERS Extreme care should be taken when moving a burner as it must be correctly centered on the orifice before any attempt is made to relight the grill Frequency of cleaning will depend on how often you use the grill Step 2 Secure the main burner on the back wall of fire box with 1 Pin and secure it at the front of...

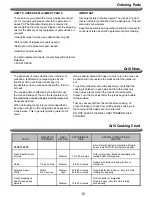
Page 10: ...ing very lean cuts such as fish These temperatures vary with the outside temperature and the amount of wind Cooking with in direct Heat You can cook poultry and large cuts of meat slowly to perfection on one side of the grill by indirect heat from the burner on the other side Heat from the lighted burner circulates gently throughout the grill cooking the meat or poultry without any direct flame to...

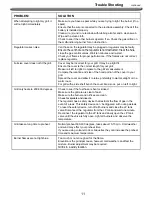
Page 11: ...ion of the cover to your grill Spread the cover and allow it to relax preferably in warm sunlight or in a warm room For grill with a side shelf bunch the cover like a sock put on left to right Grill only heats to 200 300 degrees Check to see if the fuel hose is bent or kinked Make sure the grill area is clear of dust Make sure the burner and orifices are clean Check for spiders and insects Check f...

Page 12: ...t and let the juices run out To get the juiciest meats add seasoning or salt after the cooking is finished on each side and turn the meat only once juices are lost when the meat is turned several times Turn the meat just after the juices begin to bubble to the surface the meat when cooking begins and the degree of doneness desired When defrosting meats it is recommended that it be done overnight i...

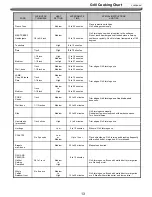
Page 13: ...inch Medium to High 13 to 20 minutes 18 to 25 minutes PORK 1 inch Medium 20 to 30 minutes Trim edges Grill turning once Cook to desired Chops Trim edges Grill turning once Cook to desired doneness Well done 1 1 2 inches Medium 30 to 40 minutes Ribs Medium 30 to 40 minutes Grill turning occasionally During last few minutes brush with barbecue sauce Turn several times Ham steaks 1 inch slices High 4...

Page 14: ... tbs lemon juice or vinegar 2 tbs oil tsp powdered mustard 2 tsp Worcestershire sauce tsp freshly ground black pepper tsp salt 1 8 tsp pepper 4 cups thinly sliced potatoes 4 medium sized potatoes Preheat grill Combine cheese condensed soup milk BBQ sauce oregano salt and pepper in a large mixing bowl Stir in potatoes until well coated Turn into well buttered1 1 2 BAKED CHILI CORN 6 medium ears cor...

Page 15: ...oin or beef cut into 1 cubes CHICKEN TANDOORI STYLE 8 large chicken thighs or drumsticks 1 c plain nonfat yogurt c lemon juice 2 tsp salt tsp cayenne tsp black pepper tsp crushed garlic tsp grated ginger Salt pepper parsley and garlic seasoning 2 oz lemon juice 10 lbs pork roast Time 1 1 2 hours to 2 hours Bring pork to room temperature before placing it on the spit rod Place on the rod and test f...

Page 16: ...sidential use Damage resulting from accident alteration misuse lack of maintenance cleaning abuse fire flood acts of God improper installation and installation not in accordance with electrical or plumbing codes or use of products not approved by the manufacturer Any food loss due to product failures Replacement parts or repair labor costs for units operated outside the United States or Canada Rep...

Page 17: ...RA USO EXCLUSIVO EN LUGARES El presente manual de instrucciones contiene información importante que lo ayudará a armar el dispositivo correctamente y a utilizarlo de manera segura Antes de armar y utilizar el dispositivo lea y siga todas las advertencias e instrucciones Conserve el presente manual para consultas futuras ...

Page 18: ... de gas flexible no debe exceder de 3 pies Instrucciones de seguridad PELIGRO En caso de que usted huela gas 1 Cierre el suministro de gas del ADVERTENCIA 1 No almacene ni use gasolina u otros líquidos o vapores inflamables en las cercanías de 1 Cierre el suministro de gas del dispositivo 2 Apague cualquier tipo de llama abierta 3 Abra la tapa 4 Si el olor persiste manténgase alejado del dispositi...

Page 19: ...Aunque el tubo de un mechero obstruido no es la única causa para que se genere un FOGONAZO es la más común A fin de minimizar las probabilidades de que ello ocurra usted debe limpiar los tubos de los mecheros antes de armar la parrilla y luego por lo menos una vez al mes hacia el final del verano o a principios del otoño que es cuando las arañas tienen mayor actividad Asimismo realice este procedi...

Page 20: ...ín que proteja la válvula del tanque Coloque la tapa anti polvo sobre la salida de la válvula del cilindro siempre que el mismo no esté en uso Instale sólo el tipo de tapa anti polvo sobre la salida de la válvula del cilindro que viene con la mencionada válvula Otros tipos de tapas o tapones pueden causar g g q p p y p encendido y dejará sin efecto la garantía Mantenga los laterales y la parte tra...

Page 21: ...s en el área en la que se está utilizando la parrilla Jamás les permita sentarse j d l ill Para que los mecheros se enciendan y funcionen correctamente mantenga limpios los orificios de los mecheros Es necesario limpiarlos con frecuencia para que su funcionamiento sea óptimo Los mecheros sólo funcionarán en una posición y deben instalarse correctamente para que su funcionamiento sea seguro Limpie ...

Page 22: ...corresponda para el tipo de conexión p p y g p g 6 Abra la válvula del tanque por completo en sentido contrario de las agujas del reloj Aplique la solución jabonosa con un cepillo limpio en todas las conexiones de gas Observe a continuación Si aparecen formaciones de burbujas en la solución las conexiones no están selladas apropiadamente Verifique cada conexión y ajústelas o repárelas según sea ne...

Page 23: ... a la temperatura mínima una vez que el alimento ya se doró Este procedimiento cocina la comida por dentro sin quemar la parte externa Los alimentos que requieren un largo tiempo de cocción o aquellos que se va hacia los mecheros En caso de que haya alguna fuga aparecerán burbujas de jabón 3 En caso de que haya una fuga cierre el suministro de gas de inmediato y ajuste los accesorios que tengan pé...

Page 24: ...rilla de control de hornilla ah correspondiente 3 Empuje y gire la perilla de control de hornilla ah correspondiente mientras mantiene pulsado el botón de encendido electrónico para encender el quemador 4 una vez encendido el quemador suelte la perilla y botón de encendido electrónico 5 Si la hornilla no se enciende gire la perilla a O y repita el procedimiento de encendido quemador lateral mecher...

Page 25: ...A Debe tener extremo cuidado cuando mueva un mechero ya que debe estar centrado correctamente en el orificio antes de que intente volver a encender la parrilla La frecuencia de limpiado dependerá de cuán a menudo utilice la parrilla LIMPIEZA DEL MECHERO PRINCIPAL DE LA PARRILLA Asegúrese de que el suministro de gas esté apagado y que las Paso 2 Sujete el mechero principal sobre la pared trasera de...

Page 26: ...Estas temperaturas variarán según la temperatura en el ambiente y la cantidad de viento Cocción con calor indirecto Puede cocinar aves y grandes trozos de carne a la perfección a fuego lento de un lado de la parrilla ya que le puede dar calor indirecto de uno de los mecheros del lado opuesto El calor del mechero encendido circula parrilla ya que le puede dar calor indirecto de uno de los mecheros ...

Page 27: ...unda y déjela reposar preferentemente al sol o en una habitación cálida Para las parrillas que tiene un estante lateral arremangue a funda como una Para las parrillas que tiene un estante lateral arremangue a funda como una media y colóquela de izquierda a derecha El motor del asador no gira Asegúrese de que el motor esté conectado a un suministro eléctrico adecuadamente conectado a masa Asegúrese...

Page 28: ...te de carne Para dar vuelta la carne utilice una espátula en lugar de pinzas o un tenedor ya que con la espátula no pincha la carne y por lo tanto no se saldrán los jugos Para obtener carnes bien jugosas agregue condimentos o sal de cada lado una vez que la cocción ha finalizado y dé vuelta la carne sólo una vez se pierden los jugos cuando se da vuelta la carne varias veces De vuelta la carne lueg...

Page 29: ... 20 minutos de 18 a 25 minutos CERDO Costillas 1 pulgada Media De 20 a 30 minutos Recorte los bordes Cocínelos en la parrilla dándolos vuelta una vez Cocine hasta el nivel de cocción deseado Bien cocido 1 1 2 pulgadas Media De 30 a 40 minutos Costillas Media De 30 a 40 minutos Cocine en la parrilla dando vuelta en forma ocasional Durante los últimos minutos pinte con una salsa de barbacoa Delo vue...

Page 30: ...Nota Reemplace el bagre el lenguado o el bacalao por salmón CHOCLO FRESCO ASADO 6 choclos de media espiga pelados 3 cucharadas Mantequilla o margarina derretida 4 costillas de cerdo Adobo 1 cebolla grande 2 cucharadas grandes de jugo de limón o vinagre 2 cucharadas grandes de aceite cucharada de mostaza en polvo 2 cucharadas grandes de Salsa inglesa cucharada de pimienta negra molida Precaliente l...

Page 31: ...ETAS DE TERNERA Y CORDERO 4 porciones lb de carne o ternera deshuesada cortada 8 muslos o patas de pollo grandes 1 taza de yogurt bajo en grasa taza de jugo de limón 2 cucharadas de sal cucharada de pimienta de cayena cucharada de pimienta negra cucharada de ajo molido cucharada de jengibre rayado 1 cucharada de aceite de maíz Mezcle todos los ingredientes en un Sal pimienta perejil y ajo para con...

Page 32: ...lamadas de servicio a su hogar Reparaciones cuando utilice el producto con otra finalidad que no sea el uso normal en casas de familia o residencias Daños que resulten de accidentes alteraciones mal uso falta de mantenimiento limpieza abuso incendio inundaciones casos fortuitos instalación incorrecta e instalación que no cumple con los códigos de electricidad o plomería o el uso de productos no au...

Page 33: ...UTILISATION A L EXTÉRIEUR UNIQUEMENT Ce manuel d instructions contient d importantes informations essentielles à un assemblage approprié et sécuritaire de l appareil Lire et respecter tous les avertissements et toutes les instructions avant l assemblage et l utilisation de l appareil Conserver ce manuel à titre de référence ultérieure ...

Page 34: ...contient un ou plusieurs produits chimiques reconnus par l État de Californie pour causer des malformations congénitales ou d autres problèmes de reproduction Mesures de sécurité DANGER AVERTISSEMENT g p p p Si vous sentez une odeur de gaz 1 Coupez l alimentation du gaz à l appareil 2 Éteignez toute flamme nue 3 Soulevez le couvercle 4 Si l odeur persiste tenez vous à l écart de l appareil et cont...

Page 35: ... être utilisés avec un réservoir de propane liquide standard 9 kg devez nettoyer les tuyaux de brûleurs avant de monter votre gril et au moins une fois par mois à la fin de l été et au début de l automne lorsque les araignées sont particulièrement actives Nettoyez également les tuyaux de brûleurs si votre gril n a pas servi pendant une longue période Un tube bouché peut favoriser un feu en dessous...

Page 36: ... robinet de la bouteille en tout temps lorsque vous n utilisez pas la bouteille N installez que le type de bouchon anti poussière qui est fourni avec le robinet de la bouteille Les autres types de bouchon peuvent entraîner des fuites du propane Ne jamais brancher un réservoir de GPL non réglementé à votre gril à gaz Cet appareil de cuisson à gaz pour extérieur est équipé d un ensemble y j les cord...

Page 37: ...e manuel Tous les autres services doivent être confiés à un technicien qualifié Les enfants ne doivent pas être laissés seuls ou sans supervision à un endroit où le gril est utilisé Ne jamais permettre aux enfants de s asseoir se tenir debout ni jour sur ou autour du gril est nécessaire de les nettoyer régulièrement pour optimiser leur performance Les brûleurs ne fonctionnent que dans une position...

Page 38: ... une brosse propre à tous les joints de gaz Voir ci dessous Si des bulles se forment dans la solution les joints ne sont pas scellés correctement Vérifiez chaque raccord et serrez ou réparez au besoin inclure un collier pour la protection du robinet de la bouteille La bouteille doit disposer d un robinet d arrêt menant à une sortie de robinet de la bouteille d alimentation de gaz PL spécifié selon...

Page 39: ...itement sans brûler l extérieur Les aliments cuisinés du gaz PL et de la valve d alimentation jusqu à et y compris le raccordement au tuyau du collecteur le tuyau qui va aux brûleurs sont bien serrées Des bulles de savon se formeront s il y a une fuite 3 Si une fuite est présente tournez immédiatement l alimentation du gaz sur arrêt et resserrez les raccords ayant des fuites 4 Remettez le gaz sur ...

Page 40: ...METTE g p 3 Poussez et tournez le bouton de contrôle du brûleur associé jusqu au symbole tout en maintenant le bouton d allumage appuyé afin d allumer le brûleur 4 Une fois le brûleur allumé relâchez le bouton d allumage et le bouton de contrôle 5 Si le brûleur ne s allume pas tournez le bouton de contrôle jusqu à O and répétez la procédure d allumage brûleur principal brûleur latéral ALLUMAGE AVE...

Page 41: ...orrectement centré sur l orifice avant de rallumer le gril La fréquence du nettoyage dépend des utilisations de votre gril Û Étape 2 Fixez le brûleur principal à la paroi arrière de la chambre de cuisson avec 1 ergot puis fixez à l avant de la chambre de cuisson avec 1 vis NETTOYAGE DU BRÛLEUR PRINCIPAL DU GRIL Assurez vous que l alimentation du gaz et les boutons soient en position d arrêt OFF As...

Page 42: ... morceaux maigres tels que le poisson Ces températures varient selon la température extérieure et la force du vent Cuisiner avec une chaleur indirecte vous pouvez cuisiner la volaille et les gros morceaux de viande lentement à perfection d un côté du gril au moyen de la chaleur indirecte du brûleur sur l autre côté La chaleur du brûleur allumé circule lentement d u côté du g au oye de a c a eu d e...

Page 43: ...le couvercle et laissez se détendre de préférence à la lumière du jour ou dans une pièce chaude Pour le gril ayant une étagère latérale pliez le couvercle en forme de chaussette Pour le gril ayant une étagère latérale pliez le couvercle en forme de chaussette placez le de côté gauche vers la droite Le moteur de la rôtisserie ne tourne pas Assurez vous que le moteur est branché à une alimentation c...

Page 44: ... et laisse le jus couler Pour obtenir des viandes plus juteuses ajoutez des assaisonnements ou du sel après la cuisson de chaque côté et ne tournez la viande qu une seule fois les jus se perdent lorsque vous tournez la viande plusieurs fois Tournez la viande après que les jus commencent à former des bulles à la surface C l è d i d l i d t d l i P Lorsque vous dégelez de la viande il est recommandé...

Page 45: ...25 minutes Côtelettes 2 5 cm Moyenne Découper les bords Griller en retournant une seule Côtelettes de porc 2 5 cm Moyenne 20 à 30 minutes fois Cuisiner jusqu à la cuisson désirée Bien cuit 3 8 cm Moyenne 30 à 40 minutes Côtes Moyenne 30 à 40 minutes Griller en retournant à l occasion Pendant les dernières minutes de cuisson balayer avec de la sauce barbecue Retourner plusieurs fois Morceau de jamb...

Page 46: ... 4 Côtelettes de porc Marinade 1 gros oignon 2 c à soupe de jus de citron ou de vinaigre 2 c à soupe d huile c à café de moutarde en poudre 2 c à café de sauce Worcestershire c à café de poivre fraîchement moulu 1 c à so pe de s cre 2 c à soupe de sauce de barbecue c à café d origan c à café de sel 1 8 c à café de poivre 4 tasses de pommes de terre coupées finement 4 pommes de terre de taille moye...

Page 47: ...NDOURI 8 grandes cuisses de poulet 1 tasse de yogourt nature maigre tasse de jus de citron 2 c à café de sel de pommes 1 tasse de vinaigre de cidre de pommes 170 ml d eau morceau de beurre Assaisonnement de sel poivre persil et ail 60 ml de jus de citron 4 5 kg de rôti de porc g g g p cubes de 2 5 cm 2 3 d une tasse d eau divisée de tasse d oignon coupé 2 c à soupe de sauce de soja de tasse d huil...

Page 48: ...imitée p g ÉLÉMENTS QUE LE FABRICANT NE REMBOURSERA PAS Interventions pour réparation à votre domicile Réparations lorsque votre produit est utilisé pour une utilisation autre qu une famille normale ou résidentielle Dommage résultant d accident modification utilisation erronée manque de maintenance nettoyage abus incendie inondation cas de force majeure installation incorrecte et installation ne c...

Page 49: ...Parts Diagram 1 2 2 5 2 3 6 31 14 15 29 4 4 7 30 32 36 34 35 16 9 8 10 11 12 13 16 33 38 37 39 28 17 19 20 21 18 39 40 41 23 22 27 26 42 18 43 28 44 46 45 53 50 47 48 49 51 52 50 54 24 25 55 ...

Page 50: ...me 1 1 12 Main burner igniter wire C 1 1 42 Door magnet 1 2 13 Main burner igniter wire D 1 1 43 Side panel left 1 1 14 Warming rack 1 1 44 Side panel right 1 1 15 Cooking grid 1 2 45 Rear panel 1 1 15 Cooking grid 1 2 45 Rear panel 1 1 16 Hood buffer B 1 2 46 Tank bolt 1 1 17 Main burner bowl assembly Non replaceable 1 47 Door iron piece 1 1 18 Main control panel 1 1 48 Triangle Bracket left 1 1 ...

Page 51: ...mechero principal C 1 1 42 Imán para la puerta 1 2 13 Cable del encendedor del mechero principal D 1 1 43 Panel lateral izquierdo 1 1 14 Pl t f l t d 1 1 44 P l l t l l d d h 1 1 14 Plataforma calentadora 1 1 44 Panel lateral lado derecho 1 1 15 Rejilla de cocción 1 2 45 Panel trasero 1 1 16 Parada de la tapa B 1 2 46 Perno del tanque 1 1 17 Ensamble de la cuba del mechero principal Non replaceabl...

Page 52: ... 1 41 Cadre du chariot 1 1 12 Fil d allumage du brûleur principal C 1 1 42 Aimant de porte 1 2 13 Fil d allumage du brûleur principal D 1 1 43 Panneau latéral gauche 1 1 p p 14 Grille chauffante 1 1 44 Panneau latéral droite 1 1 15 Grille de cuisson 1 2 45 Panneau arrière 1 1 16 Amortisseur hotte B 1 2 46 Boulon de réservoir 1 1 17 Assemblage du bol de brûleur principal Non replaceable 1 47 Pièce ...

Reviews: