8
Have them air out the building and area before you return. Properly trained service
people must repair any leaks, check for further leakages, and then relight the appliance
for you.
PRE-OPERATION CHECK
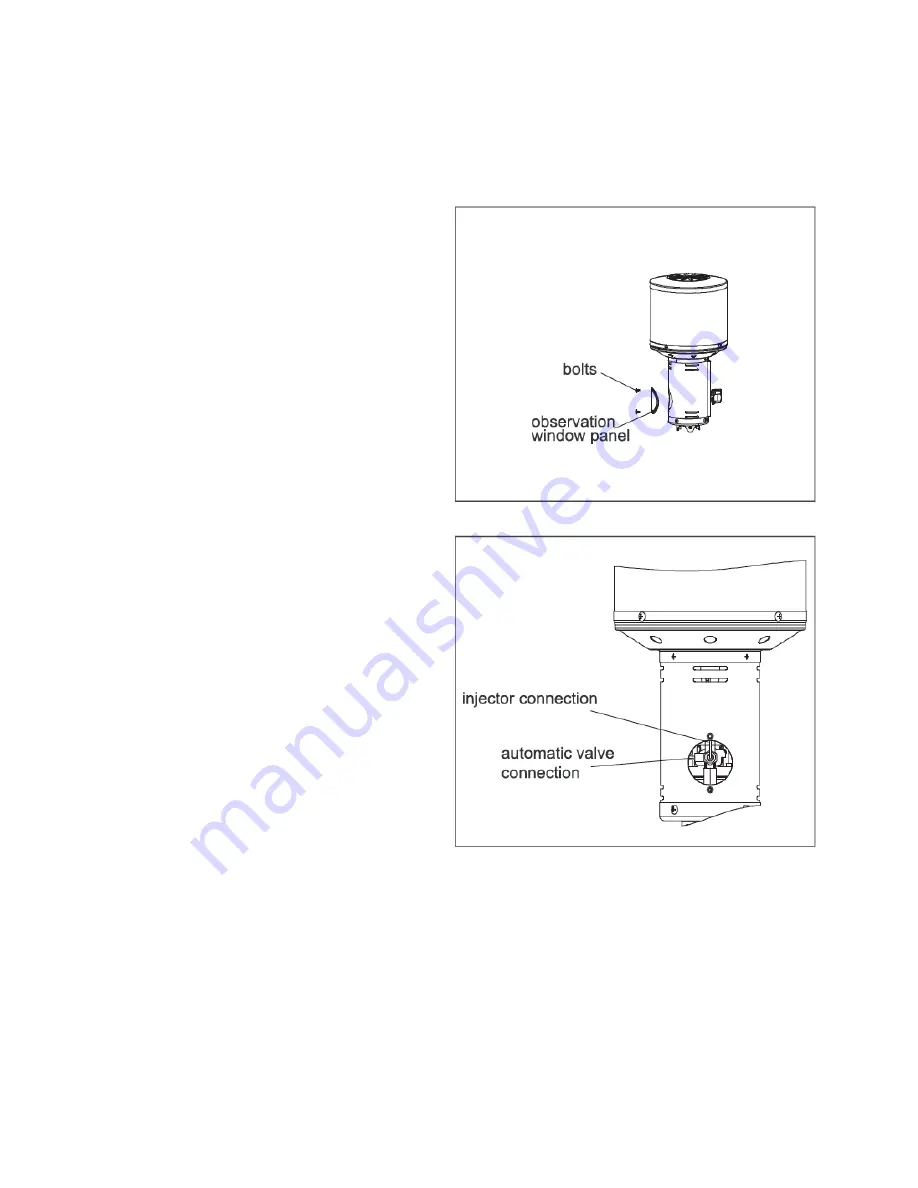
a. Remove the observation window panel
by un-screwing the two bolts.
b. Turn on the LP gas cylinder valve.
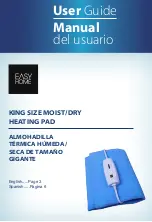
c. Spoon several drops (or use a squirt
bottle) of the soap solution onto the
gas hose connection and automatic
valve connection and injector
connection.
d. Inspect the connections and look for
bubbles.
e. If no bubbles appear, the connection is
safe.
f. If bubbles appear, there is a gas leak.
Shut off the LP gas cylinder valve,
loosen and then re-tighten this
connection.
g. Check for leaks again.
h. If bubbles still appear, close the LP gas
cylinder valve and call our customer
service department. Do not attempt to
use the heater.
Hose checking step:
(1) Unscrew M5 X 12 screws from the
pole.
(2) Pull out the head assembly, hose &
regulator from the pole.
(3) Check if there are cracks or worn
sections on the hose. If yes, replace the
hose & regulator immediately.
(4) Check for leaks according to the above
step by step after replacing the hose &
regulator.
Summary of Contents for SRPH09
Page 13: ... 13 PARTS AND HARDWARE ...
Page 14: ... 14 STEP 1 STEP 2 ...
Page 15: ... 15 STEP 3 STEP 4 ...
Page 16: ... 16 STEP 5 ...
Page 17: ... 17 STEP 6 ...


