Test Process Overview
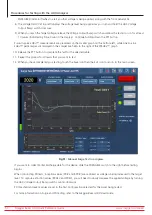
1. With the test leads properly connected to the Asset, ensure that Coil #1 is displayed in the top middle field. This
is the number of the coil you are presently testing. You can select the coil being tested manually after each coil is
tested, or you can turn on the AUTO ADVANCE ON/OFF button found in the lower right corner to have the software
advance to the next coil automatically. If AUTO ADVANCE is OFF, and this number is not advanced after a test,
results will be overwritten for the currently selected coil. This process example continues with AUTO ADVANCE ON.
2. With the ACTIVE TEST button set to RLZ, press the Push-to-test (PTT) button (top left of the ADX front panel) for a
couple of seconds then release. All low-voltage tests will be run. The LEADS ENERGIZED indicator (middle right)
flashes to alert you that voltage is being applied. LEDs on the ADX front panel also light for the lead energized.
3. Values for the RLZ tests will be plotted in the upper graph. Change test leads to the next coil and repeat until all
coils have been tested for RLZ.
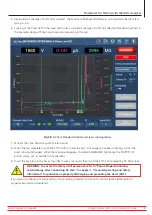
Fig 53:
Coil Test screen with example test in progress.
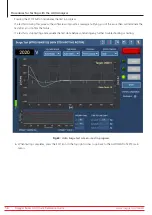
4. When all coils have been tested for RLZ, switch the ACTIVE TEST button to SURGE and set the coil to number 1.
5. Press and hold the Push-to-Test button on the top left of the ADX front panel to run a surge test. Because test
references will have been set up before the testing process, the voltage will automatically be applied at your target
level (displayed top right in the lower graph).
6. Again, the LEADS ENERGIZED indicator lights up to alert you that voltage is being applied.
7. When you reach the target level, continue to hold the PTT button until the software generates a satisfactory Pulse
Count (displayed middle right in the Surge waveform graph). Typically 10–15 pulse counts are sufficient to obtain a
stable waveform. Release the PTT button.
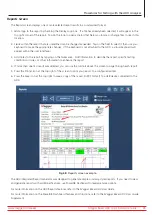
8. If testing with AUTO ADVANCE OFF, touch the Leads Direction icon at the top to switch test direction from Lead 1–2
to Lead 2–1 then run the Surge test procedure again. With AUTO ADVANCE ON, this will happen automatically.
9. Change test leads after each surge test completes and repeat until all coils have been surge tested.
10. Save results after completing your tests.
www.megger.com/baker
Megger Baker ADX Quick Reference Guide
52
Procedures for Testing with the ADX Analyzer


