DET2/3
32
Calibration check tools
Clamp calibration check
1. Make sure that the mode switch is set to
Off
.
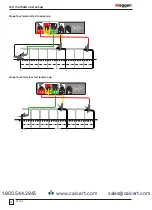
2. Connect the instrument as shown:
C1
CA
T IV 300V
P1
P2
C2
E
ES
S
H
I
V
E
X
Y
V
MVC1010
MVC1010
MCC1010
I
Dual Clamp calibration
check
Hold clamps against
these faces
3. Close the MCC1010 around one loop of the clamp calibration check tool.
4. Close the MVC1010 around the other loop of the clamp calibration check tool.
5. Make sure that there is a minimum separation of 100 mm between the MCC1010 and MVC1010.
6. Set the function switch to
I
.
7. Start a test:
Press and release TEST.
The instrument completes pre-measurement checks.
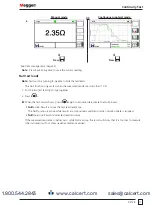
The two-clamp resistance is shown and should match the value written on the clamp calibration check tool.
Note:
Make sure that the MCC1010 and MVC1010 jaw mating surfaces are free of dust and contamination and
that they make a good contact with each other when the jaws are closed.
www.calcert.com
sales@calcert.com
1.800.544.2843
0
5
10
15
20
25
30


