Auxiliary Voltage Testing
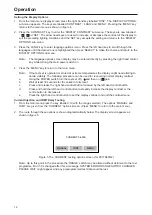
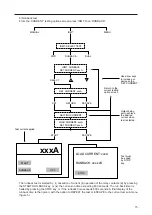
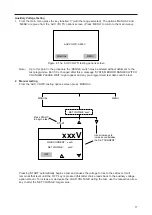
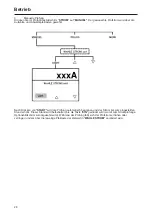
1. From the main menu press the key labelled ‘V’ (with the range selected). The options ‘MANUAL’ and
‘MENU’ are given from the ‘AUX VOLTS’ options screen. (Press ‘MENU’ to return to the main menu).
Note:-
Up to this point in the procedure the ‘RANGE’ switch may be altered without detriment to the
test programme. But if it is changed after this a message ‘SYSTEM ERROR RANGE SWITCH
CHANGED PLEASE WAIT’ might appear and any pre-programmed test data could be lost.
2. Manual testing
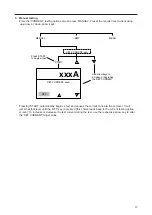
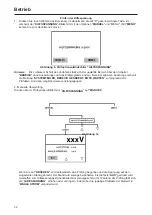
From the ‘AUX VOLTS’ testing options screen press ‘MANUAL’.
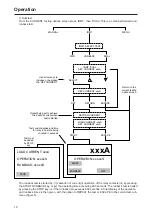
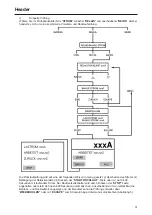
Pressing ‘START’ automatically begins a test and causes the voltage to rise to the set level. It will
remain at that level until the ‘OFF’ key is pressed (this latter choice leads back to the auxiliary voltage
option screen). To increase or decrease the ‘LOAD VOLTAGE’ during the test, use the respective arrow
key to alter the ‘SET VOLTAGE’ target value.
17
MANUAL
MENU
AUX VOLTS: 0-250V
Figure 6 The ‘AUX VOLTS’ testing options screen
SET VOLTAGE: xxxV
MENU
MANUAL
START
Press ‘START’
to begin a test
Use arrow keys to
increase or decrease
the ‘SET CURRENT’
xxxV
LOAD CURRENT: x.xxA
SET VOLTAGE: xxxV
OFF
Summary of Contents for PCITS2000/2
Page 1: ...M PCITS600 2 PCITS2000 2 Primary Current Injection Test Sets User Guide Benutzerhandbuch...
Page 5: ...5 Figure 1 PCITS600 2 and PCITS2000 2...
Page 23: ...23...
Page 37: ...37...
Page 38: ...38...


