Page 10
Instrument Control
Initial setup
It is important to setup the Real Time Clock (RTC) on S1-568 and
S1-1068 to ensure that records saved in the instrument are
time/date stamped correctly. The RTC has a separate battery to
maintain settings even when the primary battery is removed.
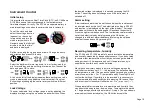
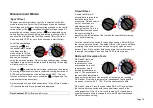
To set the clock and date,
select the settings function
(spanner) on the central
rotary switch and turn the
mode rotary switch to IR.
Navigate using the left/right
arrows to where the time
and date is displayed.
Set the time using the up and down arrows. Change the hours
and minutes then press OK to save.
Select the day/month format required, i.e. d:m for day:month or
m:d for month:day and press the right arrow button, then set the
date and press OK to save.
A tick on the left of the display indicates that a setting is saved, a
cross is displayed during adjustment indicates that it is not set.
Exit settings by changing the central rotary switch to a different
position.
Lock Voltage
The user selectable ‘lock’ voltage range is set by adjusting the
displayed voltage using the up and down arrow buttons. When
the desired voltage is displayed it is saved by pressing the OK
button. The setting does not change even if the instrument is
switched off.
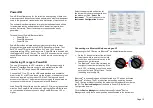
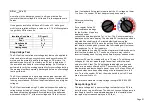
Alarm setting
A low resistance alarm can be set to sound when the resistance of
an insulator reaches this limit. The default alarm setting is 500 k
Ω
and
inactive
(x is displayed on the right of the display). Set range
and mode switches to the settings and IR positions respectively.
Press the right arrow button once. The low resistance alarm can be
set at the default value by simply pressing the OK button, or
changed to a different alarm resistance level using the up/down
arrow buttons and save it by pressing OK.
Recording temperature, humidity
The S1-568 and S1-1068 are able to record insulation temperature
and humidity measured by
independent
sensors. If you do not wish
to record either temperature or humidity do not change the default
setting or reset it if it was previously set. If temperature entry is
enabled the humidity entry can be selected.
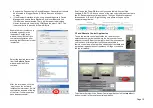
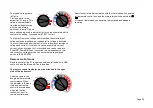
Move the central rotary switch to point to settings and press the
right/left arrow buttons until ‘t° ---‘ is displayed. The default setting is
no temperature record. This can be changed by pressing up or down
arrows to select either °F or °C temperature entry. Pressing OK will
confirm the settings. If humidity is to be recorded it is necessary to
set the temperature and humidity before pressing OK to save them
with a test result. Humidity will either be set “On”) or not set (“---“).
When prompted for temperature or temperature and humidity they
can be entered using the up - down arrows. Temperature is entered
in 1 degree steps, humidity is entered in 1% steps. The up and down
arrows adjust the selected value, the OK button accepts the


