USB-Isolator U
ser’s Manual
_________________________________________________________________________________
_______________________________________________________________________________________
6
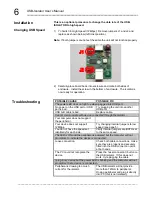
This is an optional procedure to change the data rate of the USB-
ISOLATOR to high speed.
1)
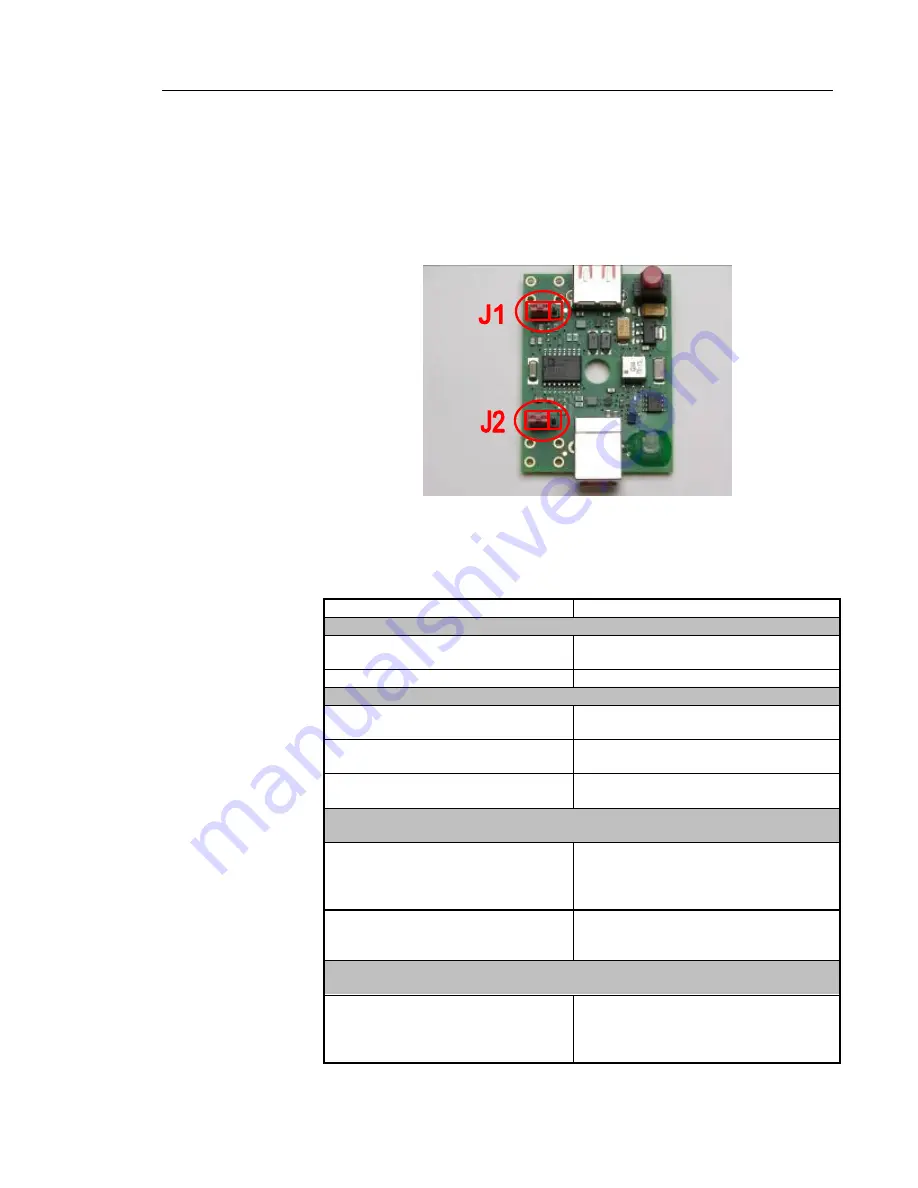
To Switch to High Speed (12Mbps):
Remove jumpers J1 and J2 and
replace as shown below (left most position).
Note:
If both jumpers are not set the same the unit will not function properly
2) Carefully place board back into enclosure and mate both sides of
enclosure. Install the screw in the bottom of enclosure. The isolator is
now ready for operation.
POSSIBLE CAUSE
POSSIBLE FIX
The power LED does not light up when plugged into USB port…
No power on the USB port or USB
port is bad.
Try plugging the unit into another
USB port.
USB A-B cable is bad.
Replace cable.
Cannot communicate with device connected through the Isolator
…
Your computer does not support
the peripheral .
Your device does not support
12Mbps.
Try changing internal jumpers to low
speed (see page 5).
You do not have the speed set
identically for each side.
Verify internal jumpers are BOTH set
to the same speed.
The LED is ON and the peripheral is powered but the computer will not
prompt me to indicate
the device is connected…
Loose connection.
Check both cable connections, make
sure they are properly and securely
fitted into the USB connection ports
at both ends.
The PC could not recognize the
device.
Press the ‘reset connection’ button on
the USB isolator. If this does not
work, try replugging the cable.
I plug in my device but the power LED is blinking and the computer will not
prompt me that a device is connected...
Peripheral is drawing too much
current for the isolator.
The USB isolator will not provide
more than 120mA to peripheral,
Unplug peripheral and plug it directly
into PC (this is not isolated).
Installation
Changing USB Speed
Troubleshooting


