

16
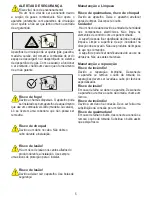
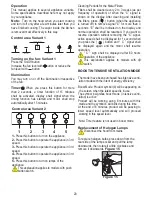
Vital risk, risk of poisoning!
There is a vital risk of being poisoned due to the
combustion gases sucked back. Do not operate
the appliance together with the air-circulated fire
appliances unless adequate air intake is ensured.
Air-circulated fire appliances (e.g. gas, oil, wood or
coal stoves, water heaters etc.) take the combustion
air from the installation place and discharge the
waste air with a waste gas system (e.g. flue). With
the hood being operated, air is taken from the kitchen
and neighbouring rooms. A vacuum is generated if
adequate air supply is not ensured. Poisonous gases
are sucked back from the flue and discharge gas
duct and re-entered to the house in such a condition.
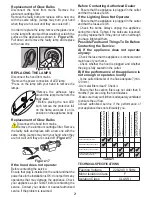
■ Therefore, you shall always ensure that clean air
intake is always adequate.
Risk of fire!
Due to the sparks fluttering around. Appliance
is allowed to be installed over a heating
appliance operated with solid fuel (e.g. wood or
coal) only if there is a cover available that cannot
be removed. Current building codes and regulations
of the local power and gas companies shall be
considered for the installation work.
Risk of electric shock!
Due to damaged connection cable. Do not
kink or pinch the connection cable during
installation. .
Risk of injury!
There is a risk of injury due to the sharp edges
during installation work. Always use protective
gloves during installation work of the appliance.
Risk of injury!
Due to the dropping of the appliance. Always
fix all safety bolts and safety covers properly.
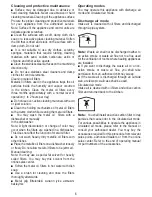
Cleaning and protective maintenance
Risk of being burnt, Risk of electric
shock!
Due to the appliance. Allow the appliance to cool
before any cleaning or maintenance. Disconnect the
fuse connection or remove the plug.
Caution!
■ There is a risk of damage due to the humidity
ingress in electronic components. Do not clean the
control elements with damp cloth.
■ Surface may be damaged due to improper
cleaning. Clean the stainless steel surfaces on the
brushing direction only. Do not use stainless steel
cleaners for control elements.
■ Surface may be damaged due to abrasive or
hard cleaning materials. Never use abrasive or hard
cleaning materials.
Maintenance and repair
Risk of fire, risk of injury! Due to improper or out of rule
repairs. Disconnect the fuse connection or remove
the plug. Repair work shall always be performed by
qualified personnel (electronic technicians).
Risk of injury!
In case of a fault or damage on the appliance,
disconnect the fuse and remove the plug and call the
authorized service.
Risk of fire, risk of injury!
Due to damaged connection cable. A damaged
connection cable shall always be replaced by
qualified personnel (electronic technicians).
Risk of being burnt, Risk of electric
shock!
In case of a faulty bulb, disconnect the fuse
connection or remove the plug. Replace the faulty
bulbs immediately to prevent overloading of other
bulbs (allow the bulbs to cool first).
Summary of Contents for MEP 191 XN
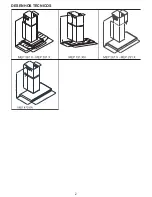
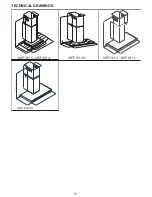
Page 2: ...2 DESENHOS TÉCNICOS ...
Page 13: ...13 TECHNICAL DRAWINGS ...


