CAUTION! Check conformity
before connecting the
charger to the AC adapter/
charger (11) with the power
supply voltage of your power
network.
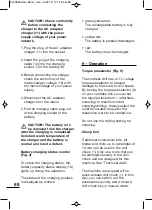
1. Plug the plug of the AC adapter/
charger (11) into the socket.
2. Insert the plug of the charging
cable (12) into the charging
socket (7) of the battery (8).
3. Before connecting the charger,
check the conformity of the
mains/charger voltage (12) with
the mains voltage of your power
supply.
4. Disconnect the AC adapter/
charger from the mains.
5. Pull the charging cable plug out
of the charging socket of the
battery.
CAUTION! The battery is to
be removed from the charger
after the charging is completed.
Constant warm temperature of
the charger and the battery is
normal and is not a defect.
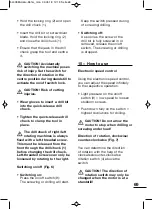
Battery charging status control
(Fig. 4)
To check the charging status, the
battery capacity status display (10)
lights up during the operation.
The status of the charging process
is displayed as follows:
• green/yellow/red:
The rechargeable battery is fully
charged.
• yellow/red:
The battery is partially discharged.
• red:
The battery must be charged.
9 – Operation
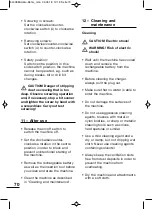
Torque preselector (Fig. 5)
The cordless drill has a 17+1-stage
torque preselector to prevent
damage to the screw or drill heads.
By turning the torque preselector (3)
on your cordless drill you can set
the required level from 1 (effortless
screw ing) to maximum (hard
screwing/drilling). Always select the
most favourable torque for the
respective work to be carried out.
Do not use the drilling setting for
screwing.
Clamp tool
Traditional screwdriver bits, bit
holder and drills up to a diameter of
10 mm can be used in the drill
chuck (1). Only use tools that can
be clamped securely in the drill
chuck and are designed for this
machine. See “Technical data”.
The machine is equipped with a
quick-release drill chuck (1). In this
way, you can switch out the
accessories quickly and without a
drill chuck key in manual mode.
68
5400980-Akku-Bohrs_man 03.05.18 12:19 Seite 68

