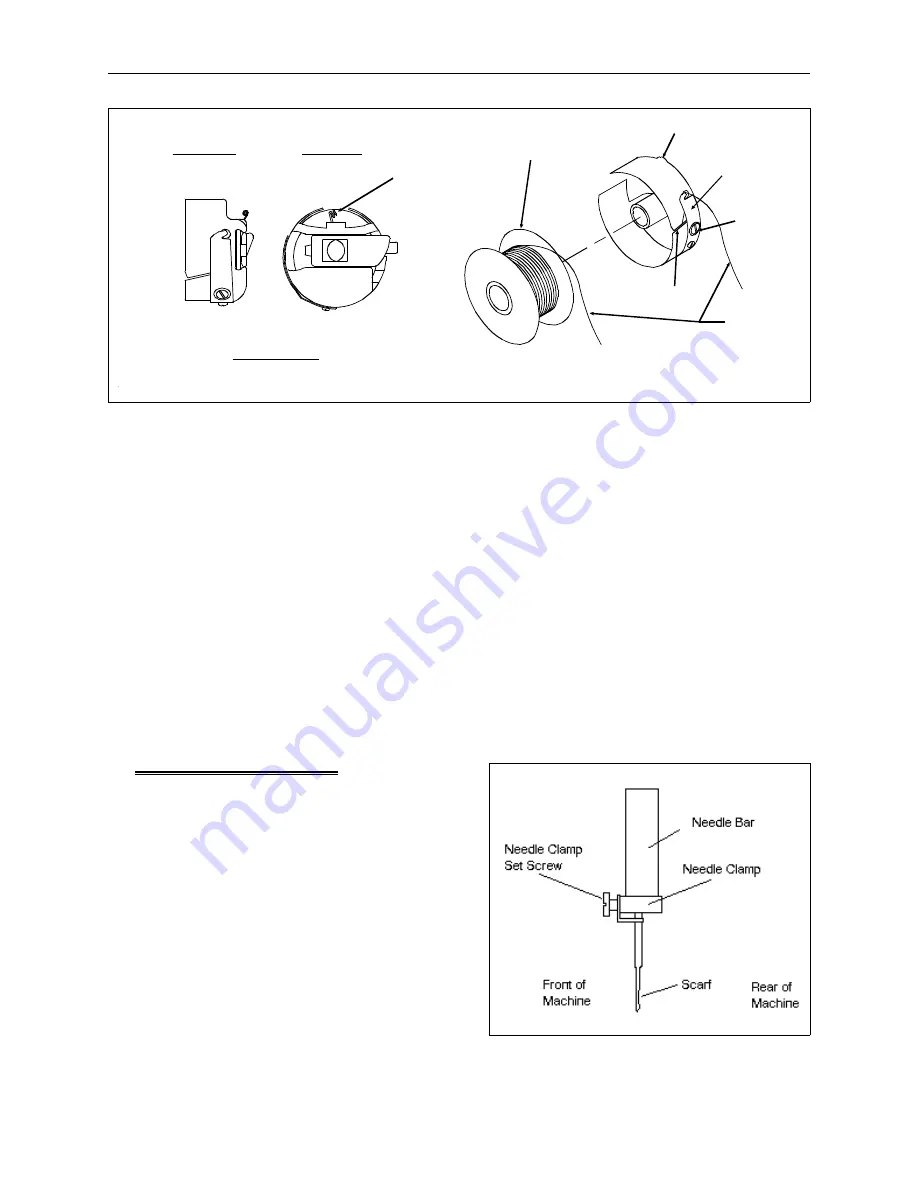
1 Put the bobbin spool into the bobbin case as illustrated in Figure 2-5. When looking at the open
end of the bobbin case, the thread should rotate clockwise off the bobbin spool when you pull
on the thread.
2. Pass the thread through the slit in the bobbin case and under the spring.
3. Using a small, flat-blade screw driver, turn the set screw until you feel a slight resistance when
the thread is pulled from the bobbin. Set the tension so that when you hold the bobbin case
suspended by its thread:
•
No thread feeds out when you are not moving it
•
About an inch of thread feeds out when you jiggle it slightly
4. With the bobbin tension adjusted, pass the bobbin thread through the bobbin case pig tail.
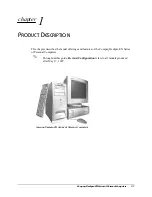
Installing a Needle
The needle clamp set screw holds the needle in place
as shown in Figure 2-6. Using the small, flat-blade
screw driver from the operator’s tool kit:
1. Turn the set screw counterclockwise until the
needle can slide down and out of the needle bar.
2. With the scarf of the new needle toward the rear
of the embroidery head, slide the needle into the
needle bar as far as it will go and tighten the set
screw.
Side View
End View
Bobbin Case
Pigtail
Bobbin
Spool
Note the direction that the thread is wound on the
bobbin spool for insertion into the bobbin case.
Bobbin Case
Spring
Set
Screw
Thread
Slit
Figure 2-5
Figure 2-6
2 - 6
Installing a Needle
Advantage 18 Operation Manual
Melco Embroidery Systems
Summary of Contents for Advantage 18
Page 6: ...Table of Contents Operation Manual iv Advantage 18 ...
Page 14: ...1 8 Start Up Messages Advantage 18 Operation Manual Melco Embroidery Systems ...
Page 92: ...C 2 Advantage 18 Operation Manual Melco Embroidery Systems ...
Page 94: ...Advantage 18 Operation Manual Melco Embroidery Systems ...
Page 96: ...Quick Reference Guide for Advantage 18 Part Number 110265 01 Rev A ...


