86 of 271
Y-Motor Timing Belt Tensioning
•
This repair requires timing and other adjustments and must be done by an authorized service
technician.
This procedure requires the use of a Force Gauge and a Universal Force Gauge Adapter.
Inspection and Adjustment
1. Attach the Universal Force Gauge Adapter, PN 32498, to the 0-10 lb. Force Gauge, PN 995591-01
(screw adapter on the end of the gauge).
2. Remove the right upper arm cover, the back screw of the left upper arm cover and the upper arm
rear cover.
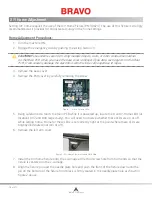
3. Using a ruler (preferably metric) mark the casting at 25mm (1”) above the machined edge that is
to the left of the y-motor belt (this is shown in the following image).
4. Align the lower face of the adapter (with gauge attached) with the mark on the casting, position-
ing the tip of the adapter on the y-motor belt (see the following image).
5.
Push the force gauge toward the machine until the flat portion of the adapter just touches the
casting. The force should be between 7.5 and 9.5 lbs.
6. If the tension measurement is not correct, loosen the three cap head socket screws that mount
the y-motor mounting bracket to the upper arm body.
7. Increase or decrease the y-motor mounting bracket and tighten the upper two screws.
8. Measure the tension again. If the tension is still not correct, repeat steps 6 and 7 again but apply-
ing more or less force on the motor.
9. When the tension is correct, tighten all three cap head socket screws mounting the y-motor brack-
et to the upper arm body to Torque Specifications.
10. Reinstall the upper arm rear cover and the right upper arm cover.
11. Run the following designs to verify belt tensioning and registration:
• AMBTESTXXX.EXP (Belt tension test)
• AMRTESTXXX.EXP (Registration test)
Table of Contents


