88 of 271
6. Cycle the machine to its Bottom Center position by pressing the Adjustment and Arrow Down
keys simultaneously on the keypad (be careful not to let the needle “slam” against the indicator
plunger because this may cause damage).
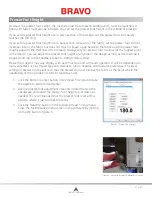
7. With the indicator plunger in full contact with the needle, hang the 3 lb weight from the needle
clamp as shown in Figure 4. Be sure its path is unrestricted and not touching the plunger.
•
NOTE:
The weight must be attached before needle depth.
Figure 4 - Needle Clamp and Weight
8. Decrease the angular position by at least 0.004” from the bottom dead center position using the
Hoop command.
9. Using the micro-stepping command (Trace and Arrow Down keys), increase the angular position
until the dial indicator needle stops moving (= “Z Lower Dwell Start”). Continue to increase in
angular position; all the while there should be no movement through 179.5 ° - 180.5 °.
10. Increase the angular position to the point where the needle starts to rise (= “Z Lower Dwell
Stop”).
11. Continue to increase the angular position until 0.001” rise (= “Z 0.001” Rise”) is measured. The
corresponding angular position at this point should be 182.5± 0.5°. If not, z-timing has to be
reset.
Adjustment
1. Color change to needle #9.
2. Open the Maintenance Menu, then click the Head Timing tab.
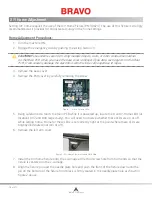
Figure 3 - Turn Z-Axis Flag Counter-Clockwise (CCW)
Table of Contents


