114 of 271
Thread Feeder Stepper Motor Assembly
The thread feeder stepper motor requires replacement when it fails. Failure of the thread feeder motor is
usually obvious: overheated motor, electrical smell, or motor fails to feed thread or fails to function satis-
factorily in both directions. There are other situations which will be determined through the troubleshoot-
ing processes that will require the stepper motor to be replaced.
•
This repair requires timing and other adjustments and can only be done by an authorized ser-
vice technician.
Replacement Parts Needed:
• P/N 30644 Motor, Stepper, Bi Polar, 1.8 Degree, 0.22 Nm
• Screw, Set, Flat Point, M4x6mm LG
Replacement Procedure:
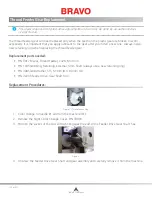
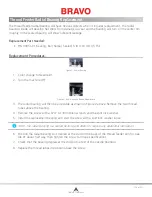
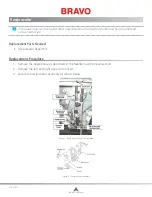
Figure 1 - Thread Feeder Stepper Motor
1. Disconnect the harness from the stepper motor.
2. Use a marker and scribe a line onto the housing around the thread feeder PCB, then remove the
PCB.
3.
Remove the three screws, lock washers and flat washers mounting the stepper motor and remove
the motor.
4. Loosen the set screw in the pulley collar and remove the feeder drive gear from the motor spindle.
5. Remove the set screw and replace it with a new one. Add red loctite (MS 222) to the set screw
threads and install it into the feeder drive gear loose.
6. Install the feeder drive gear onto the stepper motor spindle so that the set screw is centered on
the flat portion of the thread feeder gear.
7.
Tighten the set screw in the feeder drive gear just until it starts to make contact with the flat sec
-
tion on the motor spindle.
8. Push the feeder drive gear towards the motor until it hits a hard stop and tighten the set screw to
the torque specifications.
9. Install the motor onto the housing bracket, starting the screws loose, then tighten them to the
torque specifications.
10. Reinstall the thread feed sensor PCB aligning it to the scribe marks and make sure that the optical
sensor is centered to thread feed gear teeth (flag).
Table of Contents


