87 of 271
Z-TIMING: Bottom Center & Head-Up
Tools Required
•
Head Timing Dial Indicator Gauge and gauge pin (PN: 32453-01)
•
#75 (3mm) hex driver or equivalent bent Allen wrench
•
3lb weight
•
Head Timing Adaptor (PN: 33065)
Abstract
The Z-flag is manually adjusted such that a Bottom Center command initiated either by the keypad or
software will generate the lowest possible mechanical position of a corresponding needle at 180 ° ±0.5 °
z-axis position (displayed in the Bravo Operating System (OS) Maintenance > Head Timing” menu).
Bottom Center (Z Timing)
Measurement
1. Color change to needle #9.
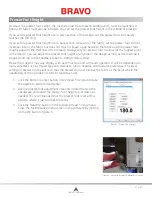
Figure 1 - Tools>Maintenance>Head Timing Menu
2. Open the Maintenance Menu, then click the Head Timing tab.
3. Remove the bobbin case and the needle plate.
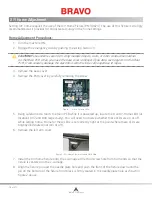
4. Assemble the Head Timing Adaptor (PN: 33065) to the dial indicator (PN: 32453-01) as shown in
Figure 2.
Figure 2 - Adaptor and Dial Indicator
5. Install the dial indicator (PN: 32453-01) and Head Timing Adaptor (PN: 33065) on the lower arm
extrusion as shown in Figure 3. Tighten the screws enough to hold the fixture securely.
Figure 3 - Dial Indicator and Adaptor Installed on Lower Arm Extrusion
Table of Contents


