


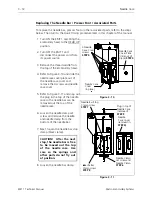
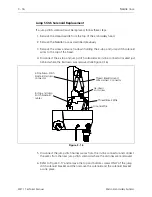


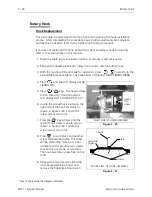
Thread Check Spring Adjustment
After replacing a thread check spring, reinstall the tensioner assembly into the
needle case. You must then adjust the tension of the check spring against the
thread break contact post. To set this tension:
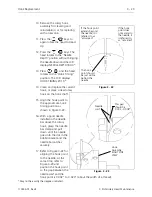
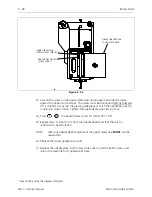
1. Slightly loosen the set screw in the side of the needle case that secures the
tensioner assembly into the needle case.
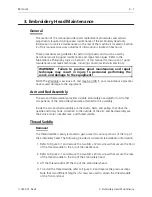
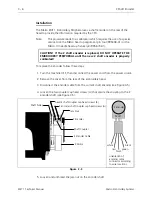
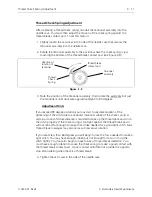
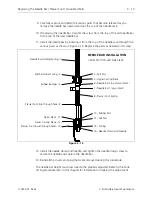
2. Rotate the tensioner assembly to the position where the check spring is just
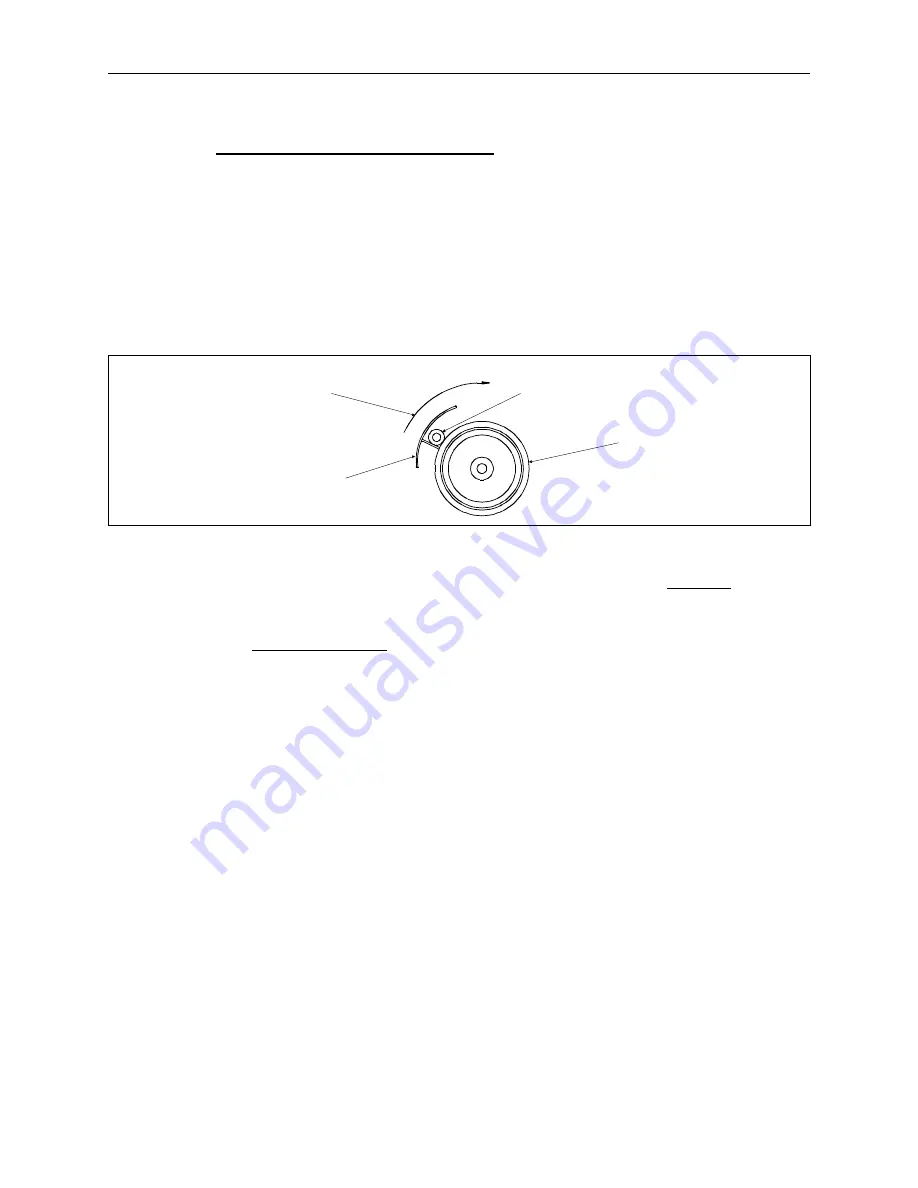
touching the bottom of the thread break contact post (see Figure 3-9).
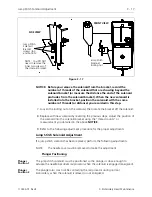
3. Note the position of the tensioner assembly, then rotate the assembly (not just
the tensioner knob) clockwise approximately 60 to 90 degrees.
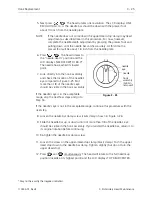
Adjustment Hints
If you exceed 90 degrees rotation you may start to see deterioration of the
tightening of the stitch due to a reduced rotational stroke of the check spring. A
certain amount of stroke distance is required to take up the thread slack and cinch
the stitch properly. If the check spring is too tight against the thread break post it
will not retract far enough to make that stroke needed for a good tight stitch. False
thread break messages may also occur with excessive rotation.
If you rotate less than 60 degrees you will begin to lose the force needed to make a
tight stitch. You may have enough stroke but not enough force to cinch up the
stitch tightly. You may also begin to have failure of thread break detection. You
must have enough rotation to cause the check spring to make a good contact with
the thread break contact post. A poor contact will often not provide the signal to
stop embroidering when there is a thread break.
4. Tighten the set screw in the side of the needle case.
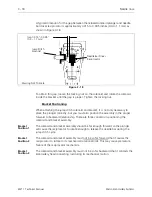
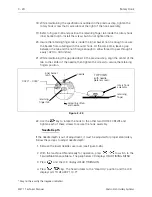
thread break
contact post
Thread
Check
Spring
direction of
rotation of
tensioner
tensioner
assembly
Figure 3 - 9
Thread Check Spring Adjustment
3 - 11
110344-01, Rev B
3. Embroidery Head Maintenance


