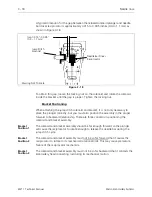


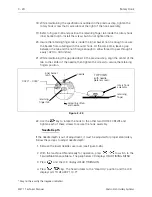
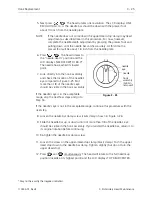

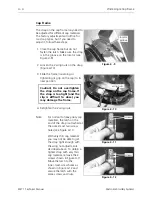


20. Position the POINT of the HOOK directly behind the SCARF of the needle. Leave
a THREAD distance between the POINT of the hook and the needle.
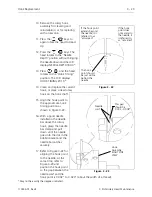
21. Tighten the colored hook screw and check that the setting is correct as shown in
Figures 3-27 and 3-28.
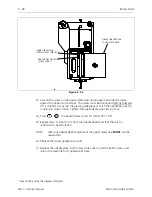
22. Press the key to rotate the the hook to access the other two hook screws
and tighten them securely.
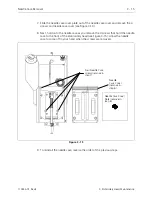
23. After checking and setting hook timing as required, replace the needle plate,
rotary hook covers, and the bobbin case; then return the machine to its
operational state.
Hook Timing Adjustments Only
3 - 29
110344-01, Rev B
3. Embroidery Head Maintenance


