
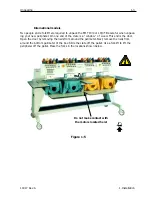

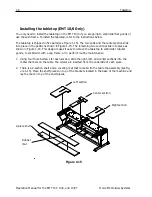
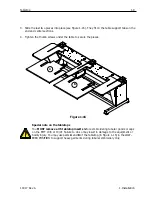


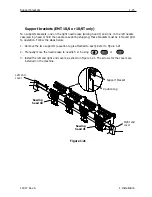


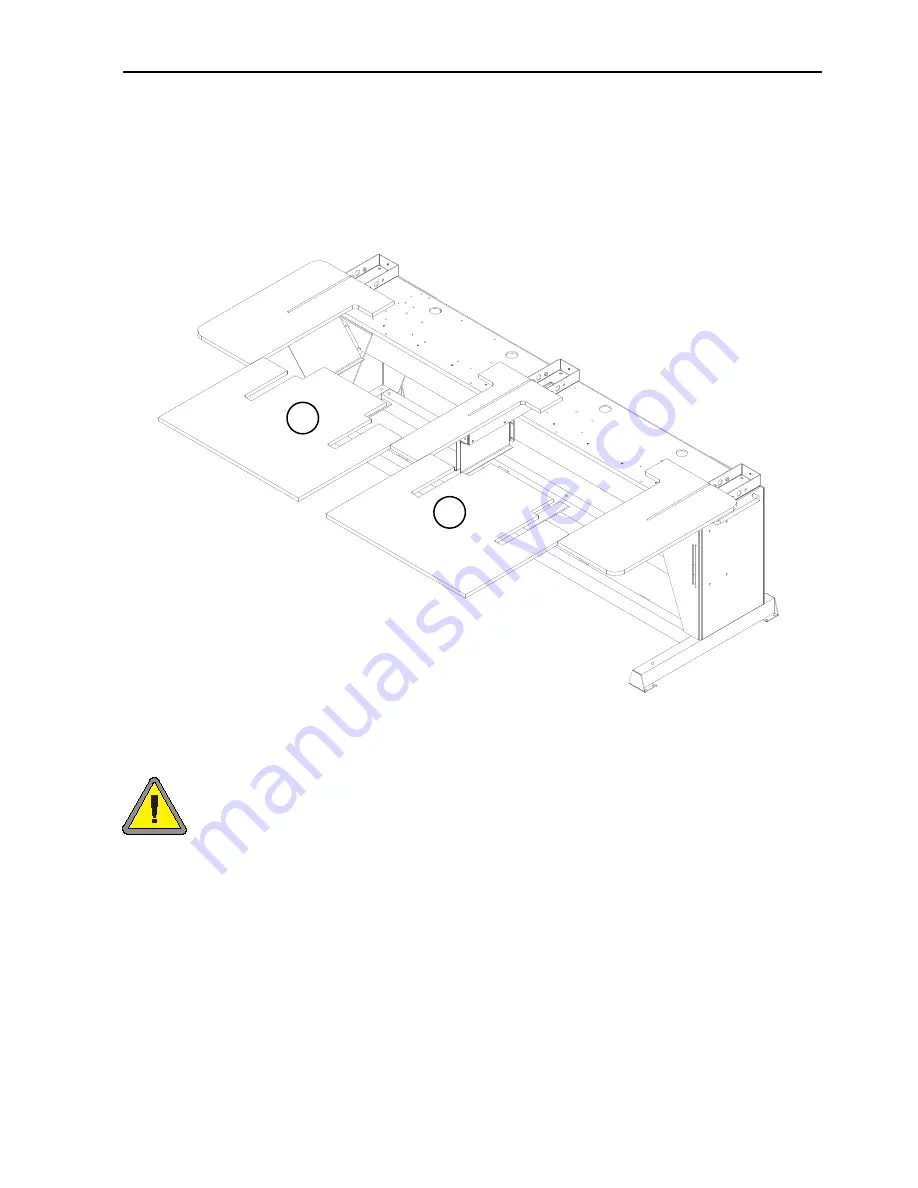
3. Slide the last two pieces into place (see Figure 1-16). They fit on the table support tabs on the
end and center sections.
4. Tighten the thumb screws under the table to secure the pieces.
Special note on the tabletops
You
MUST remove all 5 tabletop inserts
before embroidering tubular goods or caps
on the EMT 10/4 or 10/4T. Failure to do so may result in damage to the equipment or
bodily injury. You may use parts
A
and
B
of the tabletop (in Figure 1-16) in the LOW-
ERED POSITION to support heavy garments during tubular embroidery only.
Tabletop
1-9
11817 Rev. A
1. Installation
Figure 1-16
A
B
Summary of Contents for EMT 10/4
Page 52: ...2 28 Quick Start Operation Manual for the EMT 10T 10 4 and 10 4T Melco Embroidery Systems ...
Page 108: ...6 10 Error Messages Operation Manual for the EMT 10T 10 4 and 10 4T Melco Embroidery Systems ...
Page 126: ...INDEX Operation Manual for the EMT 10T 10 4 and 10 4T ...
Page 127: ...Quick Ref erence Guide for the EMT 10T 10 4 and 10 4T 11817 Revision A ...


