The Menus
2-9
Function Menu
All the commands in this menu result in machine motion and multiple beeps. The com-
mands are described below. Press
or
to view selections.
Go to hoop center?
Forces an X/Y move to the center of the selected hoop. Only allowed if you are not in the middle
of a design. Press
to perform function.
Trace design outline?
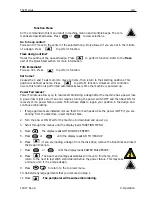
Traces the outline of the queued design. Press
to perform function. Refer to the
Trace
part of the Quick Start section for more information.
Trim immediate?
Forces a trim. Press
to perform function.
Set home?
Causes the X and Y axis motors to move to home, then return to their starting positions. This
position is defined as home. Press
to perform function. Unless an error condition
occurs, this function is performed automatically every time the machine is powered up.
Power Fail rescue?
Power Fail rescue allows you to resume embroidering a design after the machine has a power loss.
A power loss might occur if an error requires turning the power switch OFF and then back ON for
recovery or if a power failure occurs. Follow these steps to regain your position in the design and
continue embroidering.
1. If large garments are installed, remove them from all heads while the power is OFF; if you are
booting from the disk drive, insert the Boot Disk..
2. Turn the power ON. Wait for the machine to download and power up.
3. Scroll through the menus until the display reads FUNCTION MENU.
4. Press
. The display reads GOTO HOOP CENTER?.
5. Press
or
until the display reads GO TO HEADUP.
6. Press
; if you are loading a design from the disk drive, remove the Boot Disk and insert
the Design Disk now.
7. Press
or
until the display reads POWER FAIL RESCUE.
8. Press
. The beam and carriage assemblies will move to find home, then
return to the next to last stitch embroidered before the power failure. This may take
a minute or so if it is a large design.
9. Press
to return to the top level menu.
10. Reinstall any large garments that you removed in step 1.
11. Press
.
The peripheral will resume embroidering.
11817 Rev. A
2. Operation
▲
▼
▲
▲
▲
▲
▼
▼
Summary of Contents for EMT 10/4
Page 52: ...2 28 Quick Start Operation Manual for the EMT 10T 10 4 and 10 4T Melco Embroidery Systems ...
Page 108: ...6 10 Error Messages Operation Manual for the EMT 10T 10 4 and 10 4T Melco Embroidery Systems ...
Page 126: ...INDEX Operation Manual for the EMT 10T 10 4 and 10 4T ...
Page 127: ...Quick Ref erence Guide for the EMT 10T 10 4 and 10 4T 11817 Revision A ...


